
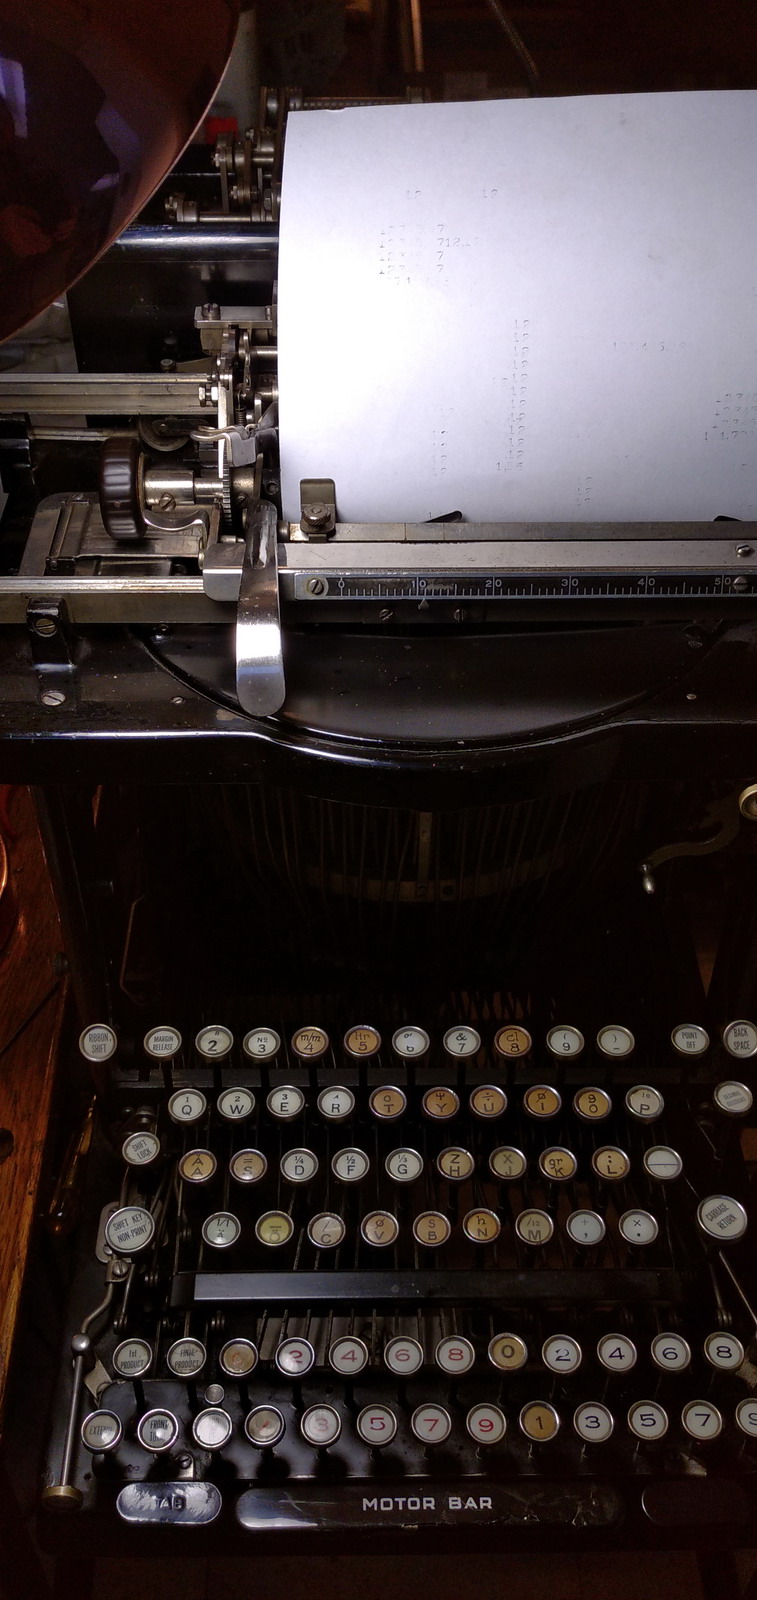
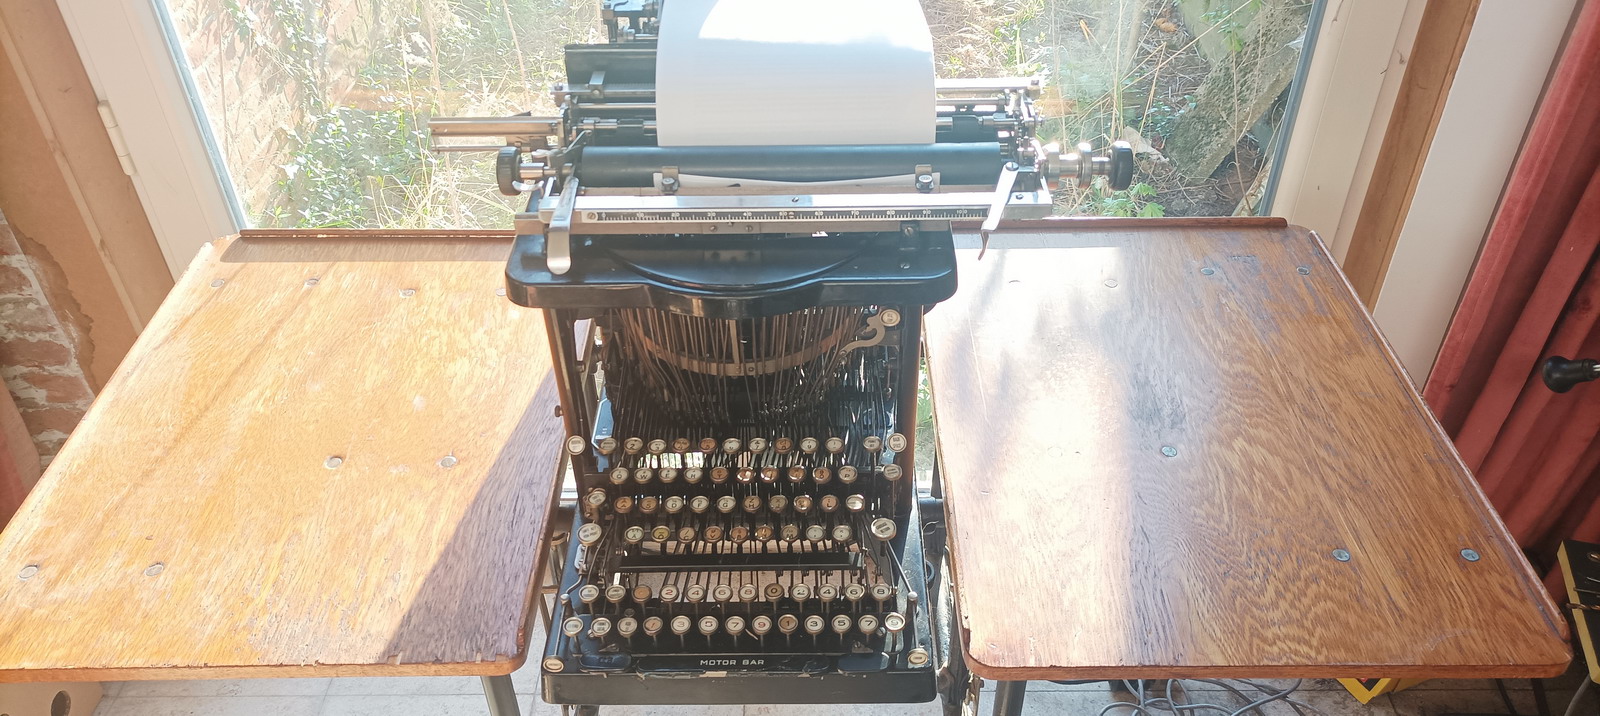
Burroughs Moon Hopkins billing machine n° 7-1209391
Hubert Hopkins invented and patented this spectacular machine in 1904 and John Moon financed the Moon-Hopkins Billing Machine Company in 1904-1905. They allegedly sold approximately 3200 machines starting around 1912 before being bought up by Burroughs in 1920. Burroughs didn’t snuff out the production of their competitor, because of the unique capabilities of the machine, that was unique in its performance, featuring a full typewriter as well as direct multiplication. They kept improving and selling it until 1957. The history of the machine is very well described and referenced (in German) in the 2019 paper by Peter Haertel, in the rechnerlexikon.There were also machines available which did have the subtractor, but could not multiply.
The initial idea for a calculating typewriter was patented in 1904 in several patents in the US, UK, France, Germany and Switzerland, however, this was a completely different machine with a frontstrike typewriter vaguely resembling an Oliver. The first machine resembling the commercial machine was US844519 in 1904 (with a different multiplier mechanism), and US1133029 in 1905 (which already resembled the commercial machine quite well) There was an improvement patent filed in 1908, both in the US (US10859120 - which featured a rotating register drum instead of sliding front registers) and in Belgium (202081) France (383719) the UK (GB190718058A), and Germany (DE222166). The 1908 UK patent features the machine as it was built and sold (although still with a hand crank). The US patent (application n° 310739) was granted only much later in April 1920 as US1336904, because it was being contested by Burroughs. When it was eventually granted (and Burroughs’ contestation being found wrong), Burroughs simply bought up the Moon-Hopkins Billing Machine company and all the rights to the machine. US patent US1.026.443(A) from 1912 features the electric motor drive. Other US patents include US1.143.241 (June 15 1915), which modifies the operation of some of the keys in order to be more in line with a fast running machine operated by an electric motor (e.g. in the earlier patent it is described that the handle should be pulled forward, and when it is fully forward, a particular key pressed - this was no longer practical with motor operation). The system described in the manual for calculating with fractions was not implemented in the early machines, and is described in the 1922 US patent 1.440.145, filed in November 1920 by the Burroughs Adding Machine Company, who had bought the Moon-Hopkins Billing Machine Co by then.
Some serial numbers are known in the 900.000 and 880.000 range, the latter dating to 1924 at the latest. Machine number 7-1209391 may thus date back to approximate end of 1928 - beginning of 1929. I don’t know what machine model it is. In contrast to models 7202 and 7205 that are described in the manual that is available, it does not have a special provision for fractions (7202 is the tenth-fractional biller, 7205 the eight-fractional biller). There is also the non-multiplying model 7604. Until some more contemporary promotional material surfaces, this numbering/model scheme will remain a bit obscure, and until more serial numbers are collected, also the serial numbers will remain a bit uncertain.
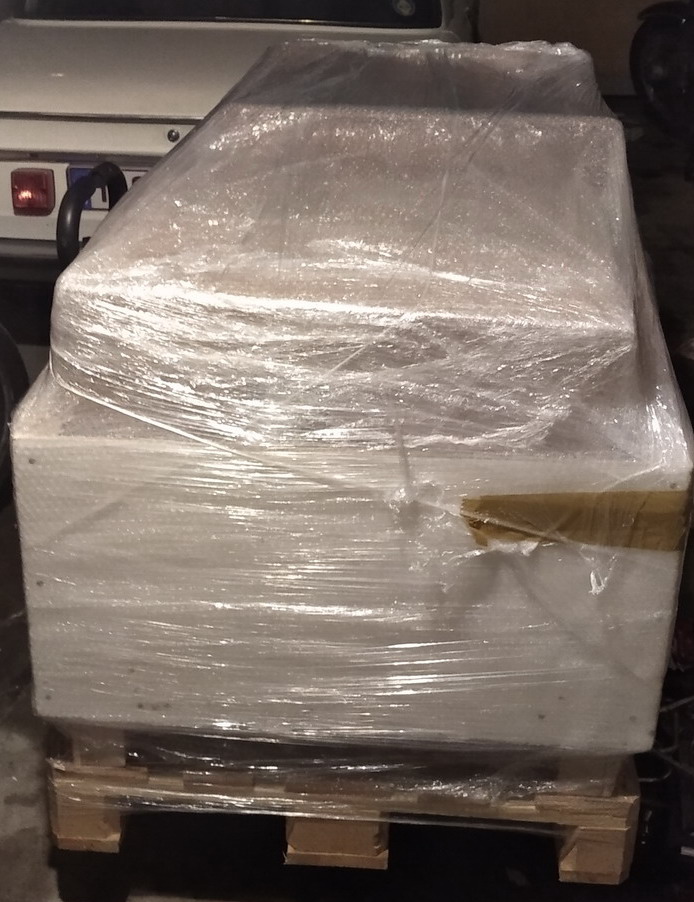
In any case, when the Arithmeum decided they wanted their machine repaired, they arranged for transport.
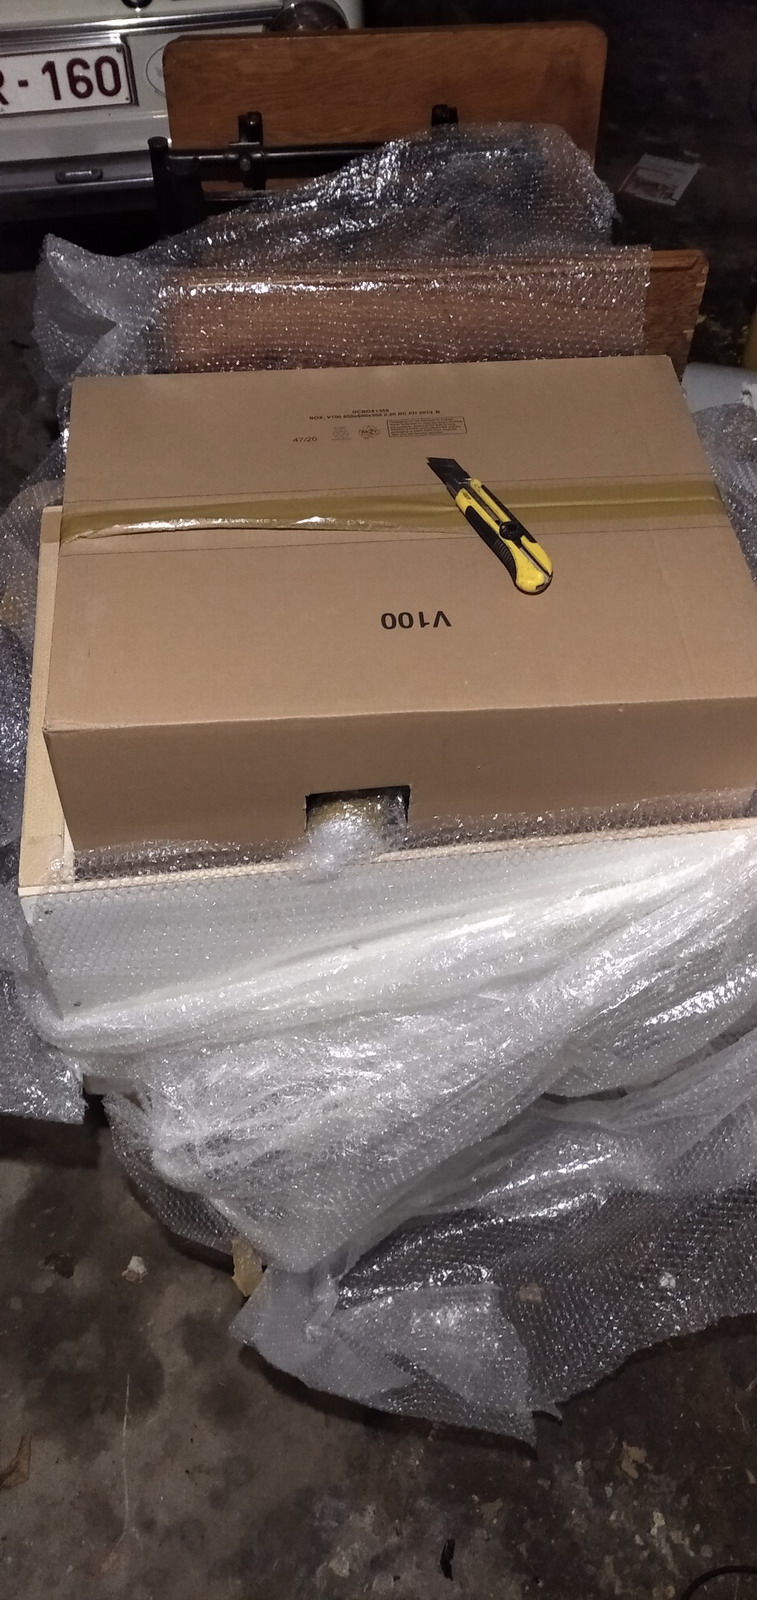
The machine arrived in a workshop in a sizeable crate, separated from its stand.
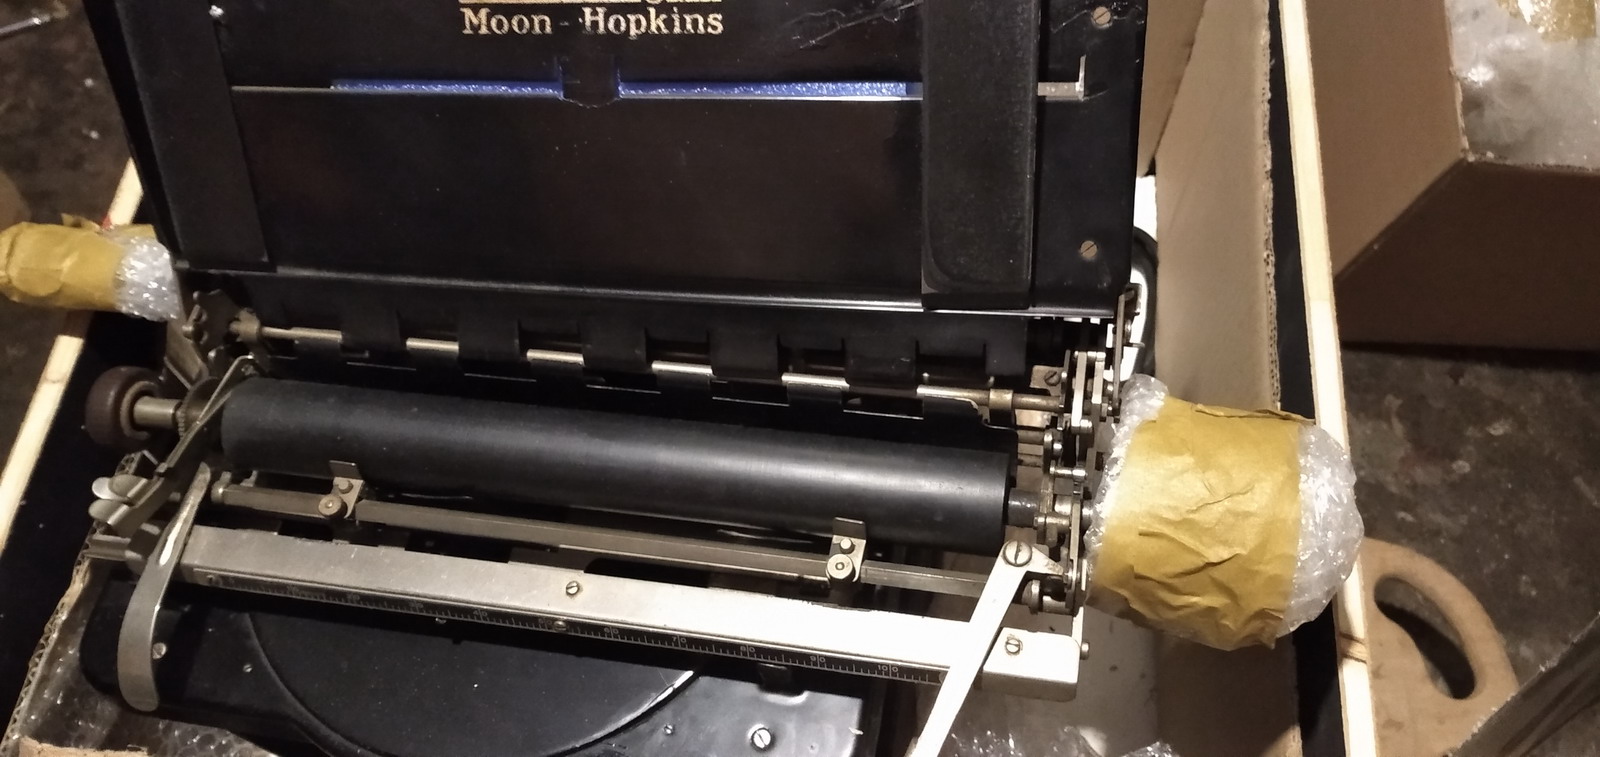
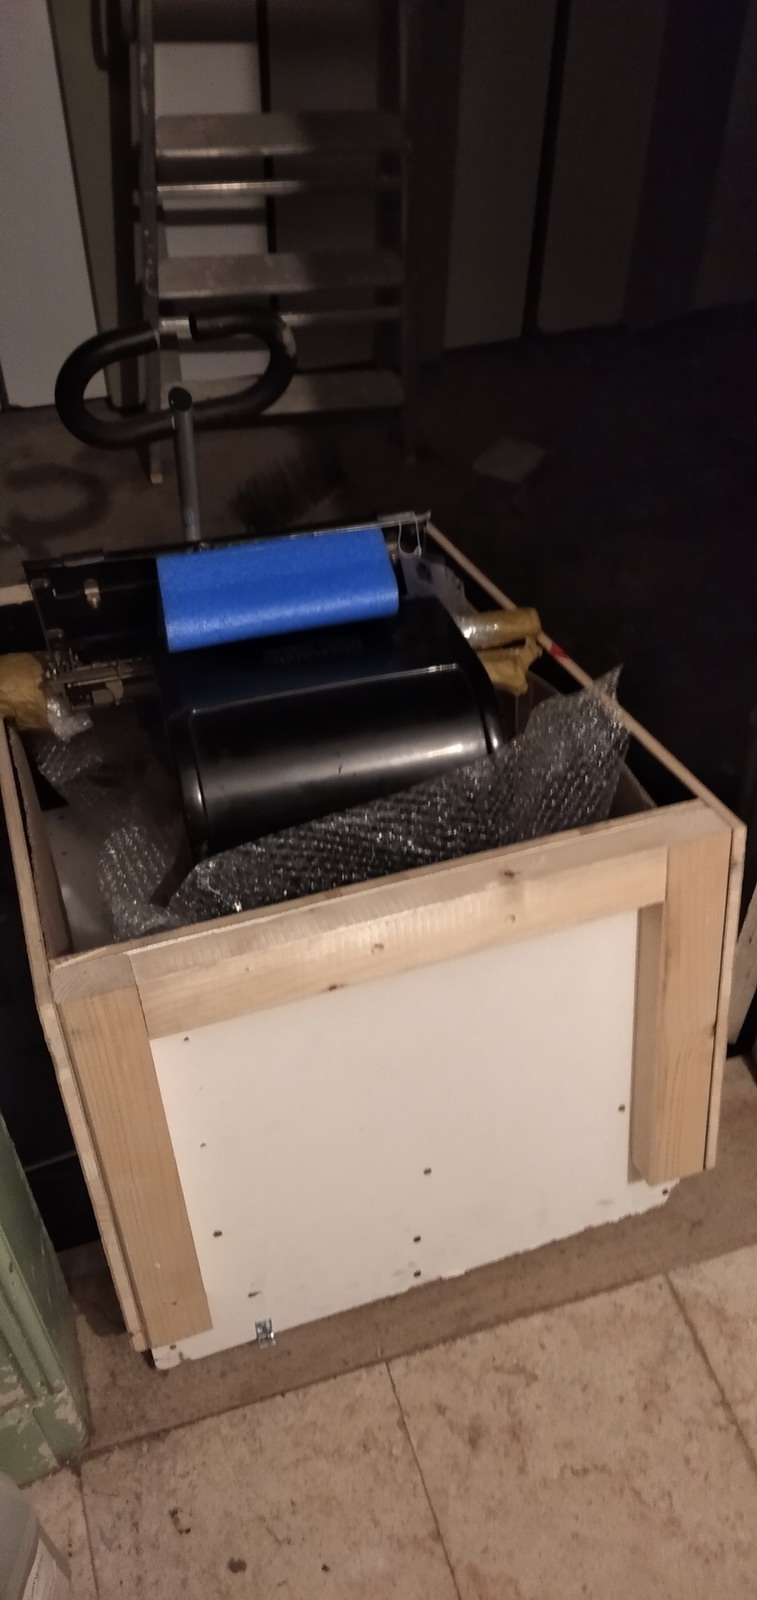
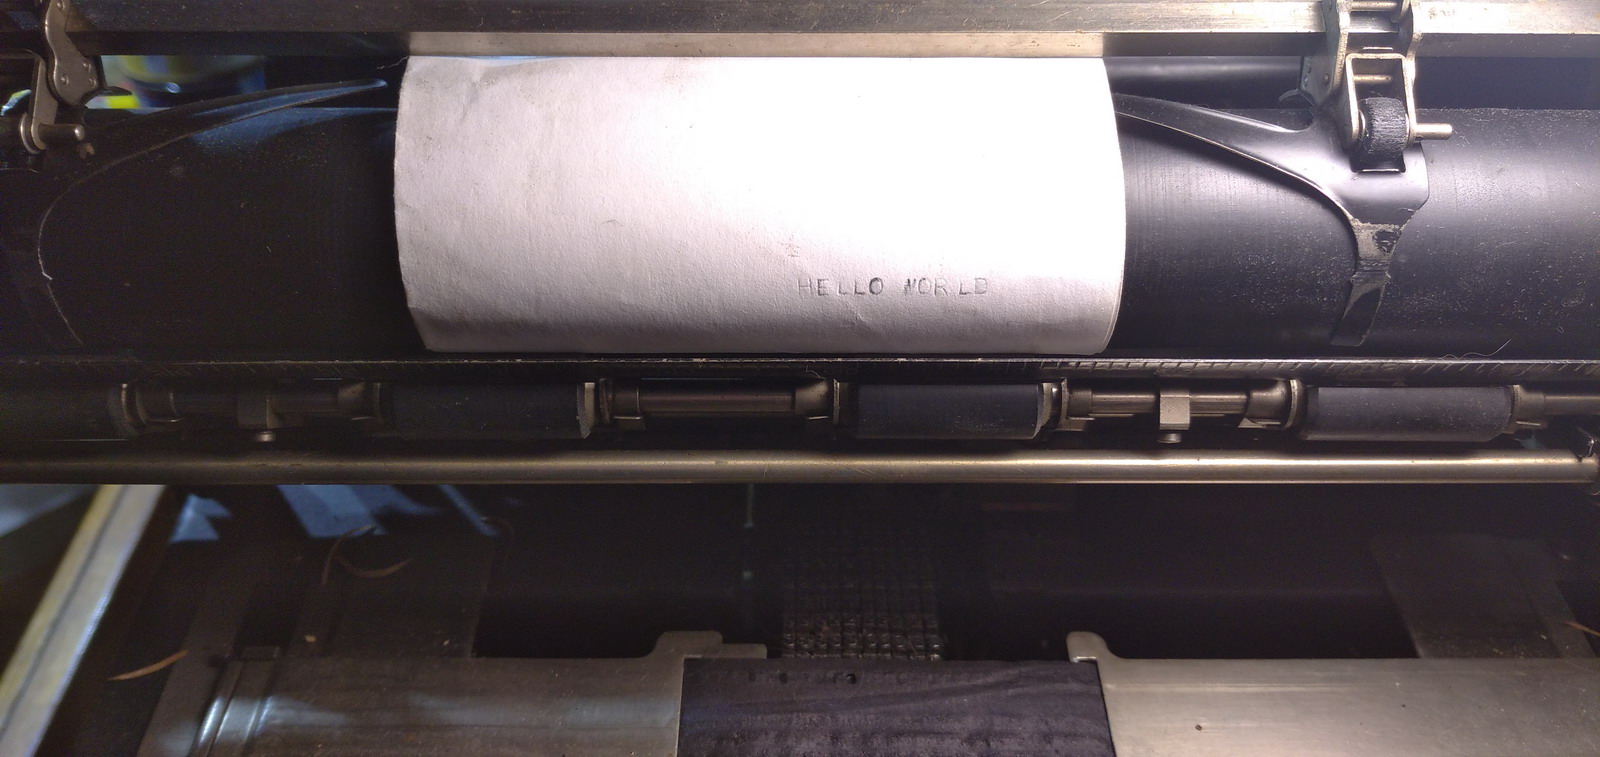
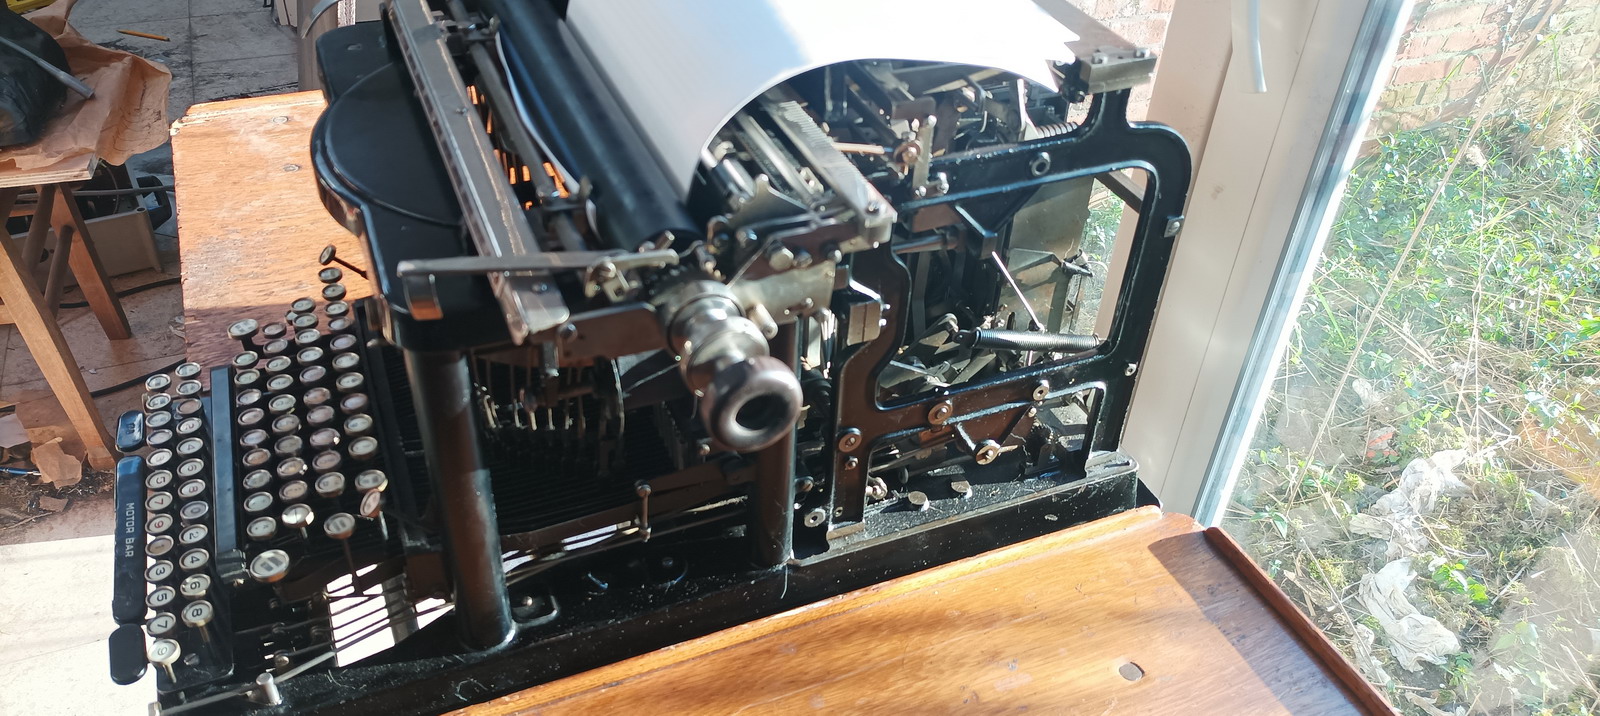
After muscling it out of the crate, and onto its stand, first, the cover was taken off, and all the dust and dead spiders blown out. It transpired the typewriter would still type.
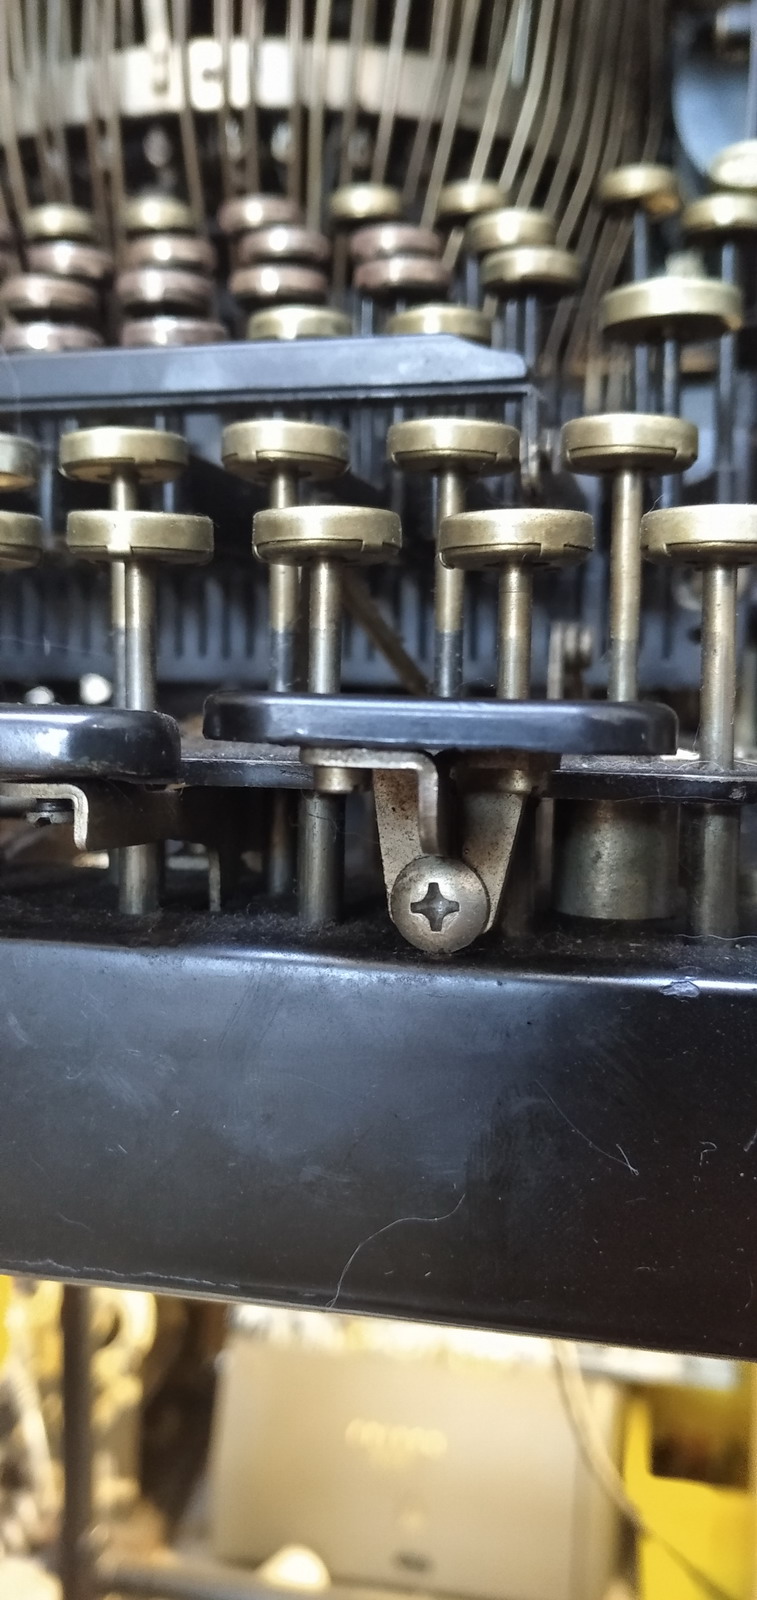
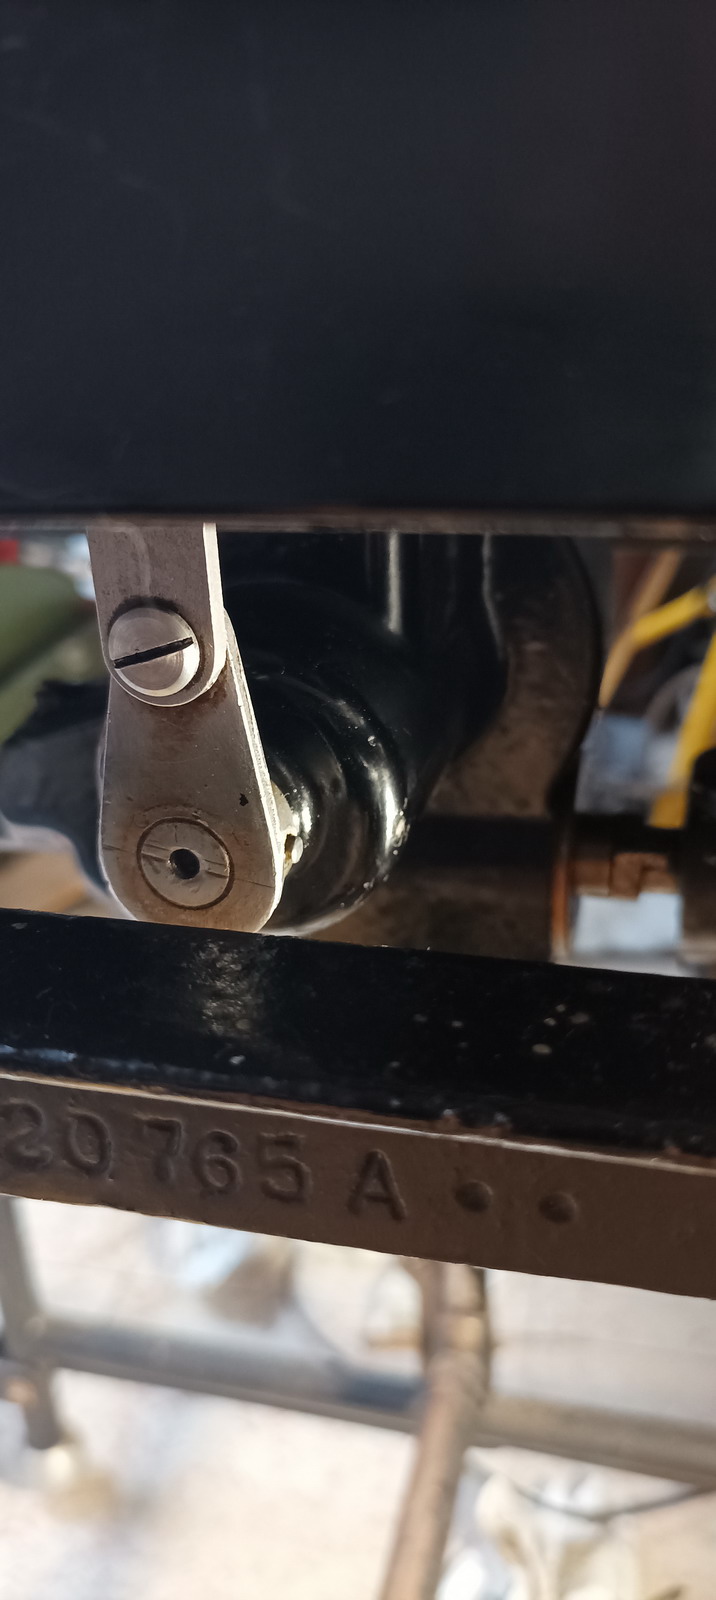
There were some strange goings-on going on, like this philips head screw wedged under “full cents” key
Then the machine was branched to 240V (after checking that the motor could handle this voltage ...) and the switch thrown. The motor sprang into life beautifully, and rotated only the vertical shaft next to the carriage, used for carriage return. The motor bar, at this point, was depressed.
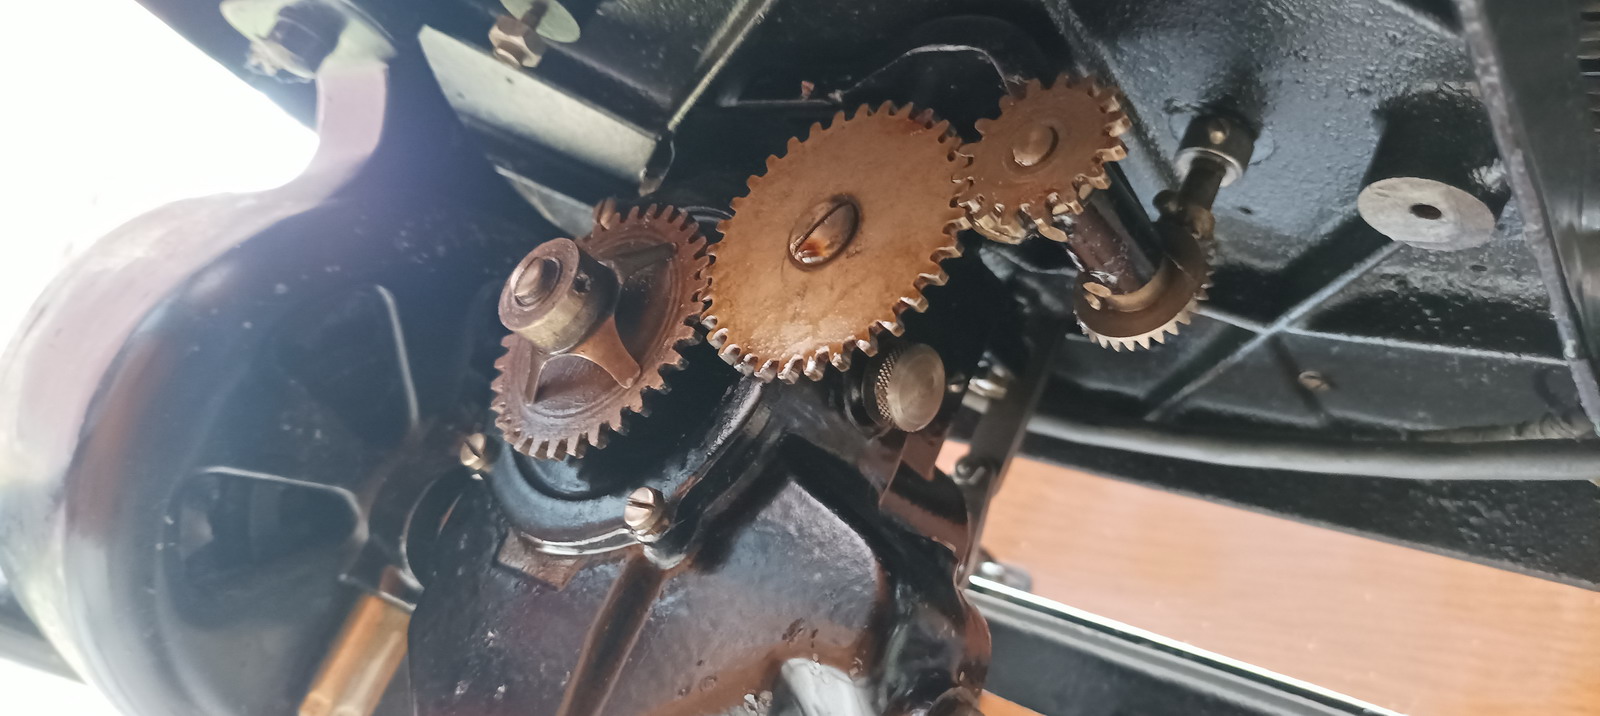
Rotating the machine by hand restored the motor bar to the neutral position, and for a brief while the machine rotated as intended - pressing the motor bar would rotate the machine one cycle. After a few cycles, however, the machine did no longer stop, and simply kept rotating. The motor drives two ends of the same shaft, one of which is leading to a set of multiplying gears to rotate the aforementioned vertical shaft, the other end leading to the main crank of the adding/calculating machine.
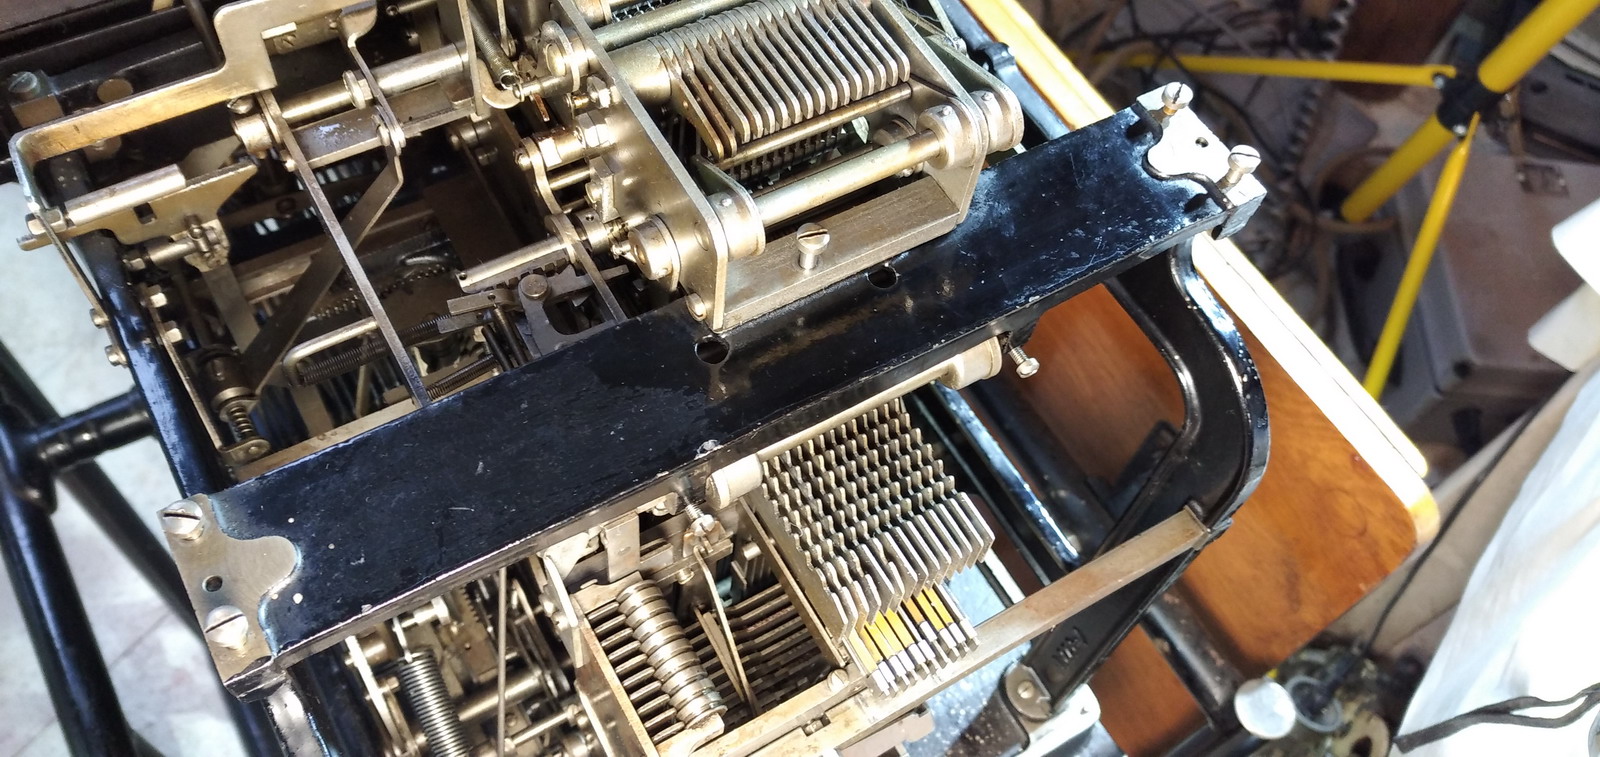
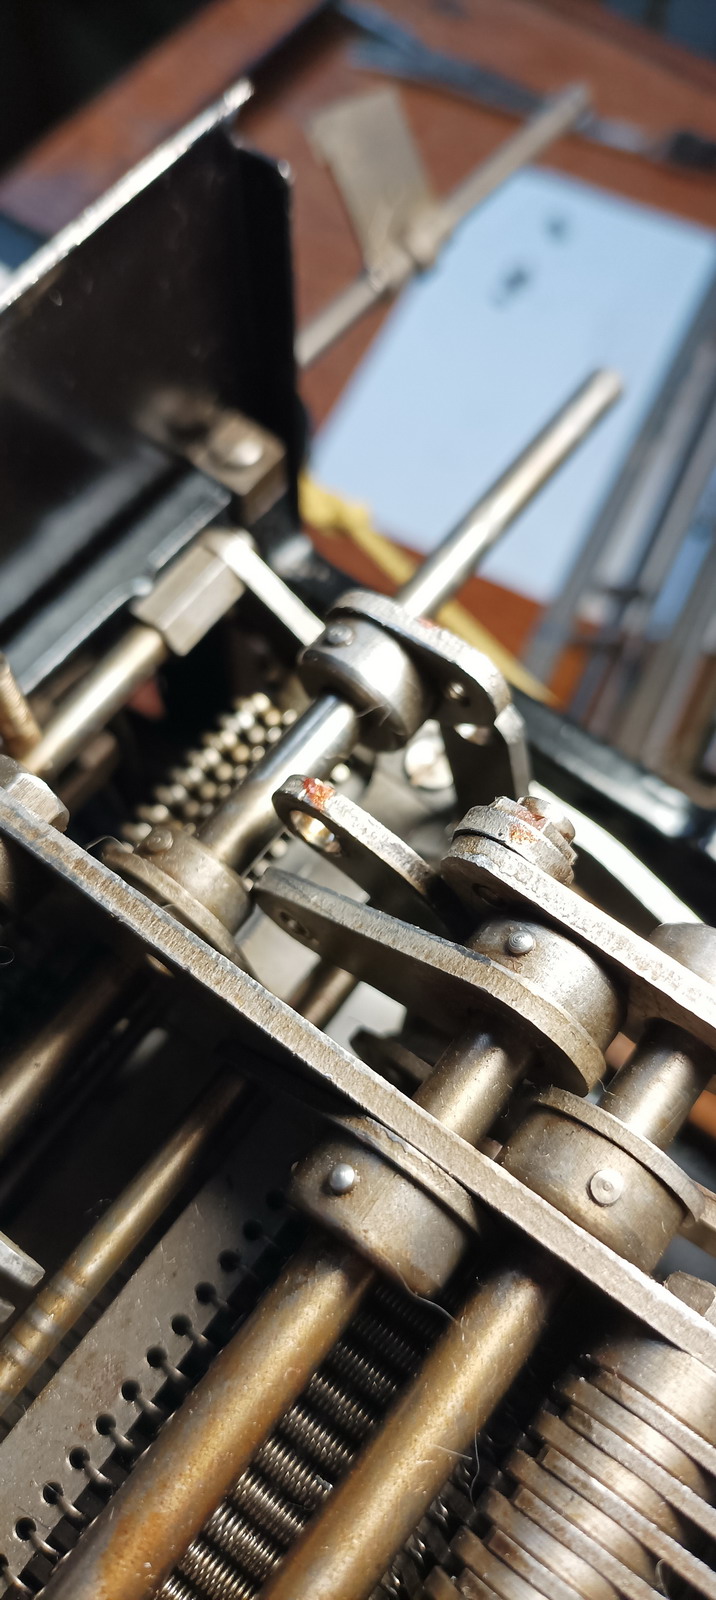
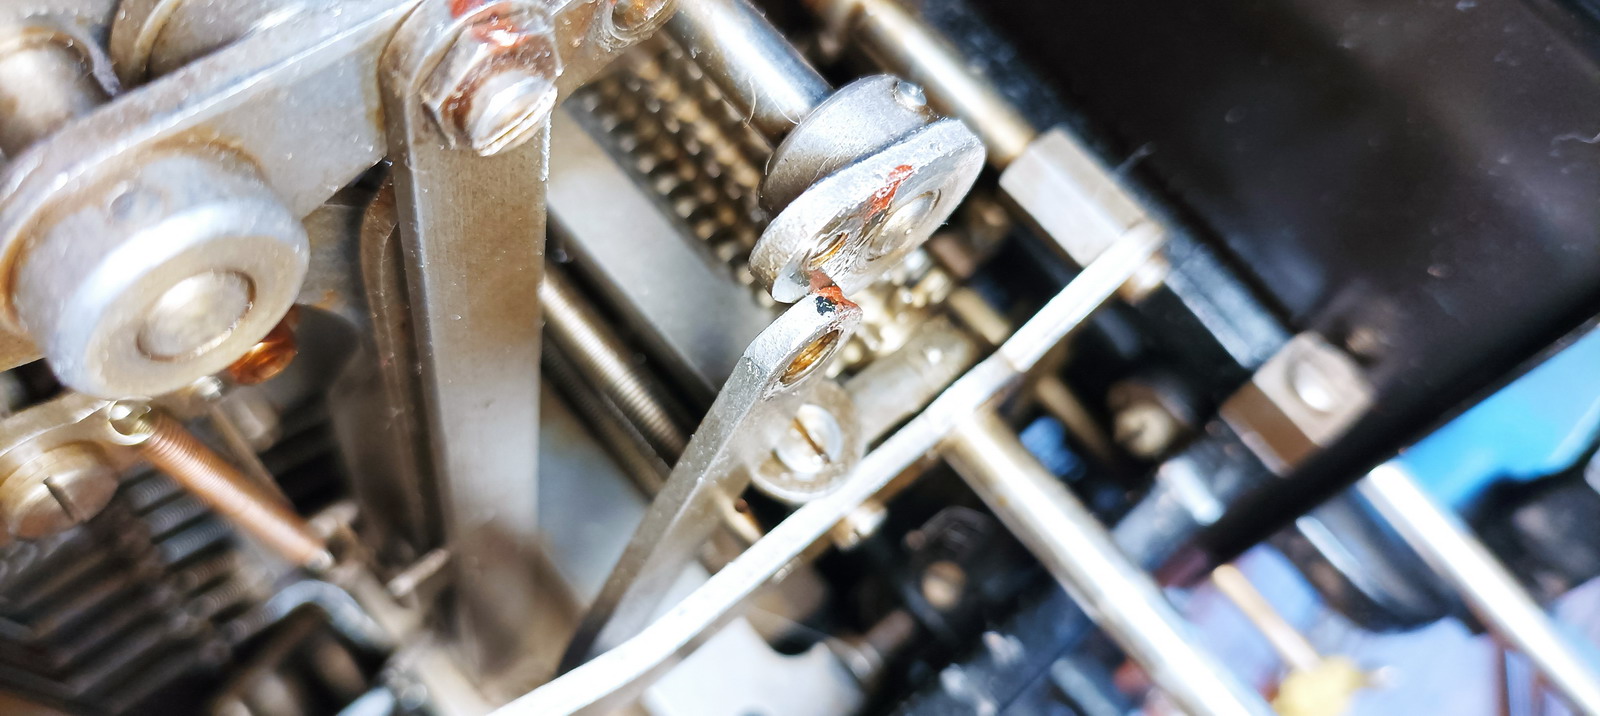
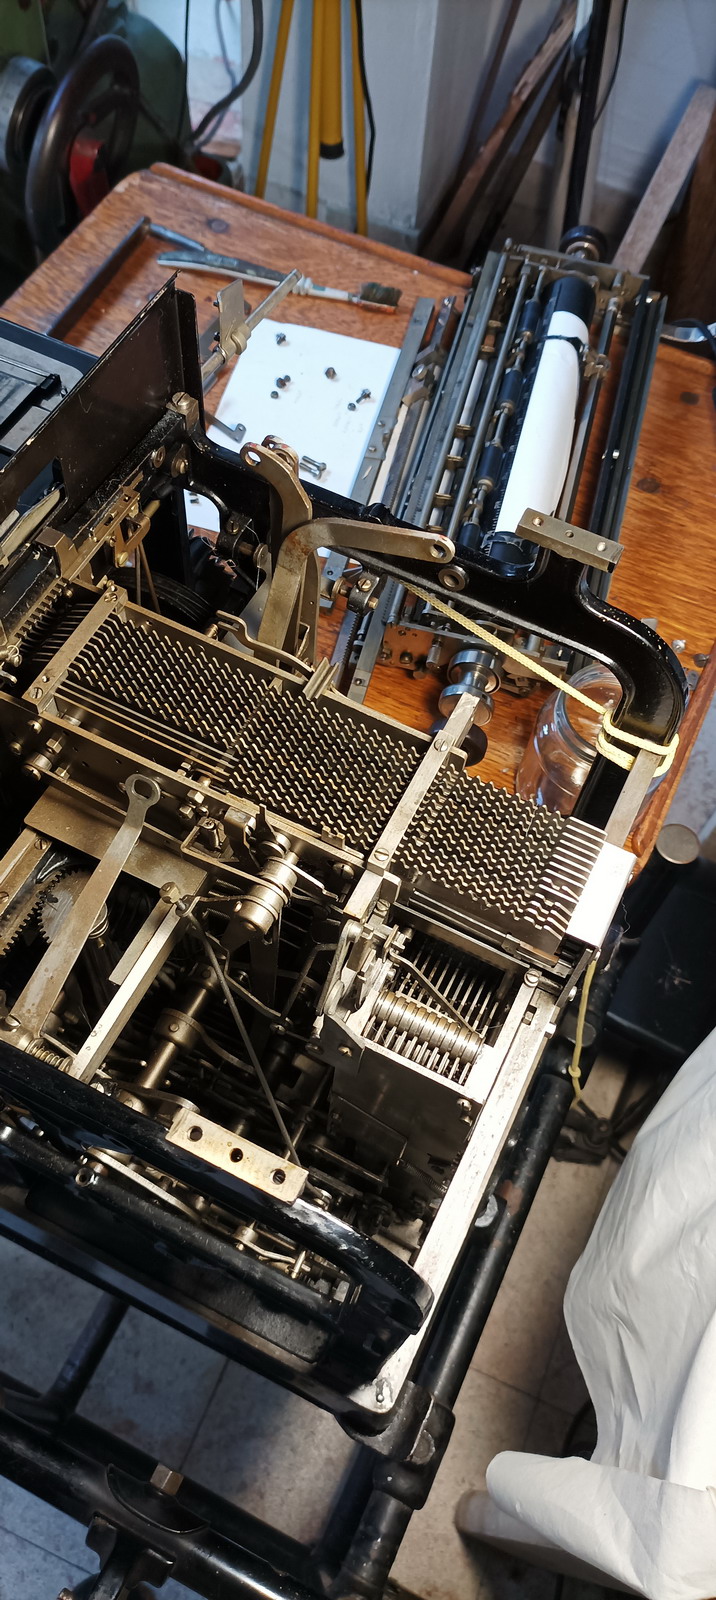
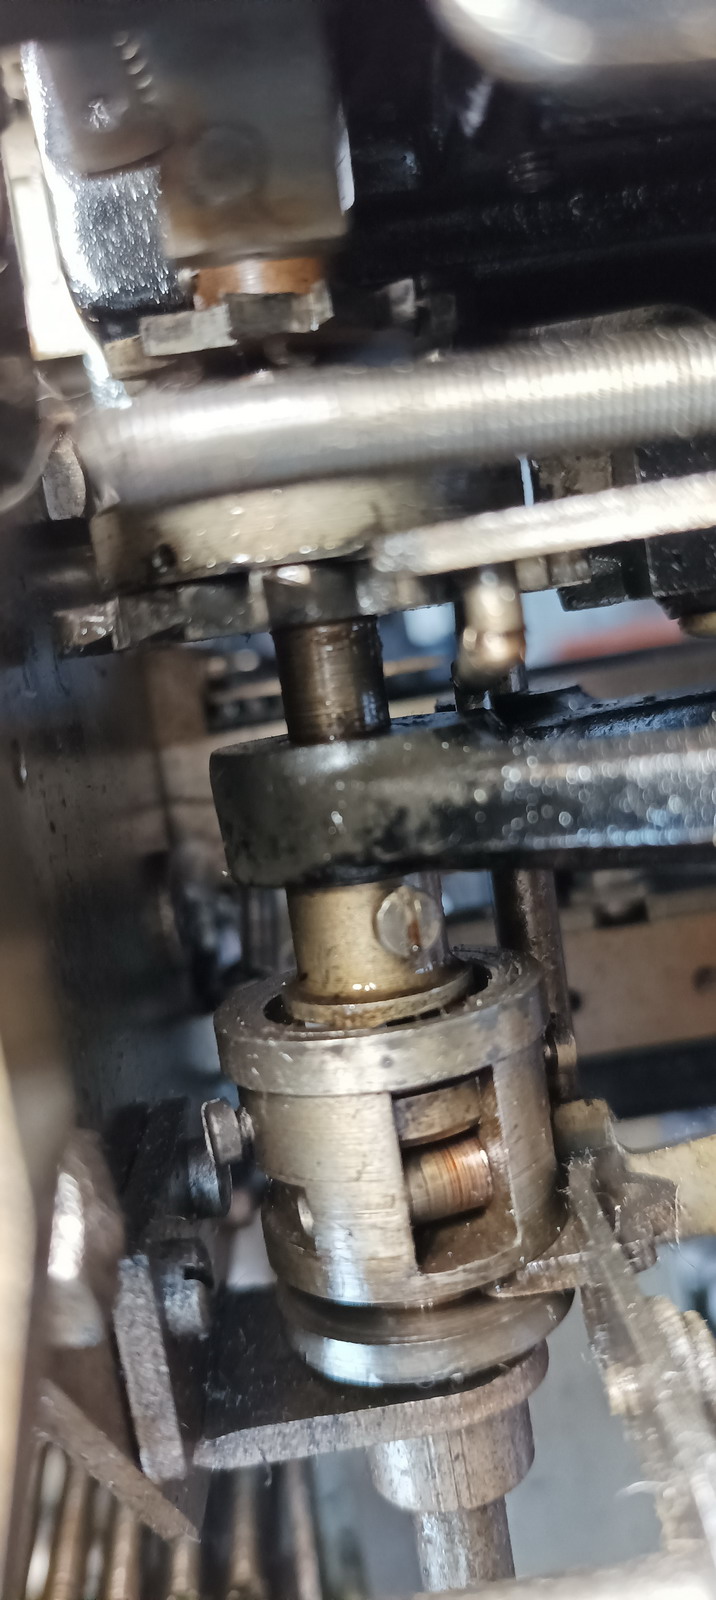
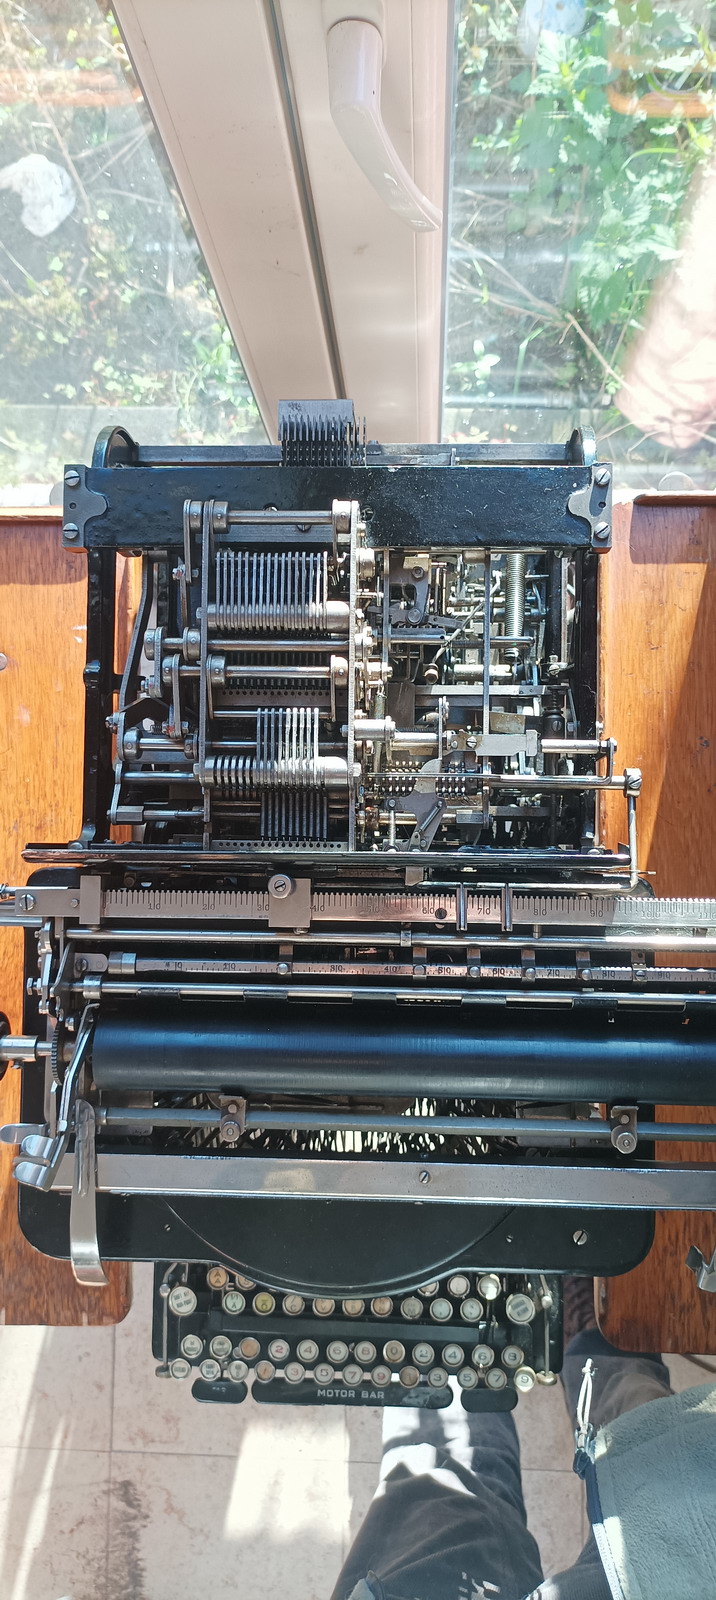
This is the motor/differential from the bottom
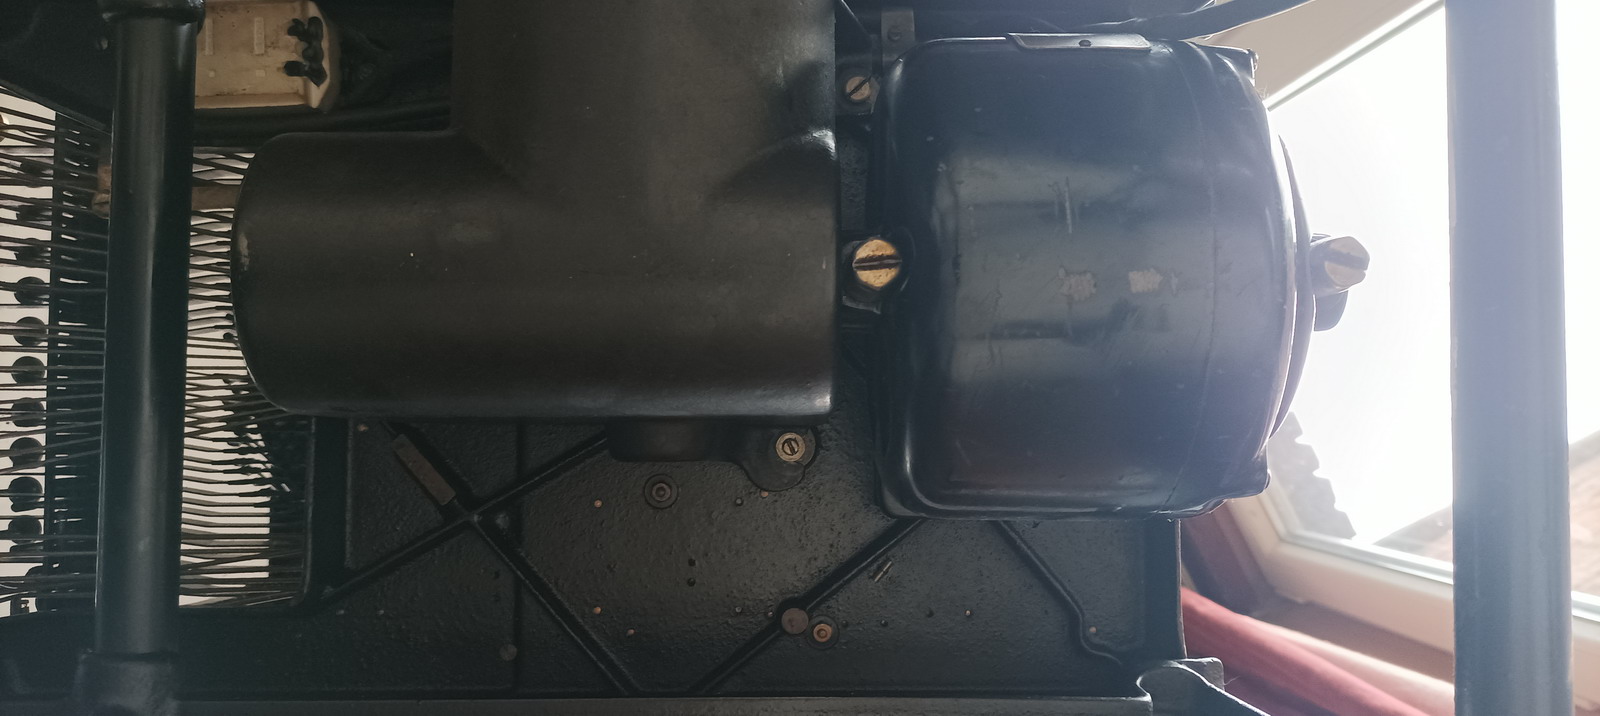
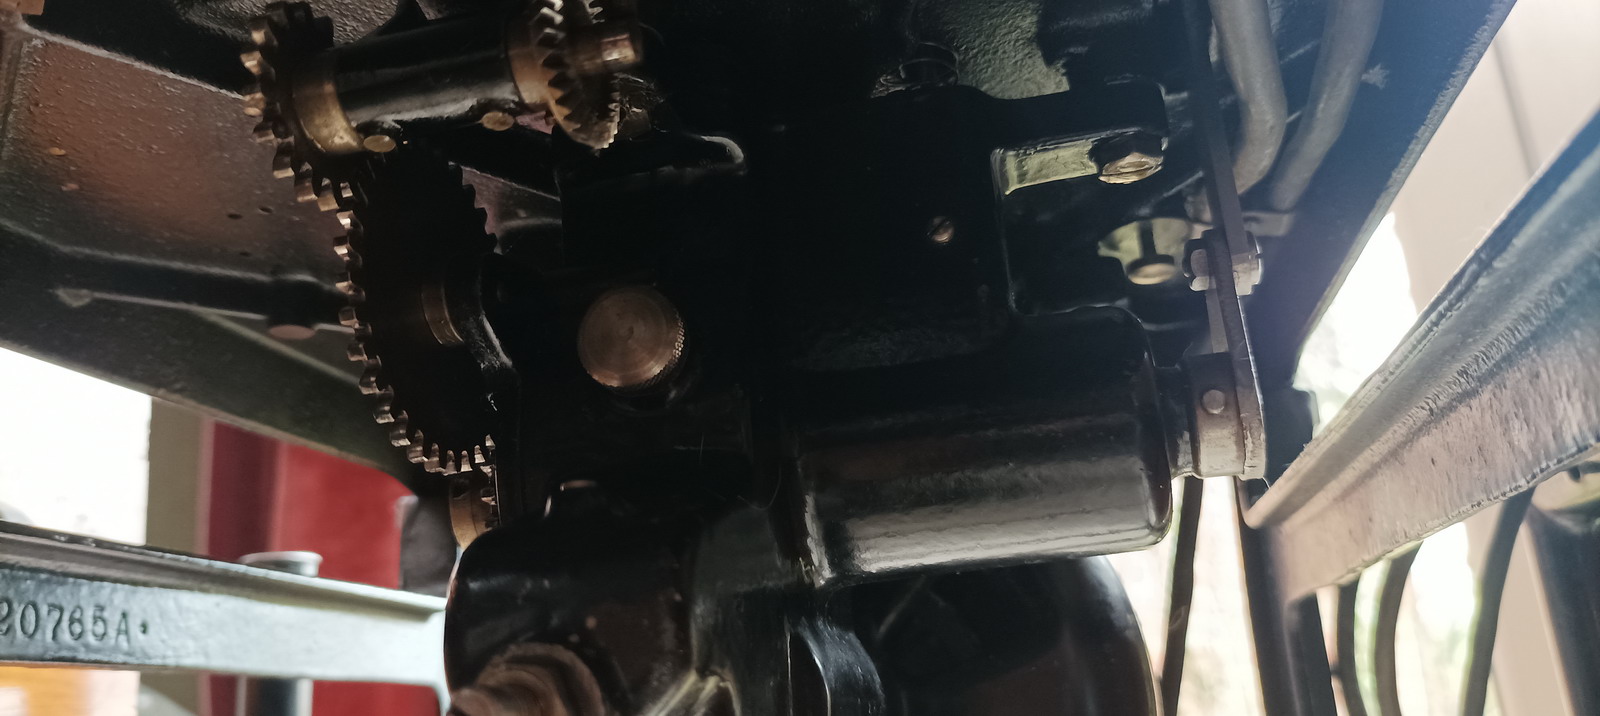
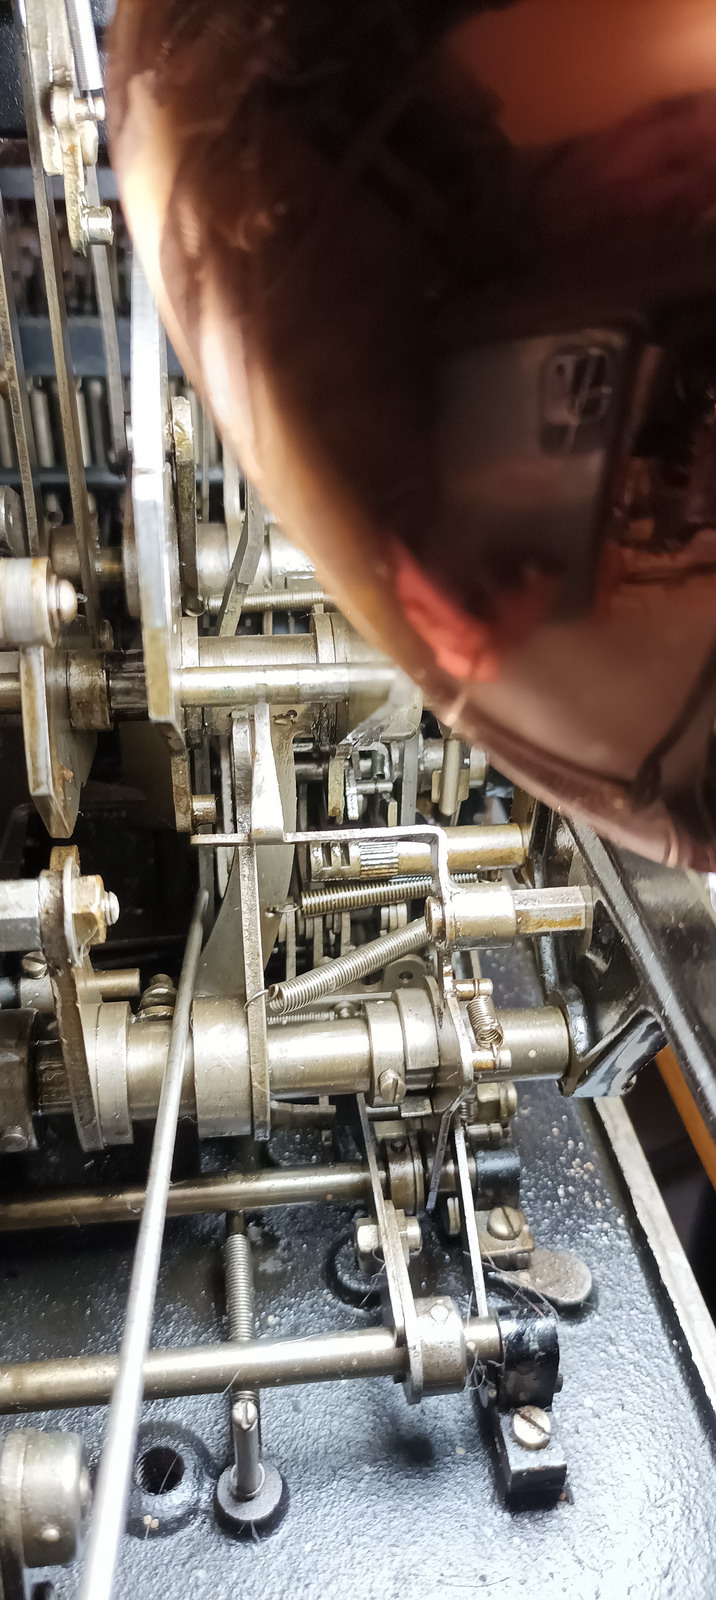
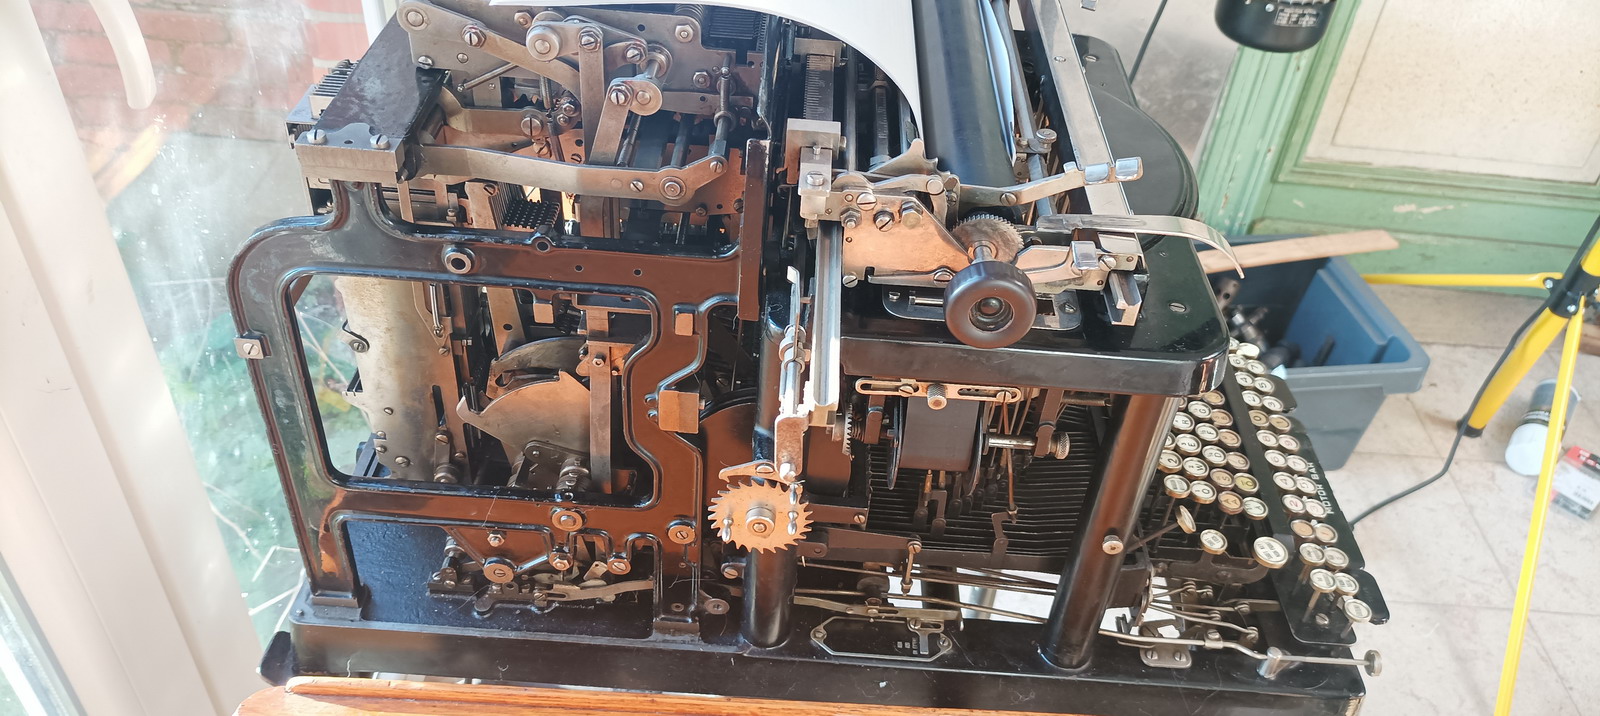
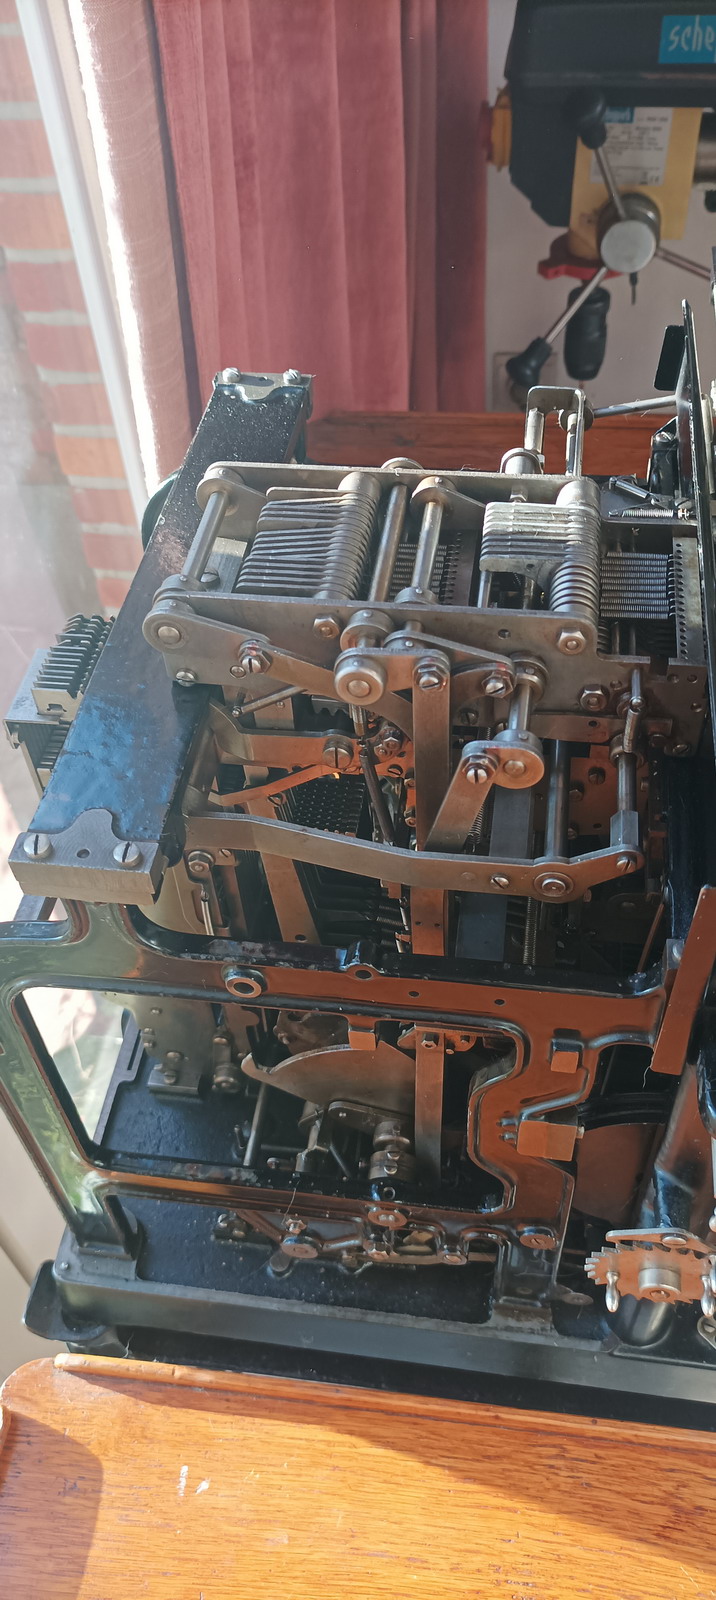
And without the cover from the left side...
...and the right.
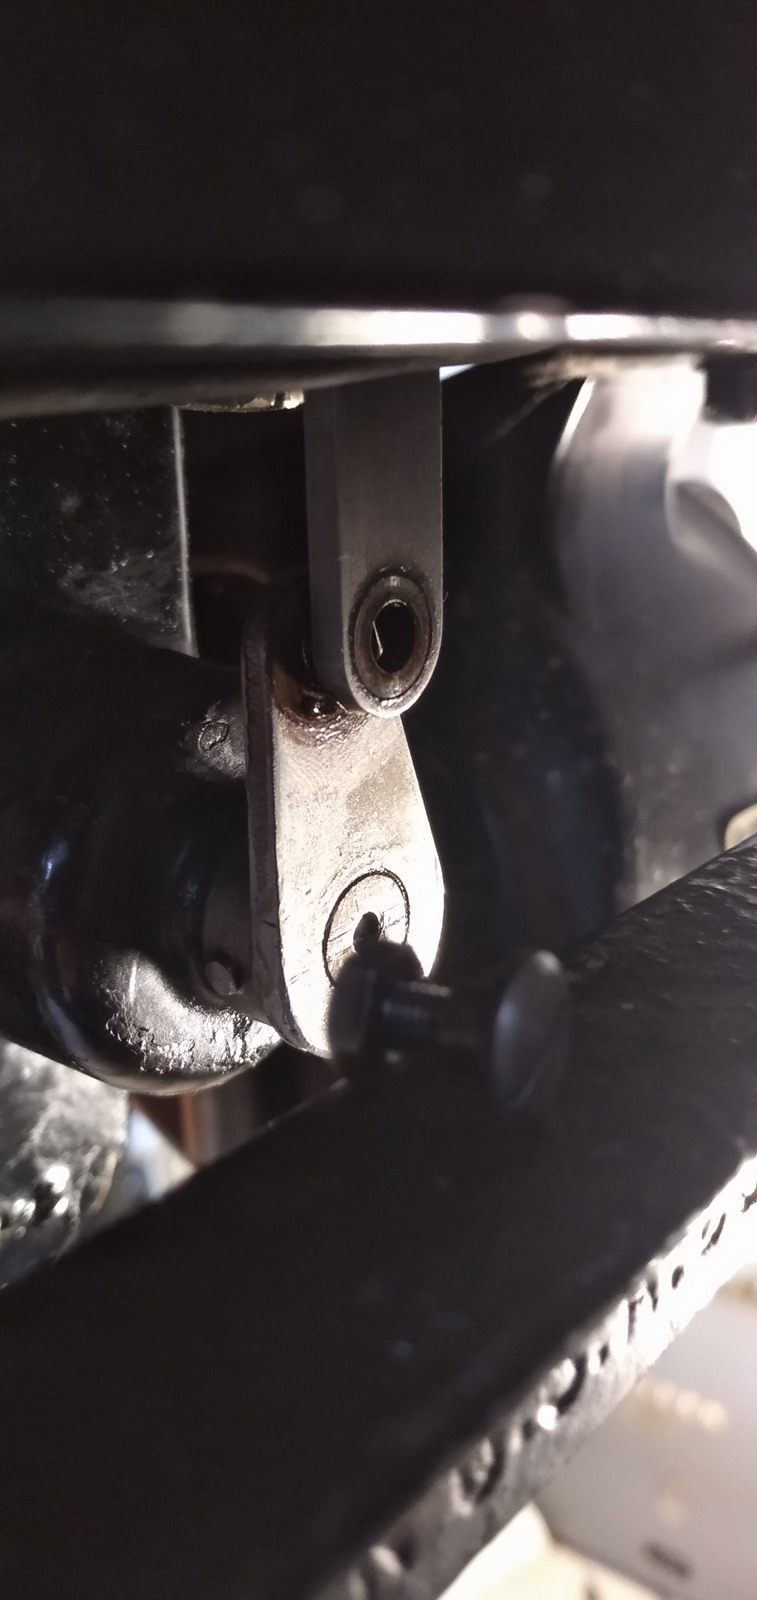
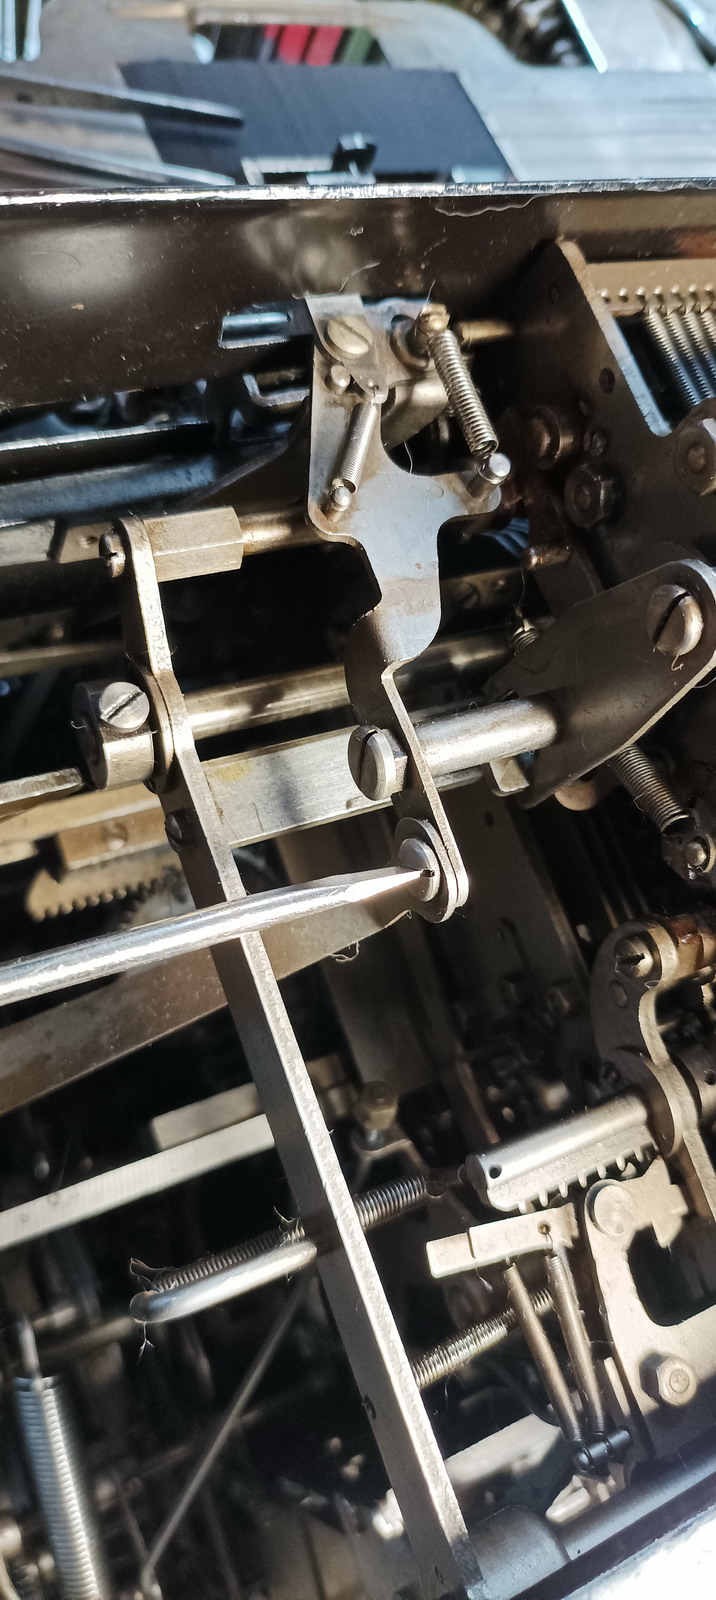
It was at that point impossible to see how the disconnect for the differential functions. The three bolts were thus simply disconnected from the main chassis, and the differential pulled off.
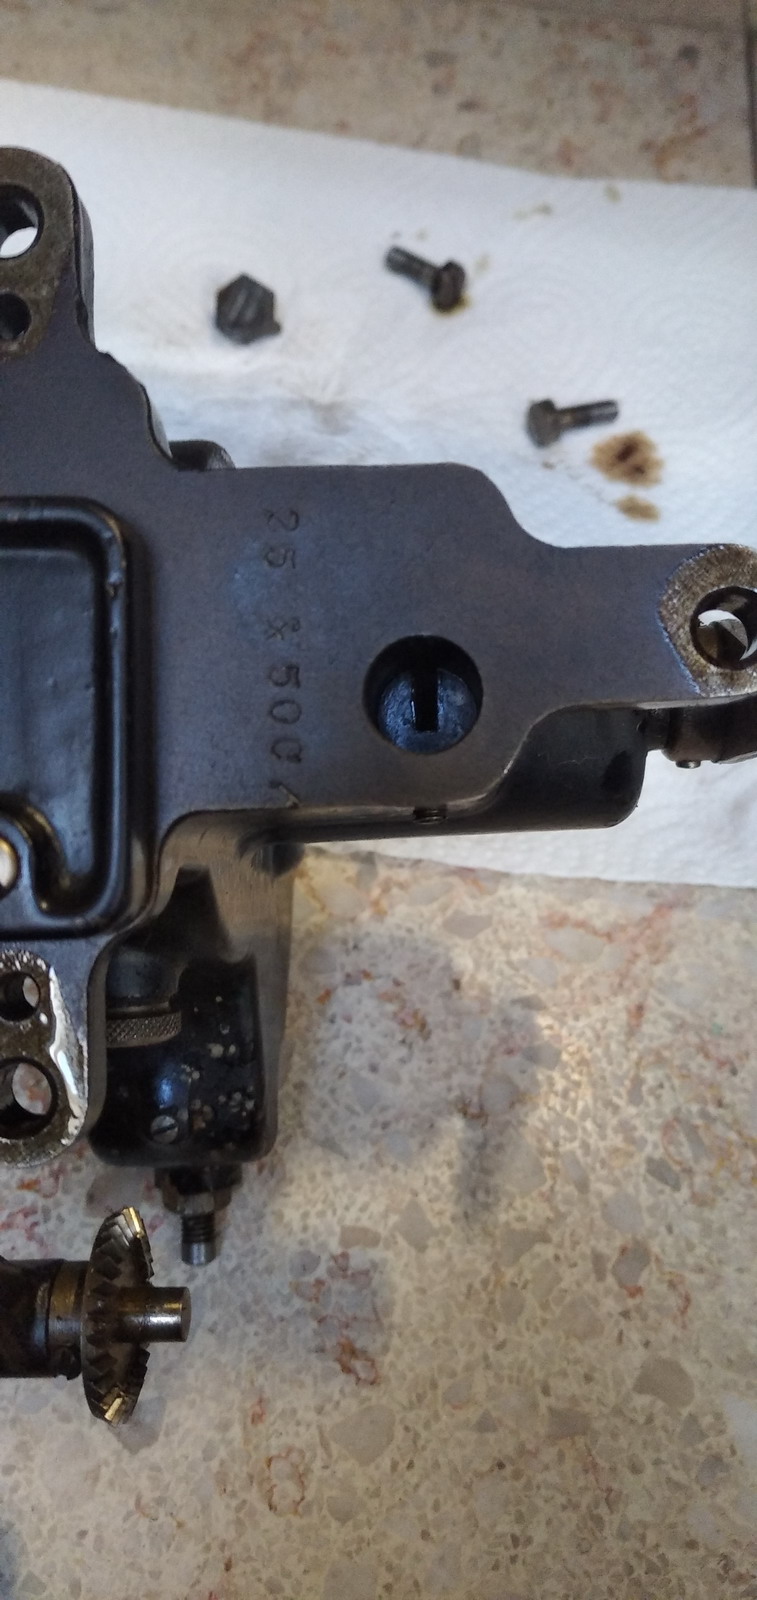
It was clear that the spring-loaded “knife” reaching inside the differential from the top, was completely sticky with old grease. Some lubricant was sprayed into the hole, the knife was cleaned, and the differential remounted.
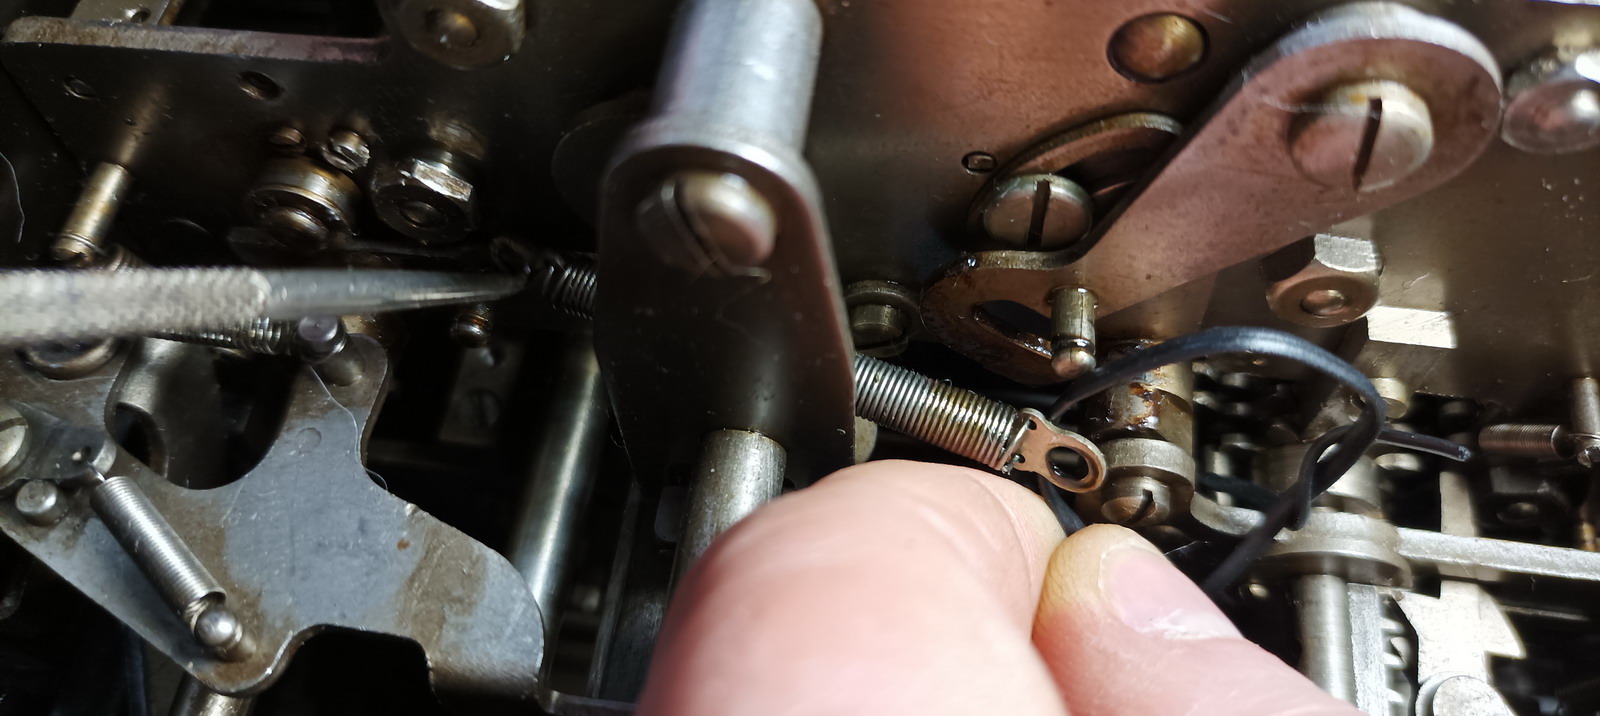
For the first few minutes, the machine refused to cycle, but after a few minutes and a bit of exercise, correct function was re-established, and the machine would cycle once if the motor bar was pressed. At this point, I started reading the manual and cleaning the machine. I reconnected the disconnected front register bar, and reattached one loose spring I found in the machine.
After familiarizing myself with what some of the operating keys do, I started to experiment, and found that I could enter numbers in the registers, clear the registers, transfer numbers into the multiplyer and also multiplying them - the only thing that the machine did not appear to do was print, so it was hard to establish whether the numbers that were coming out made sense. And then the machine blocked completely, on trying to clear all the registers. It then became clear that there was an issue with one of the lifting bars/transfer levers in the multiplier that was bent, and blocking the machine.
After a futile attempt trying to get the lever out to straighten it, then realizing this would not be possible without taking the machine completely apart (madness without a service manual ...) and straightening it as well as possible while in place, the machine still didn’t print, and also no longer entered any numbers into the registers. It transpired that in lifting the top off the multiplier to try and straighten the lever, I had misplaced a lever on the side of the multiplier. This was easily rectified, and now the typebars would move, but the printing hammers still would not work.

I do not remember how I ended up repairing this, but there definitely is an interlock that prevents the type hammers cycling when the carriage is up (or off). So after reestablishing the function of this mechanism and replacing the carriage, the machine did work more or less as intended - although now that I could see what was printed, there were clearly issues with tens transfers as well.
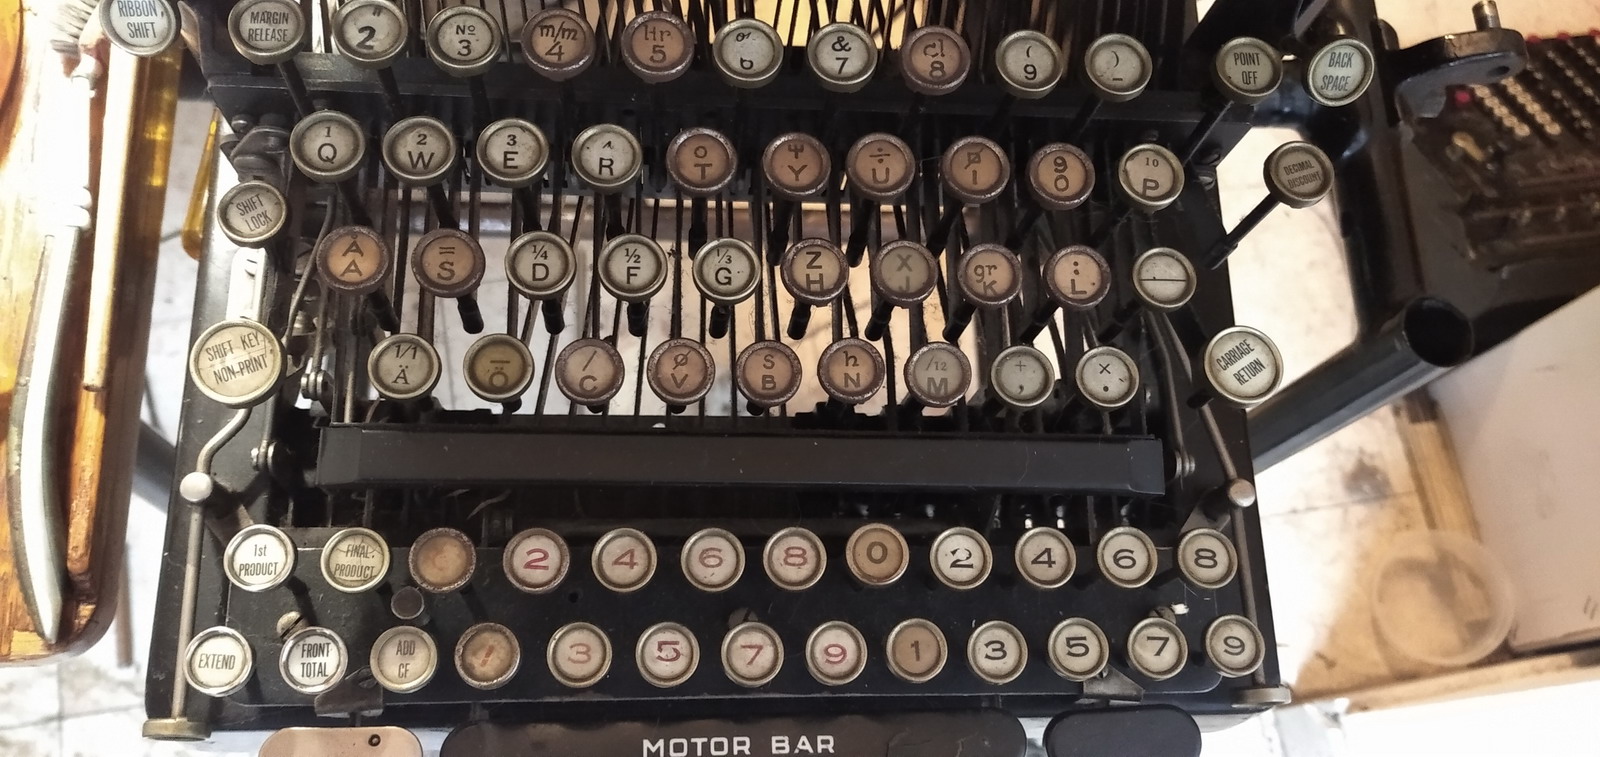
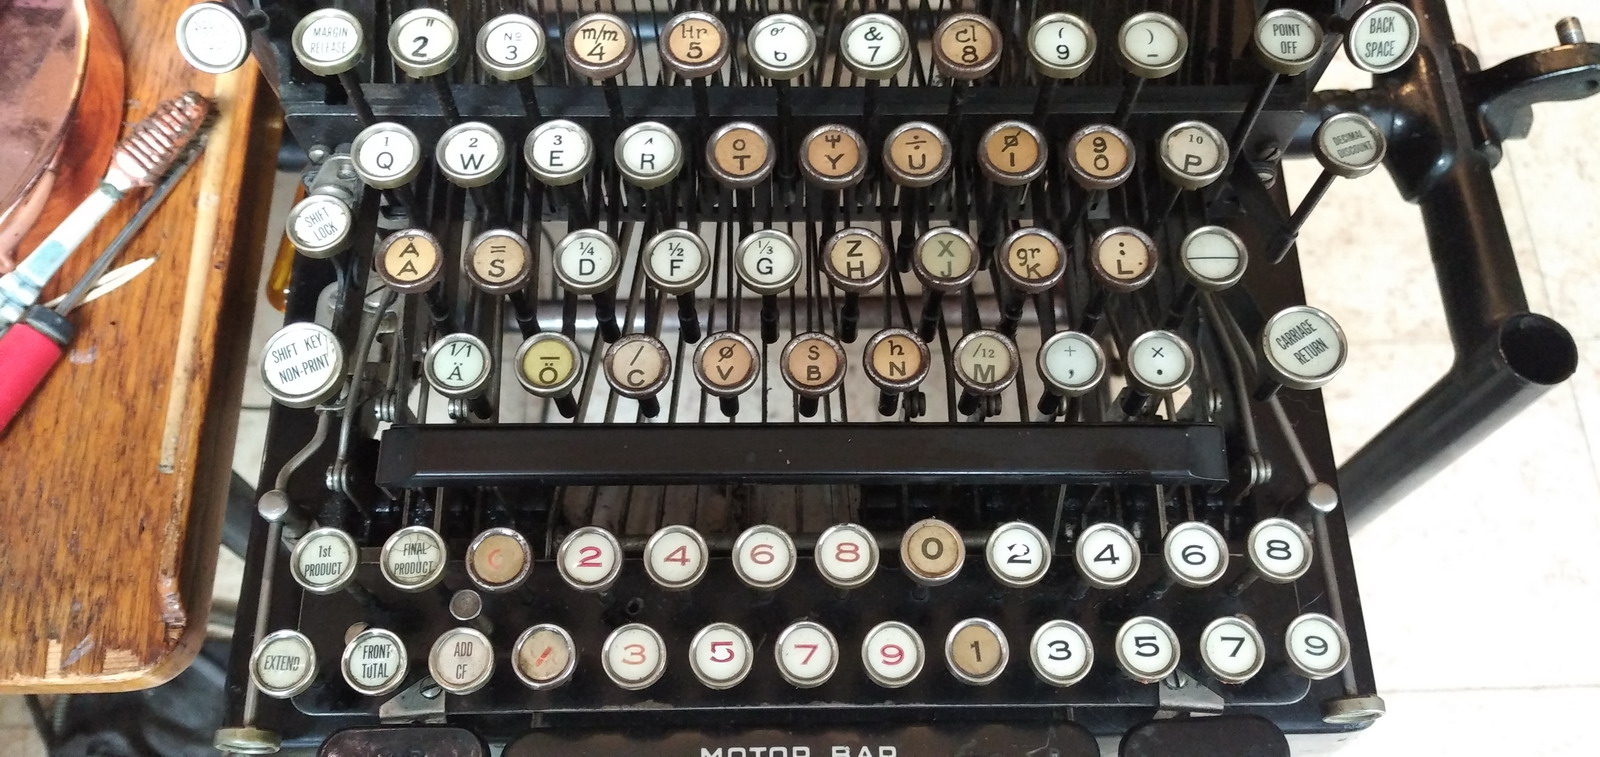
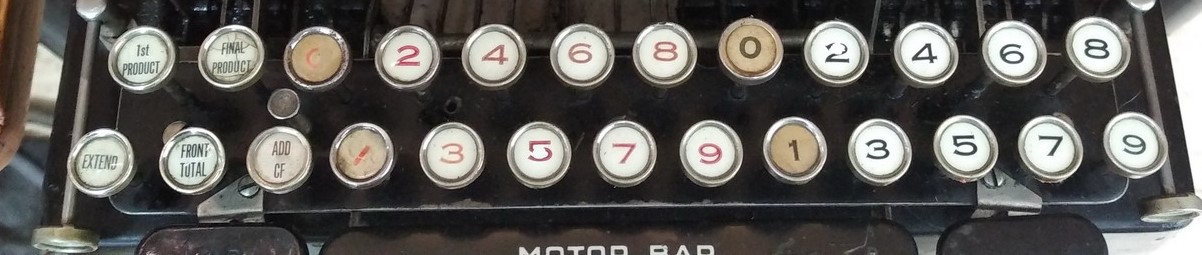
I started cleaning the keyboard, these are some before and after pictures:
it also turned out that someone bumped into the machine at some point, bending the line feed control bar and breaking its bracket.
There were a lot of trial calculations, the bracket was looked at, and a new ribbon was ordered too ...
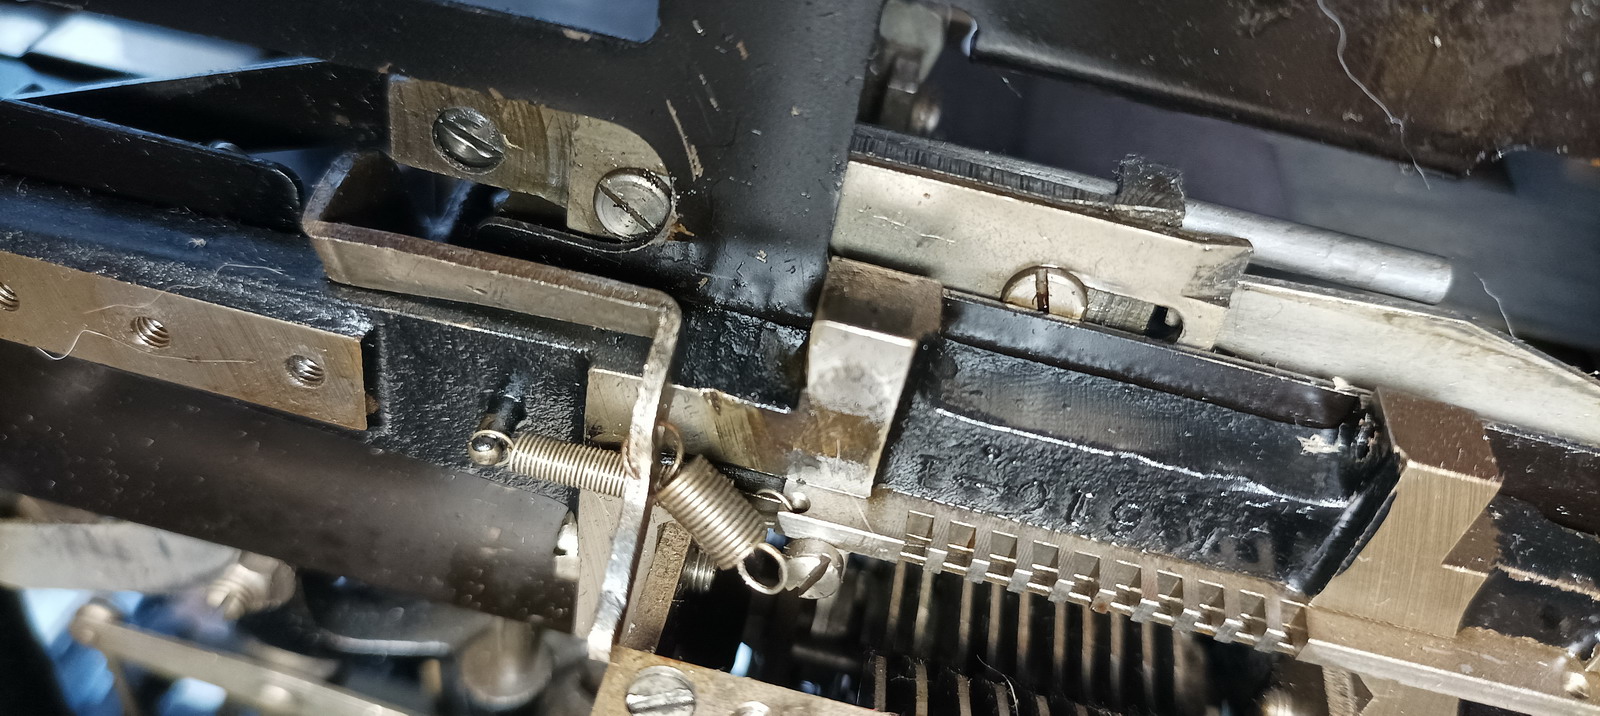
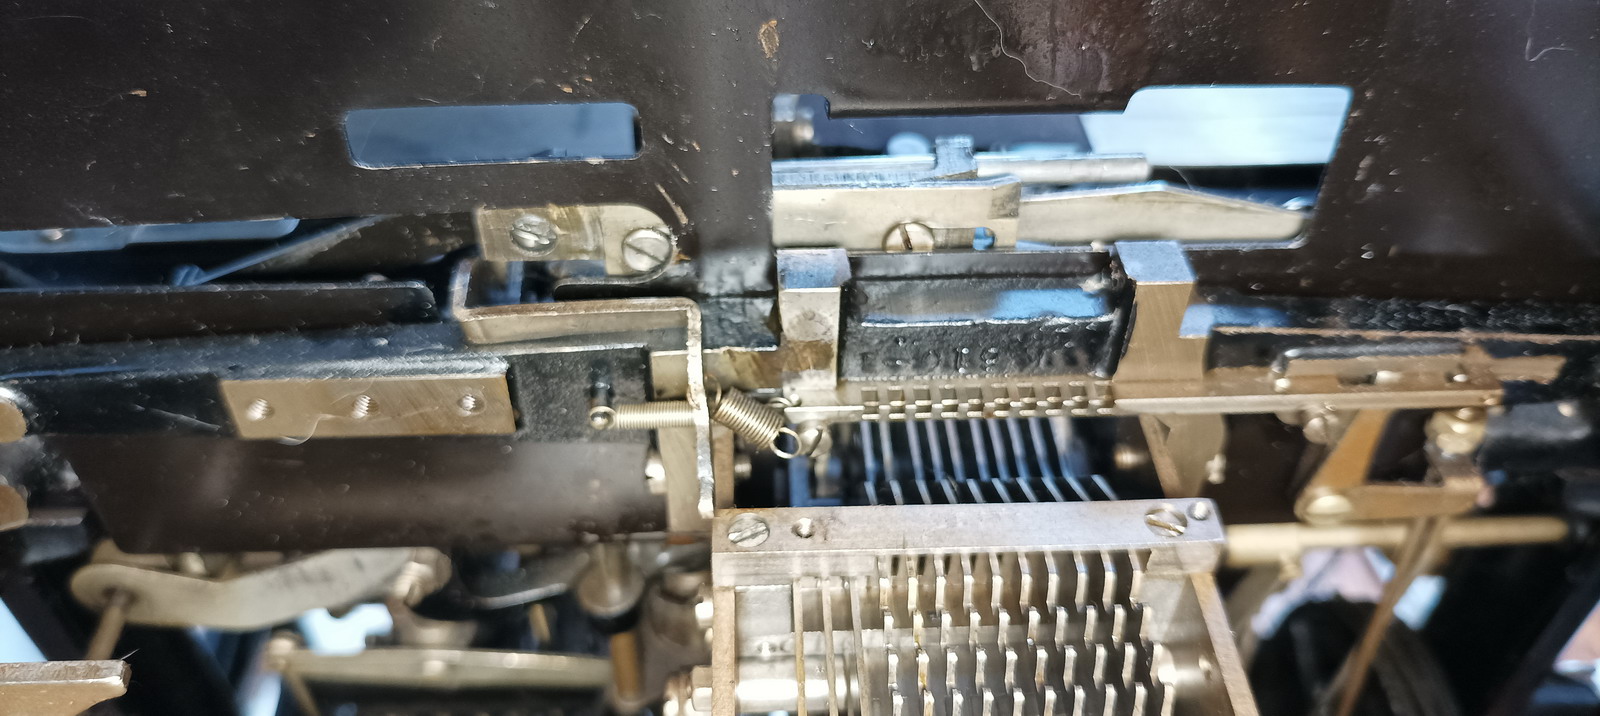
The top bars with all the control blocks for the margin release and the register tripping were shined up a bit:
There was then a lot of faffing about with the (still slightly bent) multiplier lifting bar, and while I managed to make it better, I never succeeded in getting all the critical surfaces in the right orientation and at the right distance from each other, so when finally someone turned out to have a parts machine, I jumped at the chance of obtaining a straight version of the broken and bent lever. So the next issue was how to get the broken lever out of the machine to exchange it - this necessitated taking the entire top part of the machine off, complete with the registers. The new lever came along with the person who took it out of his parts machine, and hence had some idea of what to take apart in order to get it out and back in. Not quite as good as a service manual, but enough to reduce the scope of the task from impossible to merely slightly insane, since we now had a pretty good idea of where the pitfalls were. Thanks ever so much, Jaap! We marked the eccentric bushings that had to go back together in a certain orientation, undid all the operating levers, had to undo a few more parts and springs, and finally were able to lift the top part of the machine free.
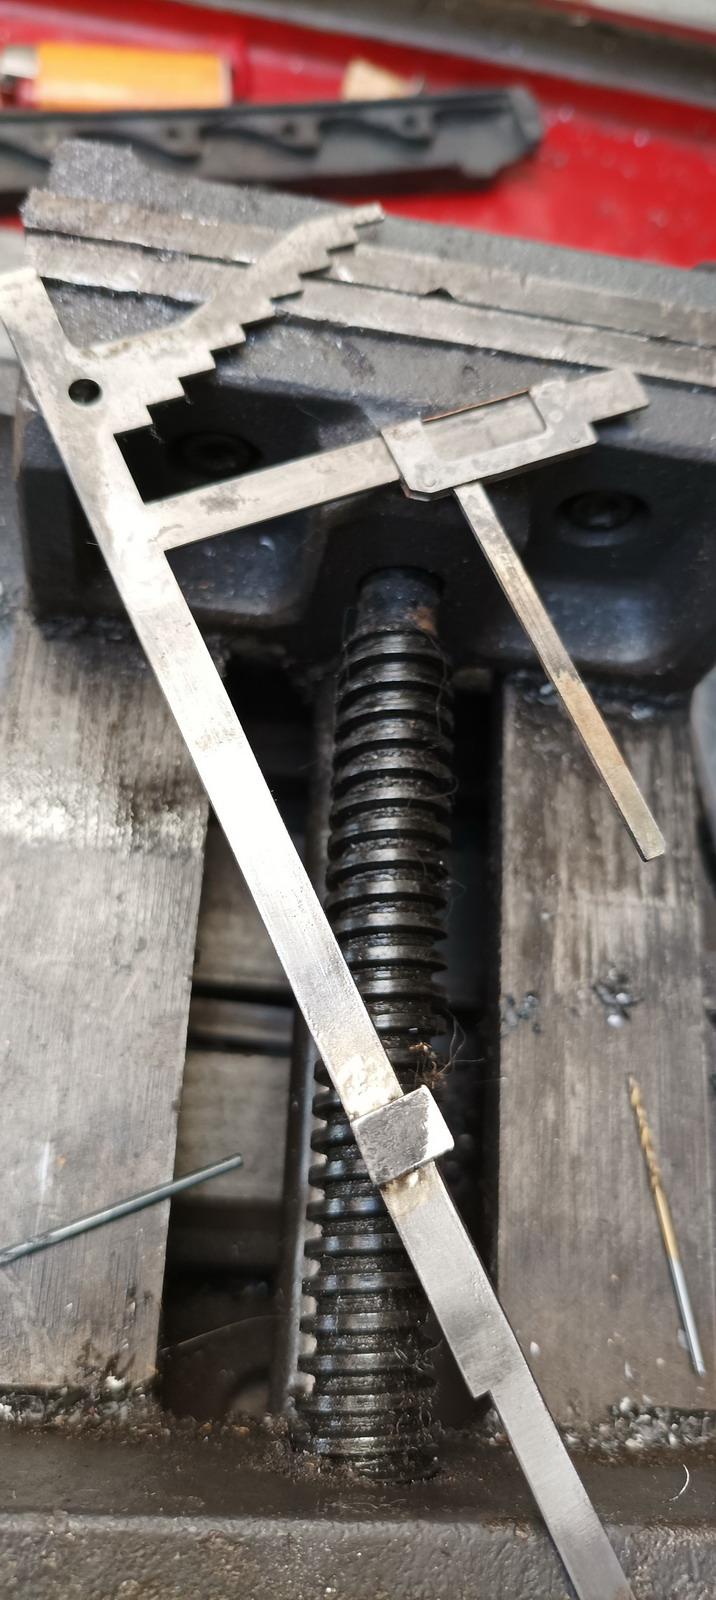
Then there was some more digging to get at the bent lever, I soldered a bracket onto the new one, because of course it was lever number 1, and as lever number one, there is an extra sticky-out bit that has some probably crucial function yet to be determined (It turns out to be for the function of the “full cent” key - in hindsight that may have been why they blocked this key with the philips head screw, because it was the original cause of the disaster with the units position in the multiplier). This is the “new” lever:
 And some parts of the machine just chilling about on the floor in the meantime:
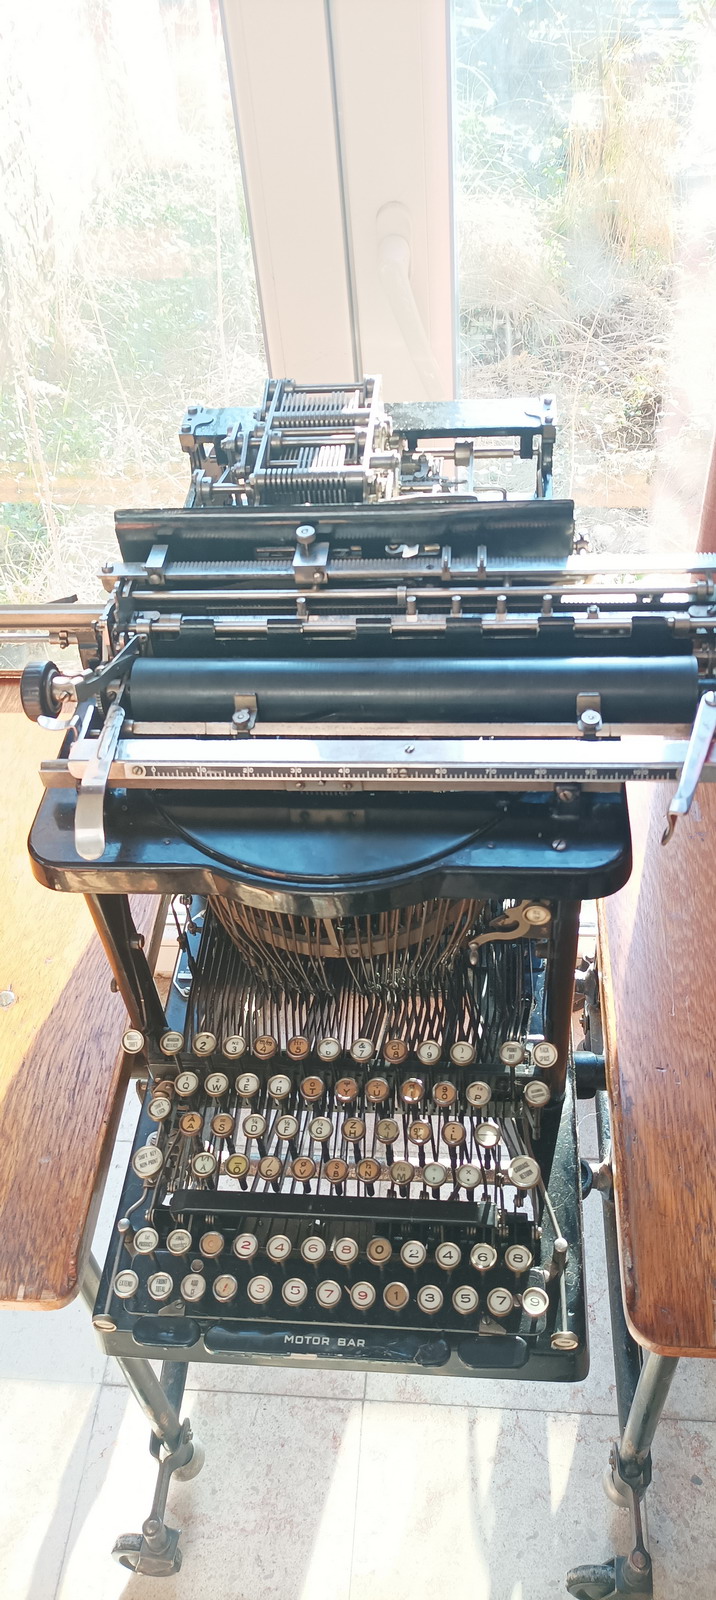
This is the rear of the typewriter and the carriage transport mechanism, which also still had an issue, see below...
Then followed the reassembly, in turn followed by putting the top back onto the machine and a very careful run through of the functions by hand, not by motor. Some problems remained to be fixed, the machine blocked at some point, but I managed to free it up and to get it (almost...) working correctly. Another rather baffling occurence that we managed to fix on that day was the very stiff operation of the carriage return - something in the mechanism had been misplaced somehow, and exercising it a number of times suddenly led to a mysterious loud clunk, and the carriage return operated completely effortlessly from then on. Hmm. Success!
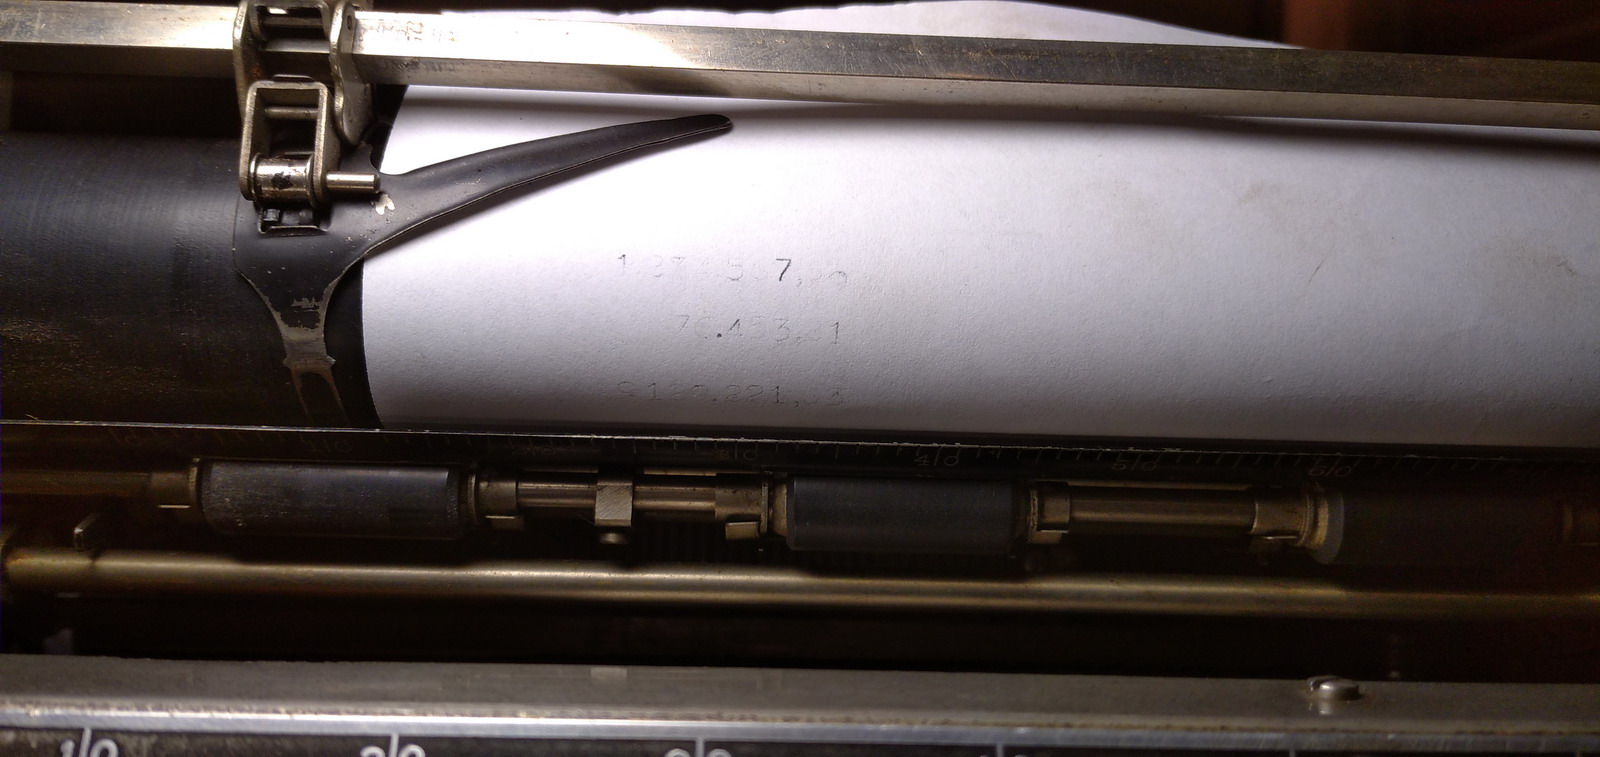
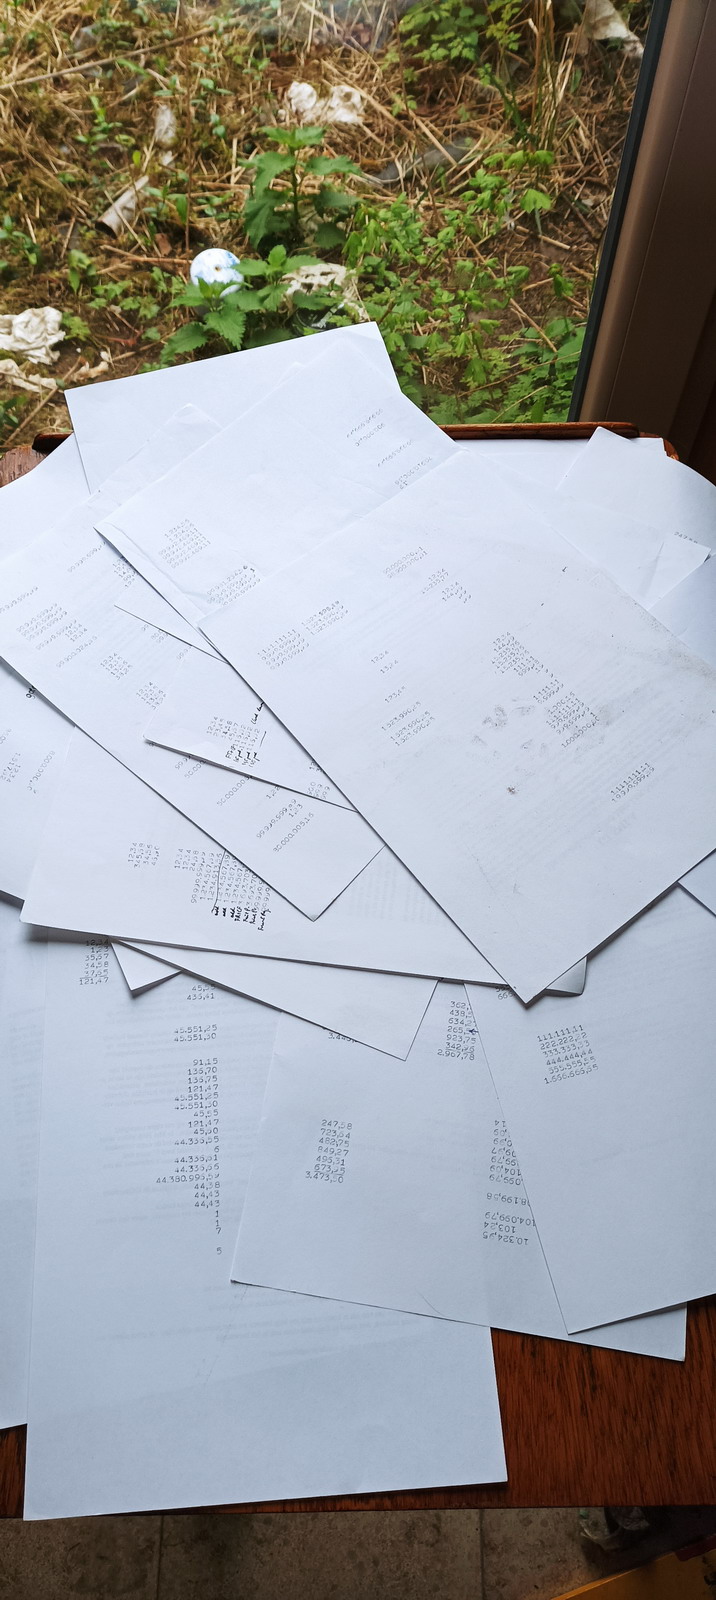
Then came the time to put the carriage back onto the machine, which then allows to see what numbers come out of the various registers. This was very enlightening indeed, and I have pages and pages of prints trying various sums in the various registers. Just to give an idea ...
The front registers had a lingering problem, where the tens carry in the front registers was faulty in position number 6. Adding e.g. 333.333,33 to 777.777,77 will yield 1.101.111,11. This was due to the 6th carry lever not running entirely free, and it is impossible to get at it without disassembling the complete top of the machine (not just taking the top off, but taking it apart - yet another level of insanity!), so this remains somewhat problematic. Exercise and lubrication appear to be continuously improving the problem, so I will just keep at it ...
Another issue that cropped up after taking the top off the machine is the readout and clearing of the rear register, which reads correctly when First Product is used to read it out and clear it, but when Final Product is used, it always reads 99.999.999,99 instead of the number in the register.
After more throrough testing, three lingering problems from the removal of the top of the machine appeared to persist:
1. A multiplier isuue. When first used, it turned out that the rear register that shifts to the left when successively entering numbers in the multiplier was erratic in doing so. That cleared itself up, but now it turns out the resetting of the rear register back to the right when clearing it, is erratic.
2. The “Final Product” issue mentioned higher. Bafflingly, it turned out that, while the “first product” key would bring the rear register down and into engagement with the printing bars, the “Final Product” key (which in addition to printing the rear register content and clearing it, also throws it into the front register, and clears the multiplier) would not. After pondering for a long time, it was blatantly clear that the way the machine currently operated was simply impossible and incorrect. It was verified by hand that pressing down the rear register when “final product” was in operation would lead to the desired effect - rear register being cleared, thrown to the front register, and printed (instead of 99.999.999,99). So then the search was on, and the solution turned out to be quite simple - when disconnecting the bar that takes down the rear register while disassembling the top of the machine to take it off, it was leaning to the side, and lost its engagement with the “Final Product” key, simply slipping out of the hole in the actuating rod. Since the bar is so long, reaching all the way down to the bottom of the machine, it didn’t stand out that it was flexing a bit and that this was an issue. There’s also nothing else in its way that would interfere with it. But loosening the top of the bar and wiggling it back into engagement with the key indeed fixed the problem. Woohoo!
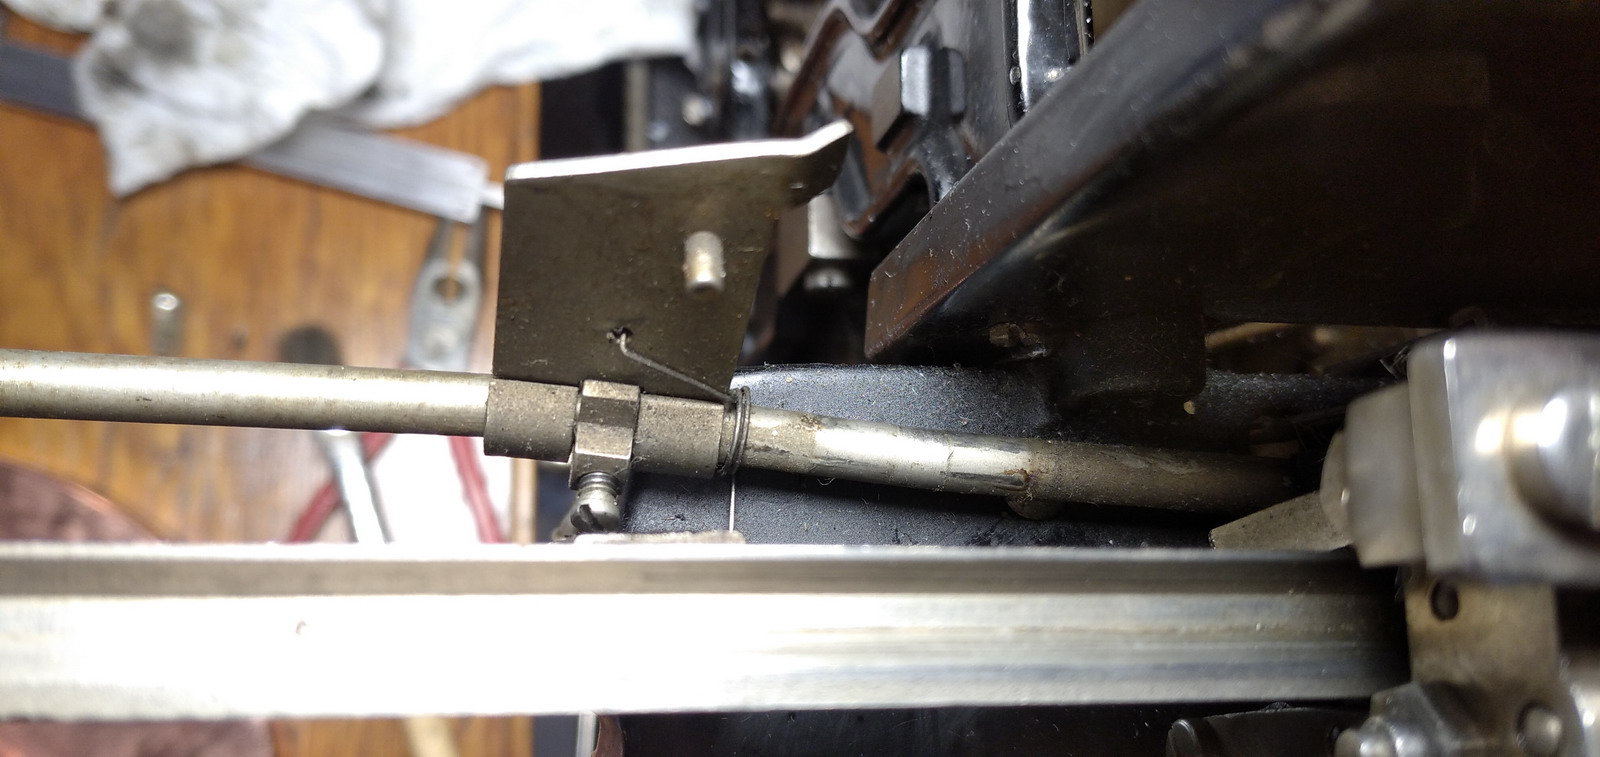
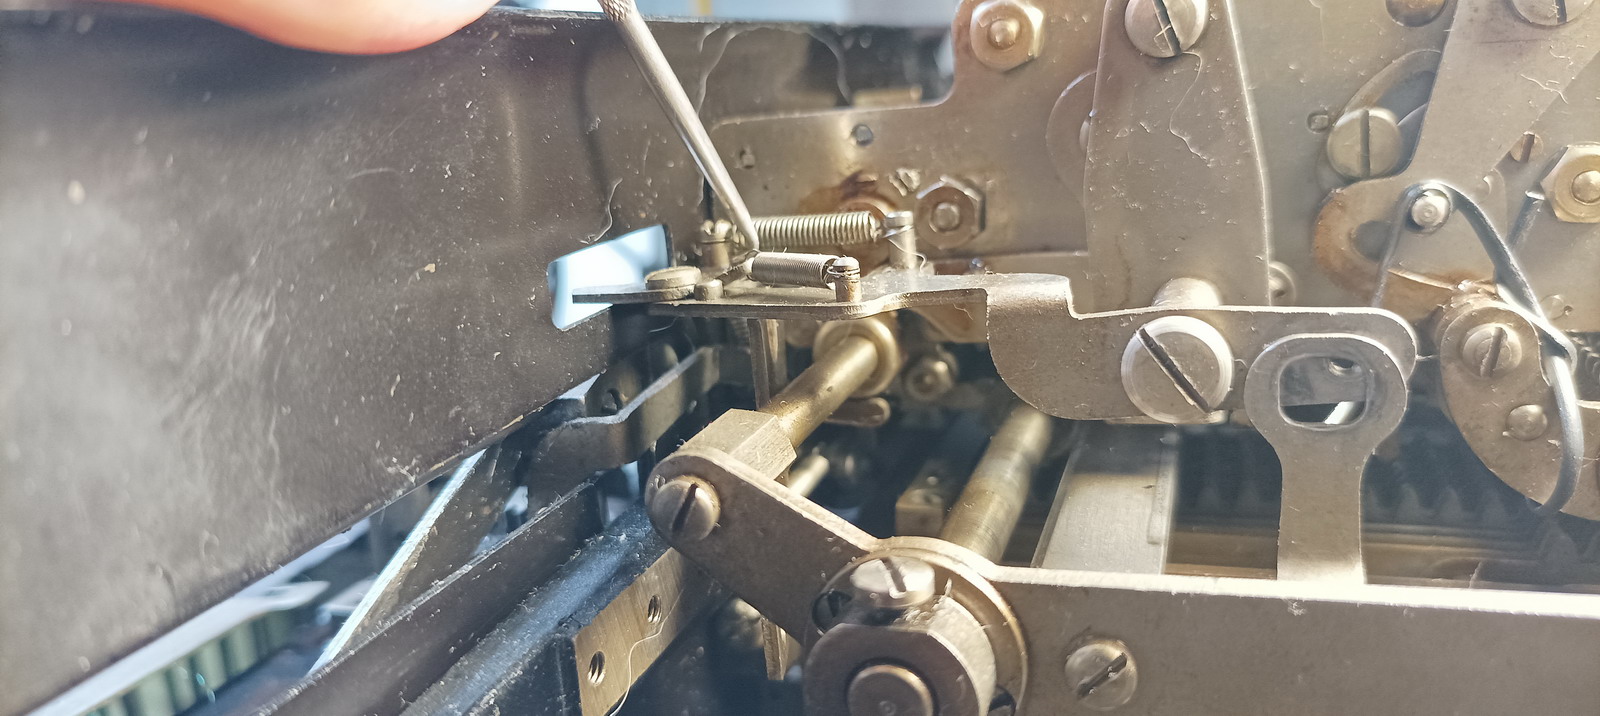
This bar here, that I am pointing at with the rod from the bottom left, was the culprit...
3. However ... now multiplications still would have an issue with numbers appearing high up in the register. This was traced to a 9 being added in the top spot in the register on every single multiplication cycle. All the other typebars were kept in place, it was just the top one that would manage to get loose and run up to 9 because it was not stopped by anything. The typebars are normally kept in place by the multiplier lifting levers raising slightly at the beginning of a multiplication cycle, and at that point it turned out that the highest value lifting lever was completely stuck in place (these are the contraptions that we had to dig into the machine for to replace the lowest value one). Thankfully I never completely filled the multiplier and tried a multiplication before I discovered that... after taking a substantial amount of time to understand what was going on and partially disassembling the multiplier register again, it was found that the problem could be traced to a guide bar behind the multiplier lifting bars that we had to undo and put back in the process of getting the bent bar out - after a quick adjustment, everything was back to working fine.
So now the only the baffling problem that remained was the refusal to reset the rear register position to the right on clearing it with “final product”, but not so with “first product”, although the sequence of operations is exactly identical for the two of them. When turning the machine by hand, they both work flawlessly, it’s just when running the machine at speed with the motor that problems occur with the “final product”. It must be a question of fractions of a millimeter or milliseconds in the timing. It turns out that slight adjustment of the eccentric nut at the top of the machine that pulls down the rear register to engage it with the toothed printing bars fixes the issue. And that was the final piece of the puzzle - I can now add in the three registers, transfer numbers between them, add numbers in the rear register, subtract in the rear register, multiply in the rear register and transfer these figures to the front register(s) and make grand totals there - this machine is really the spreadsheet of the beginning of the 20th century!
So that leaves one job left to do - making the invoice for the repair - on the machine!
And that immediately led to another issue that became obvious very quickly - because when using the typewriter in the front, the letters and numbers were all over the place.
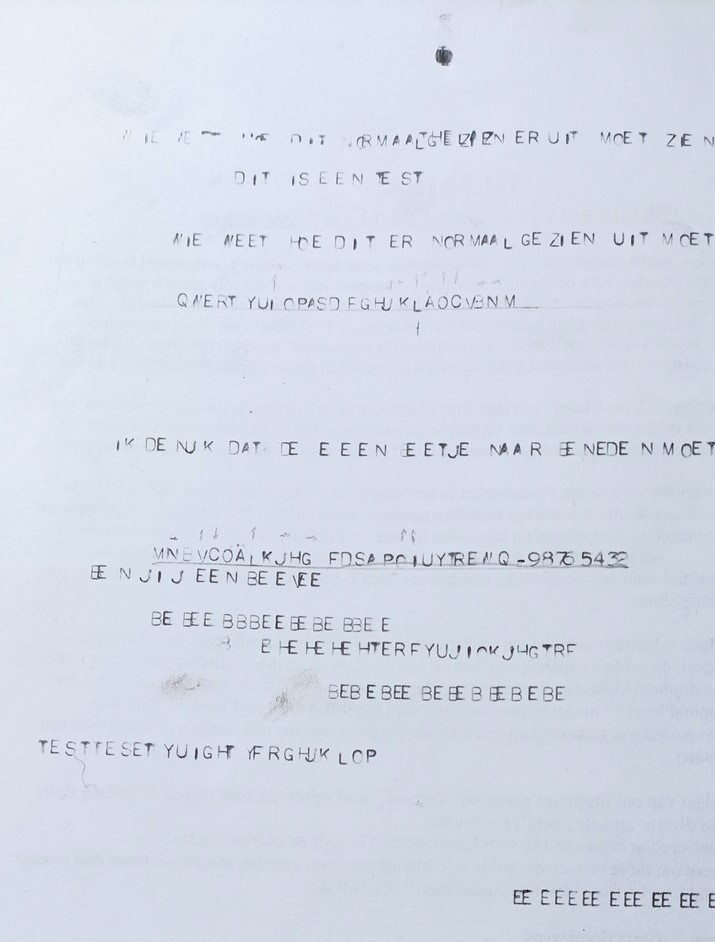
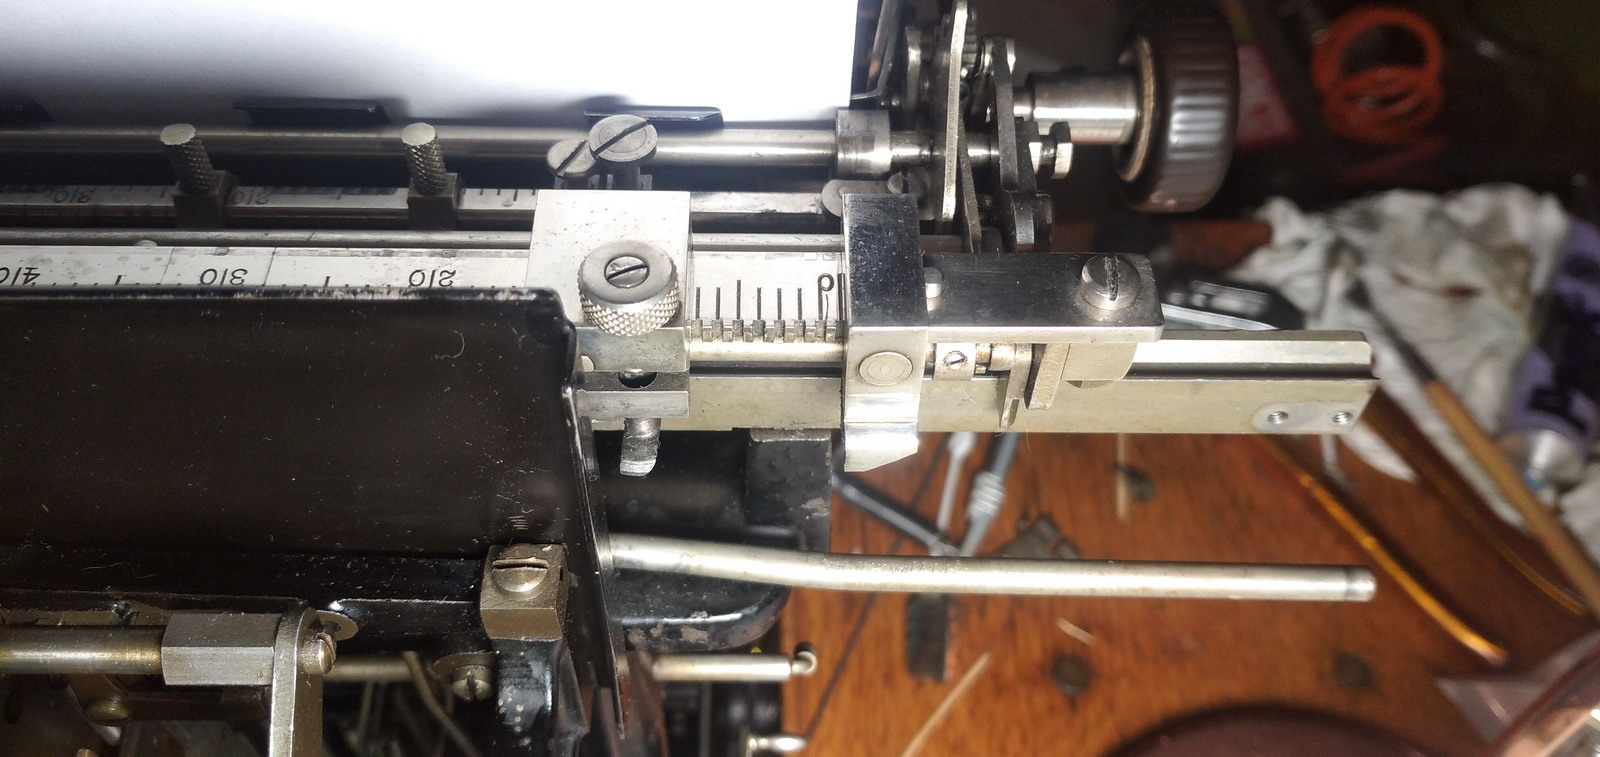
This was not just an issue with the alignment of the type, also the escapement that provides the spacing had some sort of issue. An escapement works the same as the one in a clock, where two teeth alternately hold back slanted gear teeth, advancing the pointers (or in this case, the carriage) a fixed amount. The arrangement in a typewriter is a little different, the escapement wheel is horizontal, and the space bar and all keys push a fixed tooth down into the escapement wheel. There is also a movable tooth that then springs out, and when moving back up engages with the next tooth and lets the escapement wheel move by one tooth.
It turns out that when it was moving back up, this moveable tooth would sometimes just miss the escapement tooth, hook behind it and get stuck - and hence provide either half a space or one and a half space. Some video to demonstrate this:
Since this involved finagling way deep inside the typewriter, it was not the easiest to picture what exactly was going on, but since the movable tooth was apparently moving slightly too far back, the solution consisted of moving the whole tooth assembly forward - and since it pivots on two plain bearings that can be adjusted, it is a matter of adjusting them both forward a bit, and the whole assembly shifts. Then some more adjustment, so that everything went back to running freely, and guess what - that fixed the problem, and the typewriter now spaces reliably. That already did wonders for what the typed text looks like, but still some adjustment was needed for some letters.

That requires a little tool to locate the type slug in space where it would hit the platen. That tool was made out of a thin aluminium plate based on the location of the letter H.
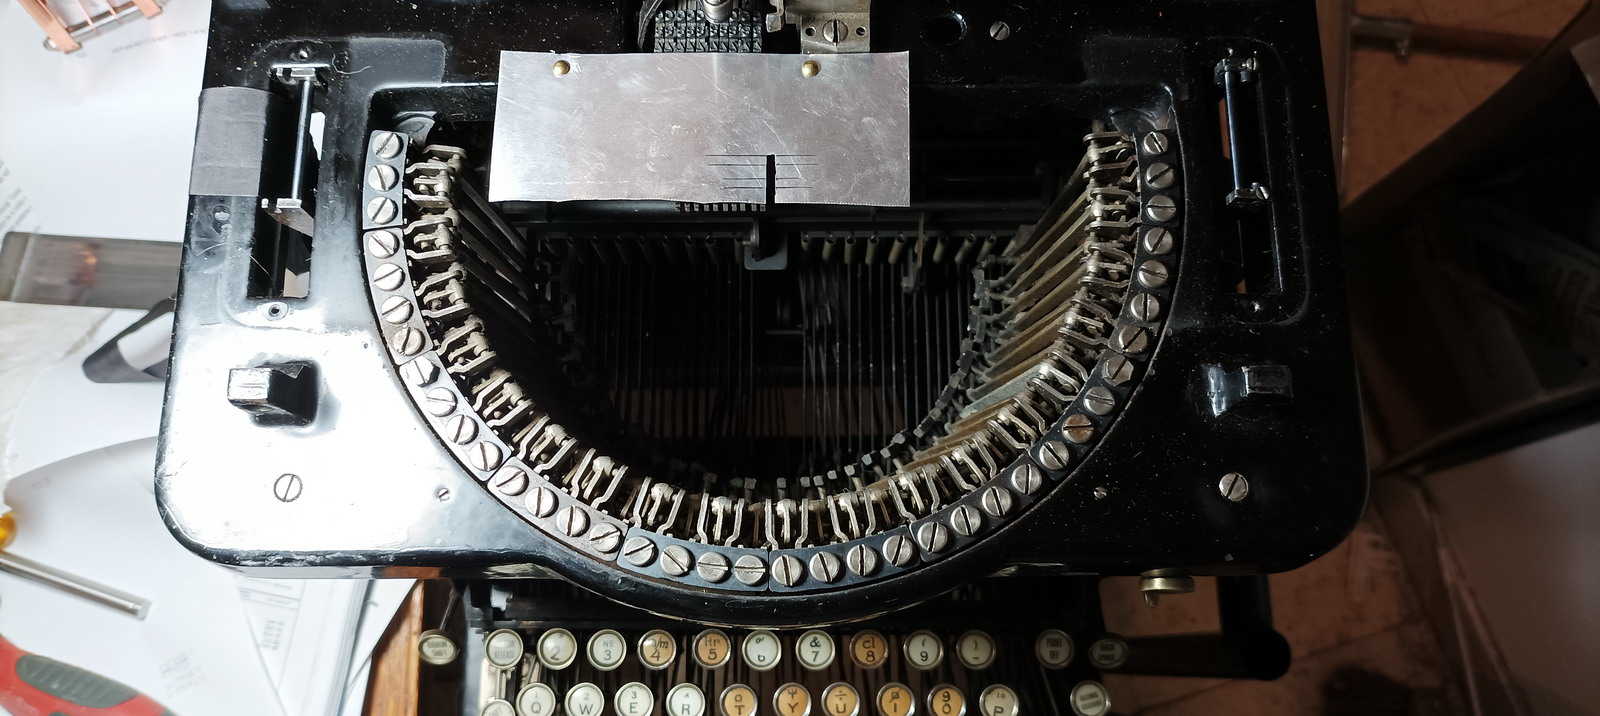
With the carriage off the machine and the locator plate in place, you can align all the type slugs to this location by undoing a large screw on top of the type basket for every type bar, and simply wiggling the type bar until it is at the exact right spot - then do up the screw. Then it is carriage back on, and test-typing a few lines, see what still needs adjusted, and then hopefully, the adjustment can be done without taking the entire carriage back off. Not that bad anymore. The “W” typeslug at some point has taken a hit - it is not so much a bad impression, as part of the typeslug that is actually missing.
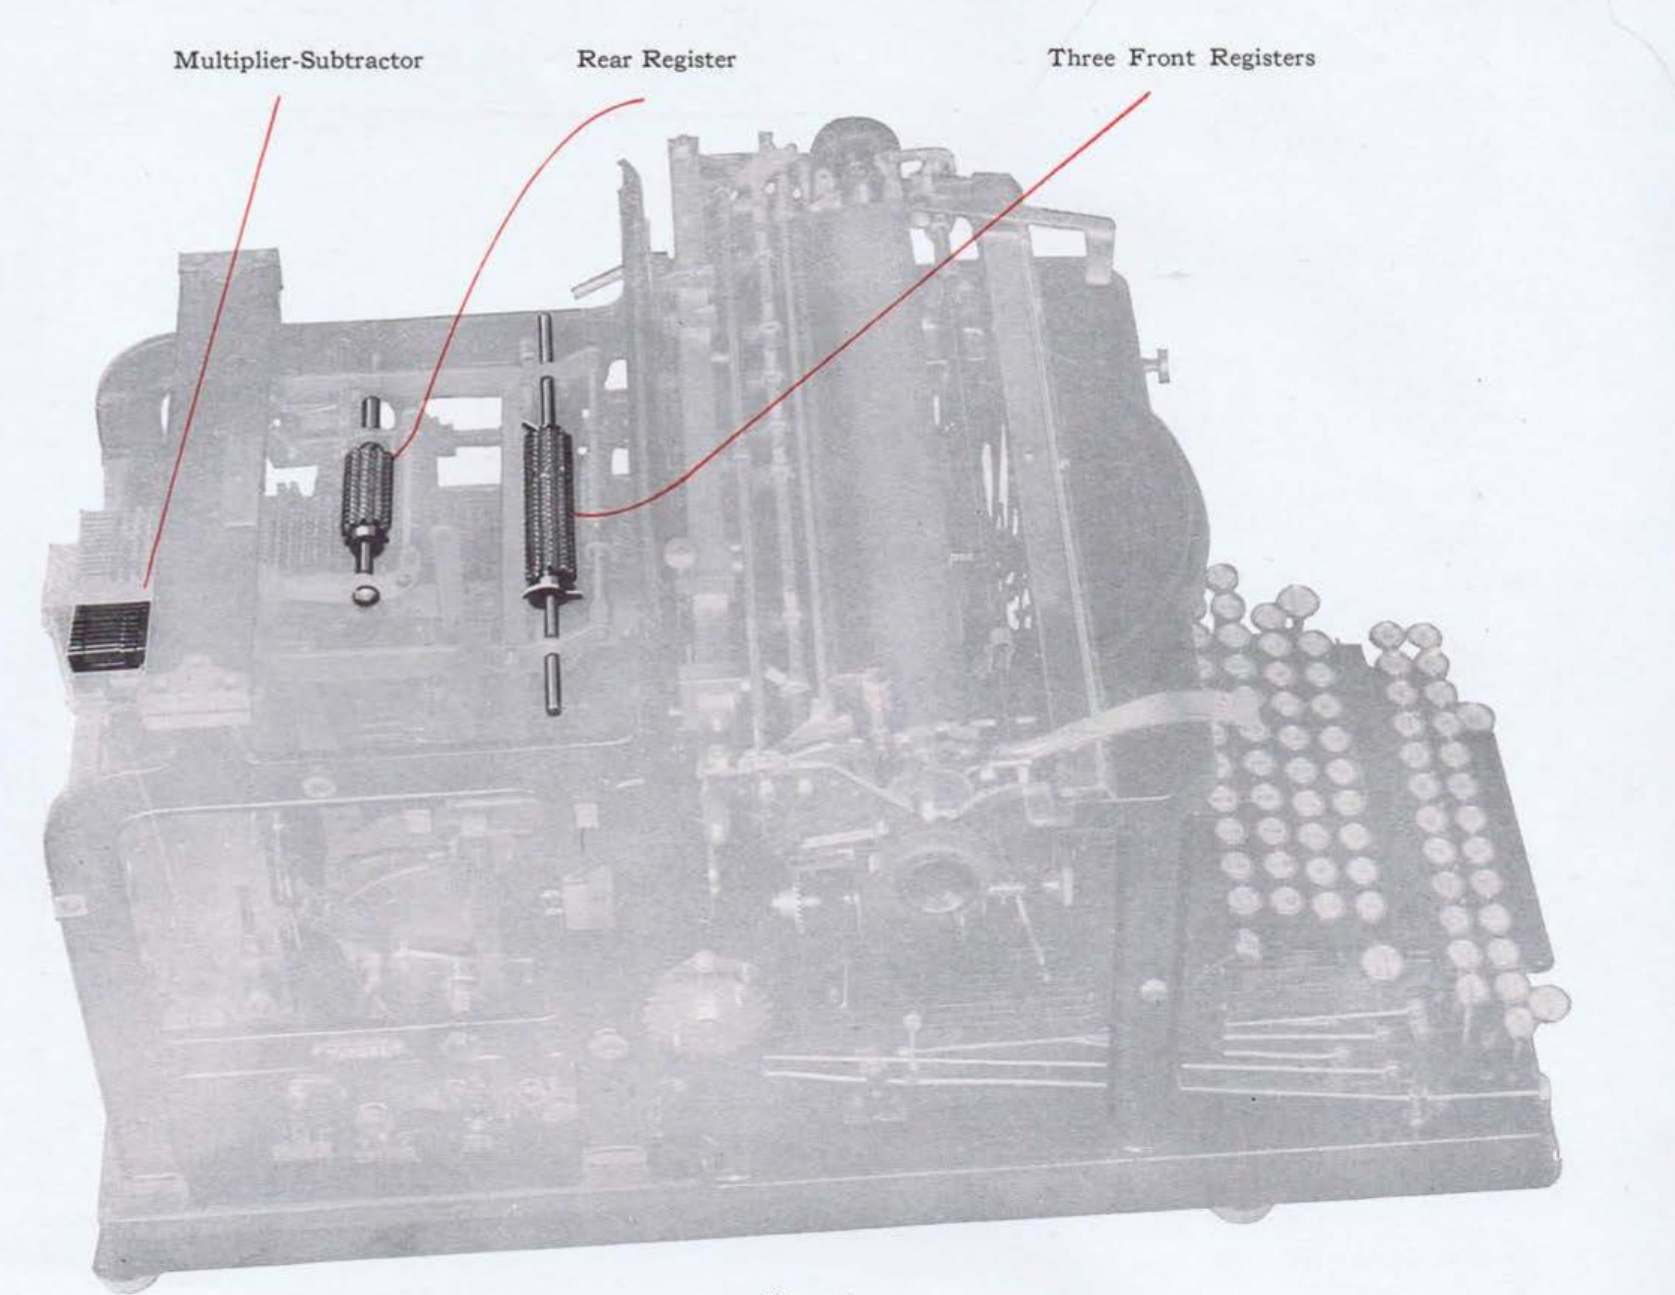
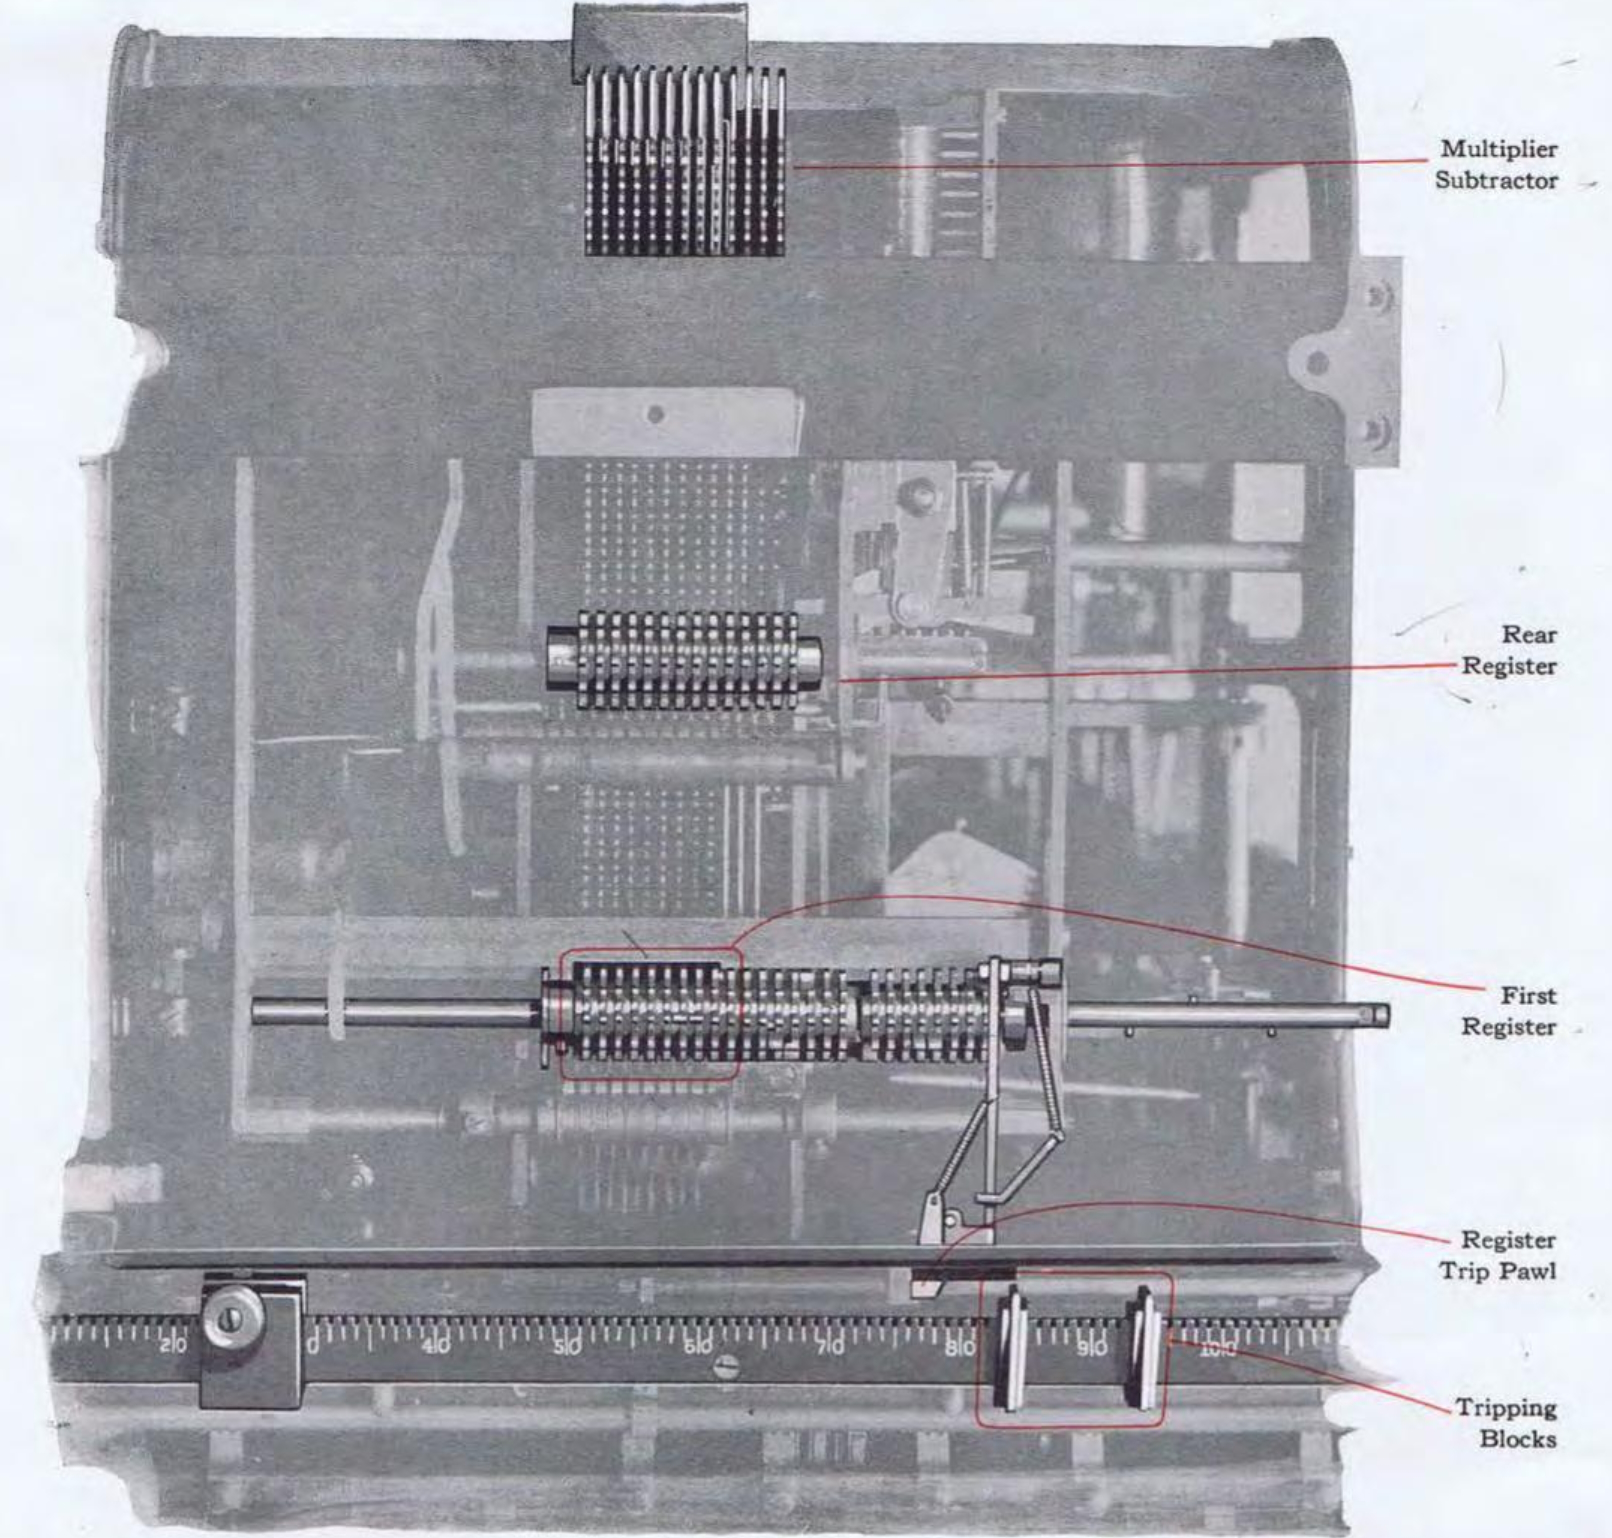
With everything more or less aligned (I’m more into calculators than typewriters ....) I could do some test calculations and start filming and documenting this very nice machine! So then ... how does it work ? A very nice manual exists, which can be downloaded online (here), that contains a number of very handy see-through illustrations that show where the essential elements in the machine are, and quite a thorough explanation of all the keys that can be used in machine operation.
The problem that they faced in trying to make the operation of the machine obvious to the user is that it doesn’t exactly obey the principle of “one key- one operation”. The keys had to be labeled in certain ways that would be “clear” to the operator, but then they are sometimes used in combinations that do completely different things, where the operator would perhaps benefit more from understanding which separate operations inside the machine are jointly operated by a particular key, because as things stand, it can really get quite confusing.
So let’s first look at what the keyboard looks like, and how it relates to what happens inside the machine.
The calculator keyboard is located below the typewriter keyboard, and there is no interaction between the two - there are numbers on the typewriter keyboard, but they don’t “talk” to the calculator. If numbers are going to be entered into the machine, it happens on the lower calculator keyboard.
There is some interaction going on between the carriage position and the calculator, and that will become more clear once we start describing its actual way of operation.
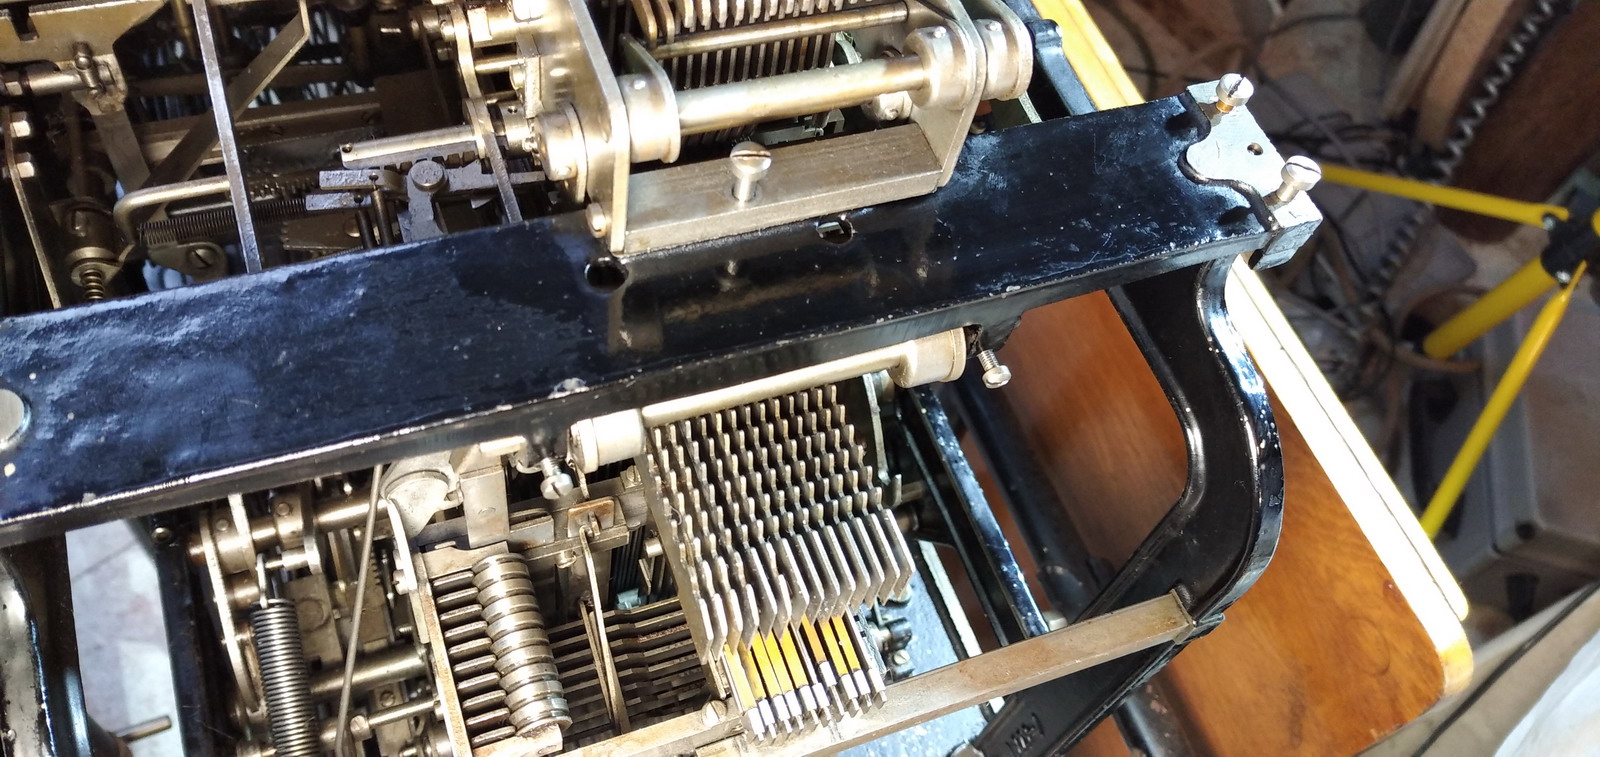
The machine has several registers. First of all, there is a set-up register, which allows to enter numbers into the machine. Numbers are entered into it with the red keys on the left side of the keyboard, and it is a very similar “pincushion”-like system to most other adding machines (this concept, incidentally, was also what the big patent fight of the Moon-Hopkins Billing Machine Co. with Burroughs appears to have been mainly about). It will tabulate to enter sequentially entered numbers into several columns. It’s actual operation is almost impossible to see, but here are some pictures of it in operation - for reference, these are taken from the lower left rear of the machine, looking up. See also the video below for some moving images of this thing in operation, from the other side.

As soon as the motor bar is pressed, the set-up register tabs back to its original location, and as the machine runs, it reads in and prints the number set in the setup register, and then erases the setup register.
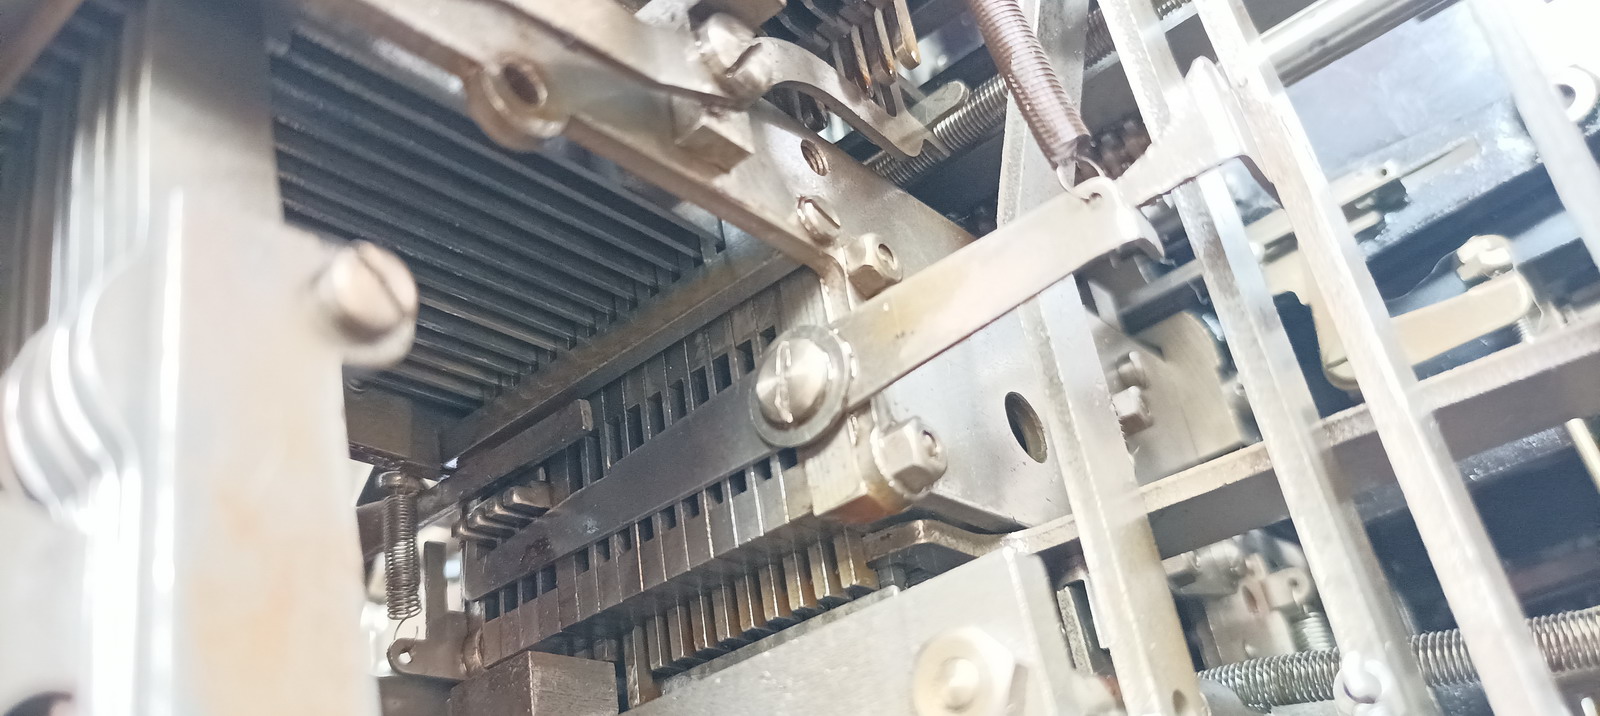
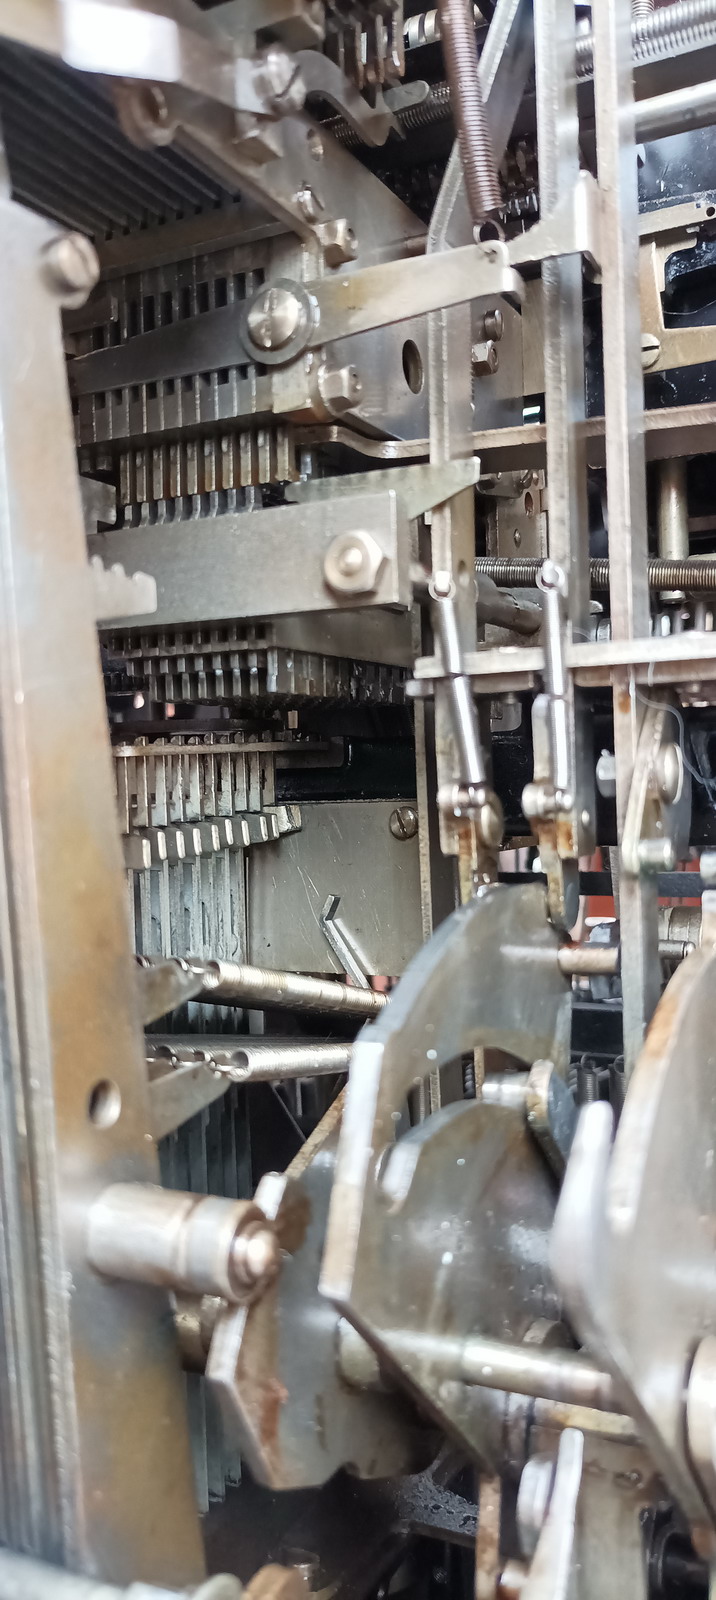
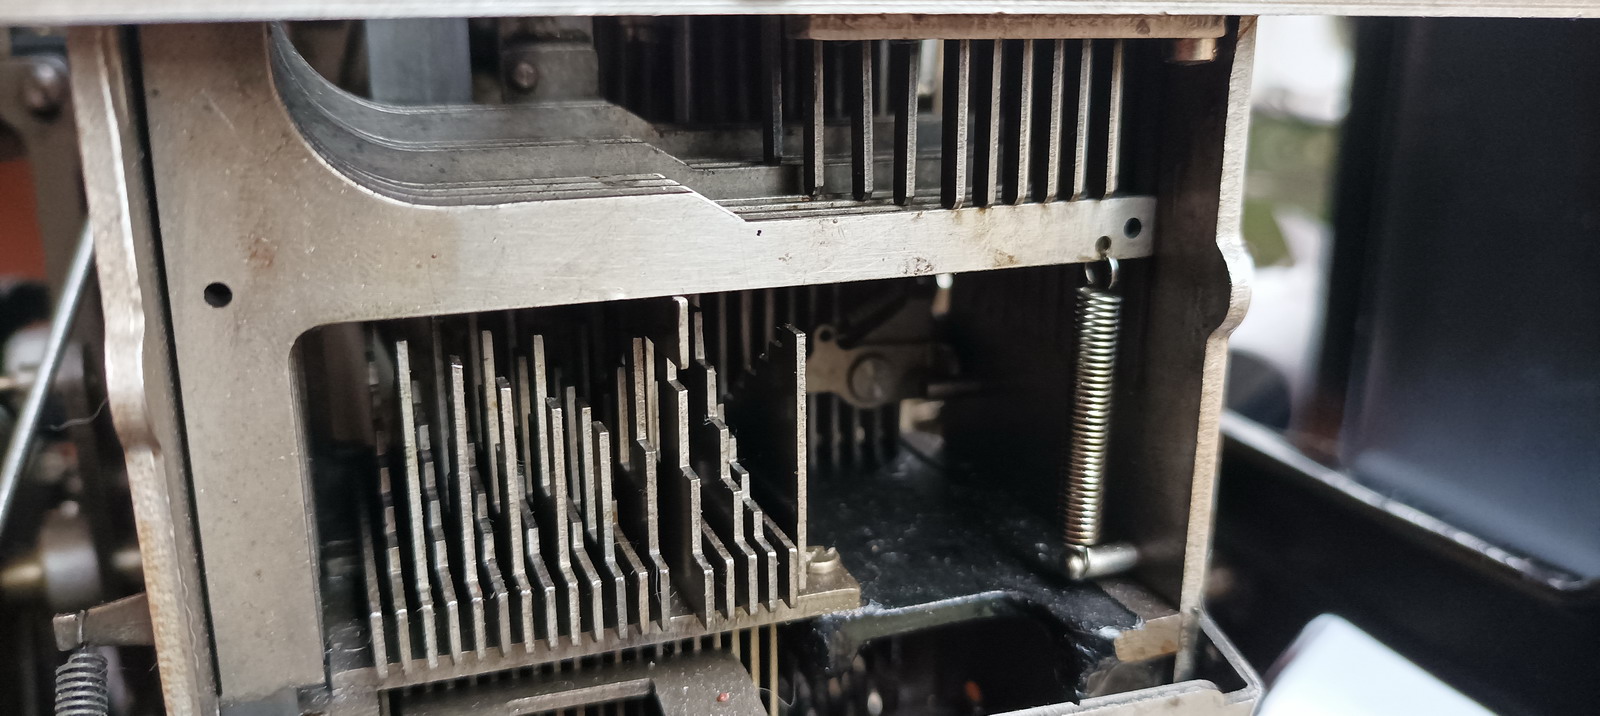
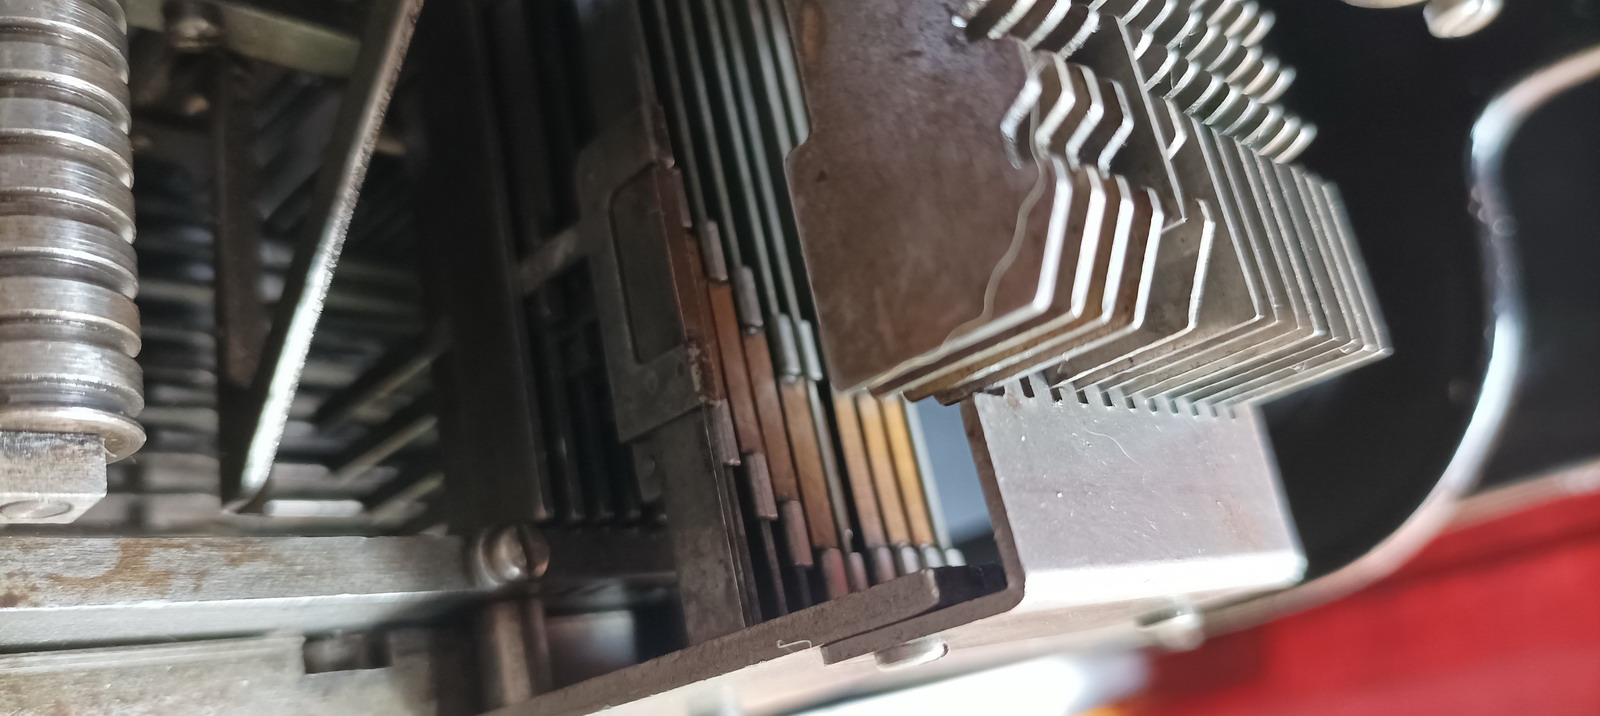
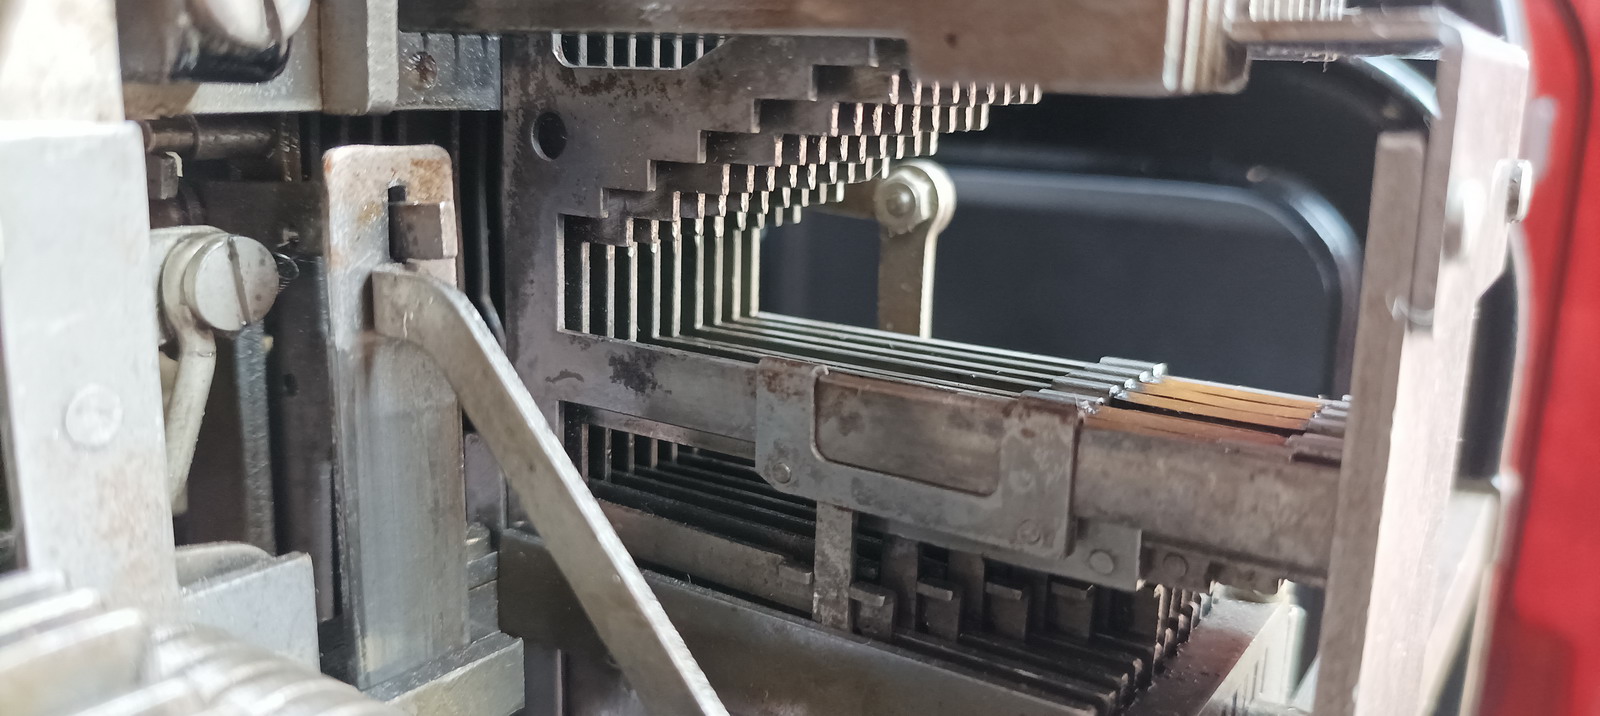
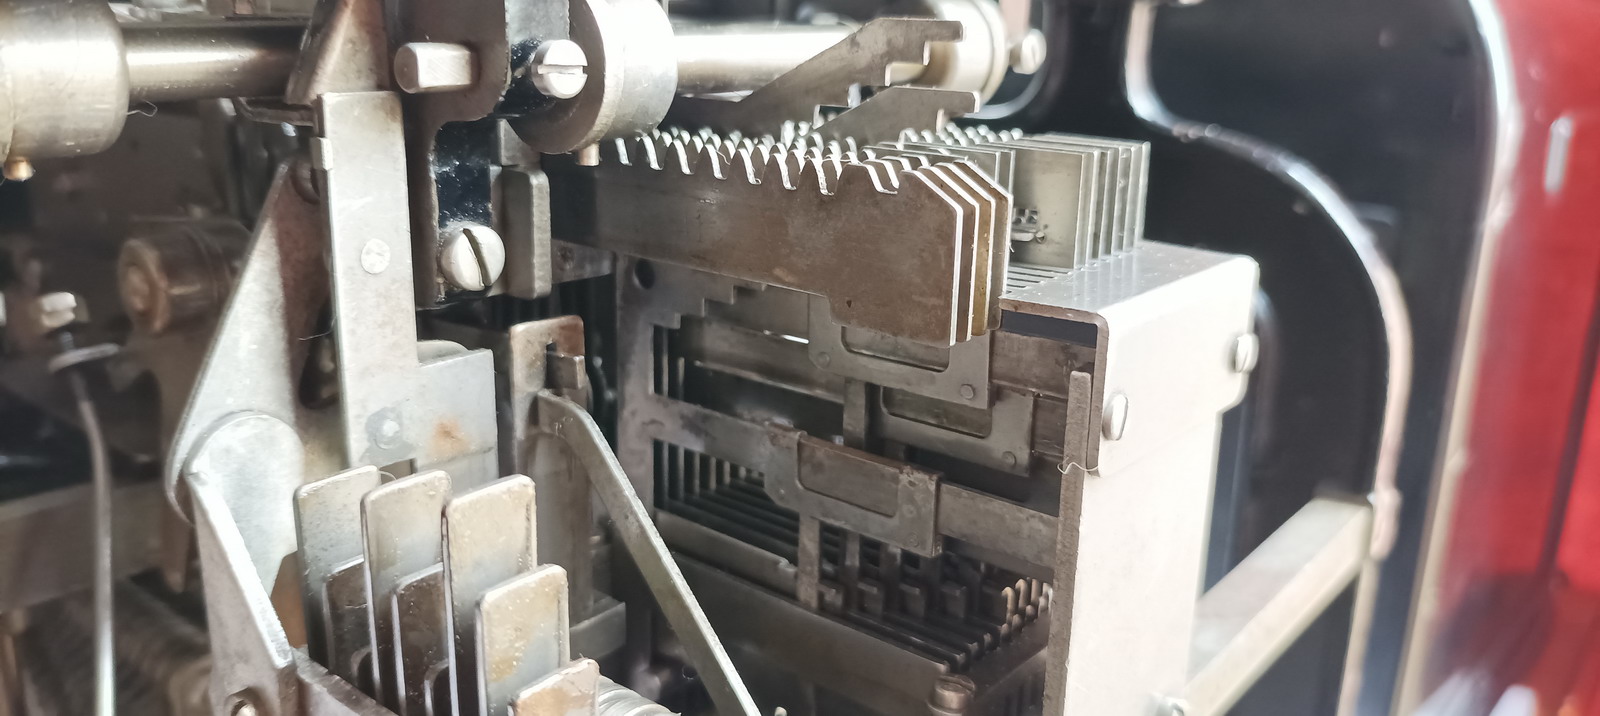
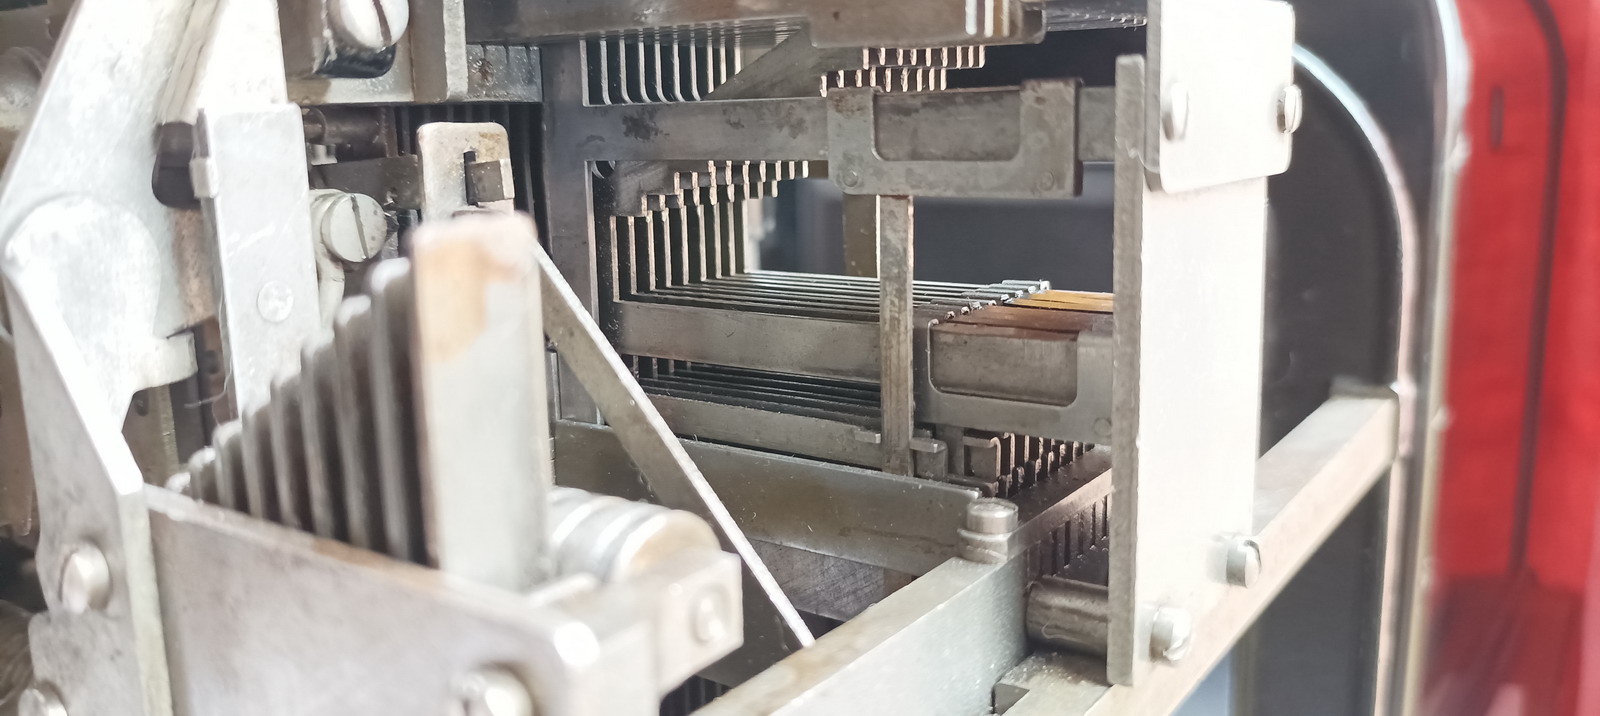
It now becomes mandatory to understand how the machine processes numbers. This happens with the help of the logitudinal bars which terminate in the calculator typebars at the front of the machine. They have gear teeth at the top, so they are really racks, and they have some things sticking out at the bottom as well, which allows them to interact with e.g. the pincushion of the setup register.
This is the front of them:

This is the rear:
And here they are again with the top of the machine off:
So how does the machine read a number out of the pincushion ? The longitudinal bars are pulled to the front during the machine cycle, and a protrusion at the bottom of them is stopped by the pins that stick out of the top of the pincushion. So if the pincushion contains the numbers 00000269, the typebars for the hundreds, tens and units run out to 2, 6 and 9 respectively, whereas the higher ones are kept stationary, because it is detected that a number has not been entered into the pincushion of the setup register for that column, and hence the bar is stopped at zero. The type slugs themselves that sit in the typebars are movable, and they are hit by a type hammer from the bottom when the time to print has come, so that pushes them up against the ribbon and the platen. A mechanism is provided to prevent the leading zeroes from printing, by not operating those type hammers. The same mechanism prevents (all) type hammers from striking the type if the platen has been lifted.
So that part takes care of printing - the number went from the setup register, which is always reset to 0, into the longitudinal bars. It is from there, after it has been printed, that it goes into the registers of the machine. The registers are a stack of gears, provided with a tens’ carry mechanism, and they can be pushed down into the gear rack on top of the longitudinal bars. And this is exactly what happens with the active front register after the motor bar is pressed - the number is read out of the pincushion, goes into the printing bars, and is printed - at that point the active front register is pushed down in to the gear rack at the top of the logitudinal bars, and as they run backwards to zero, whatever number was printed, is now added into the active register. The register is provided with a tens carry mechanism, so if the register was not empty, any gear in the register that rotates past 9 triggers a shift of one unit in the next higher gear in the register.
Lovely - so now the number we entered is safely in the active front register - what can we do with it ?
Well, instead of using the longitudinal bars to read out a number in the setup register, you can leave the setup (“pincushion”) register empty, and bring the active front register into engagement with the longitudinal bars at the start of the cycle, when they are running forward. They will rotate the gear wheels in the register backwards to zero, and there the register gears reach a hard stop they can’t rotate past. Hence also the logitudinal bar stops moving, at the location of the number that was present in that particular gear wheel in the register - and if the printing hammers are tripped, the number that was in the register is printed.
At the same time, the entire register has been cleared to zero - so depending on what you want to do next, you can either leave the register engaged and read the number out of the typebars back into the register where it came from, or you can disengage the register with the typebars run out and the register at zero, and in that case the register remains at zero, and the number is lost.
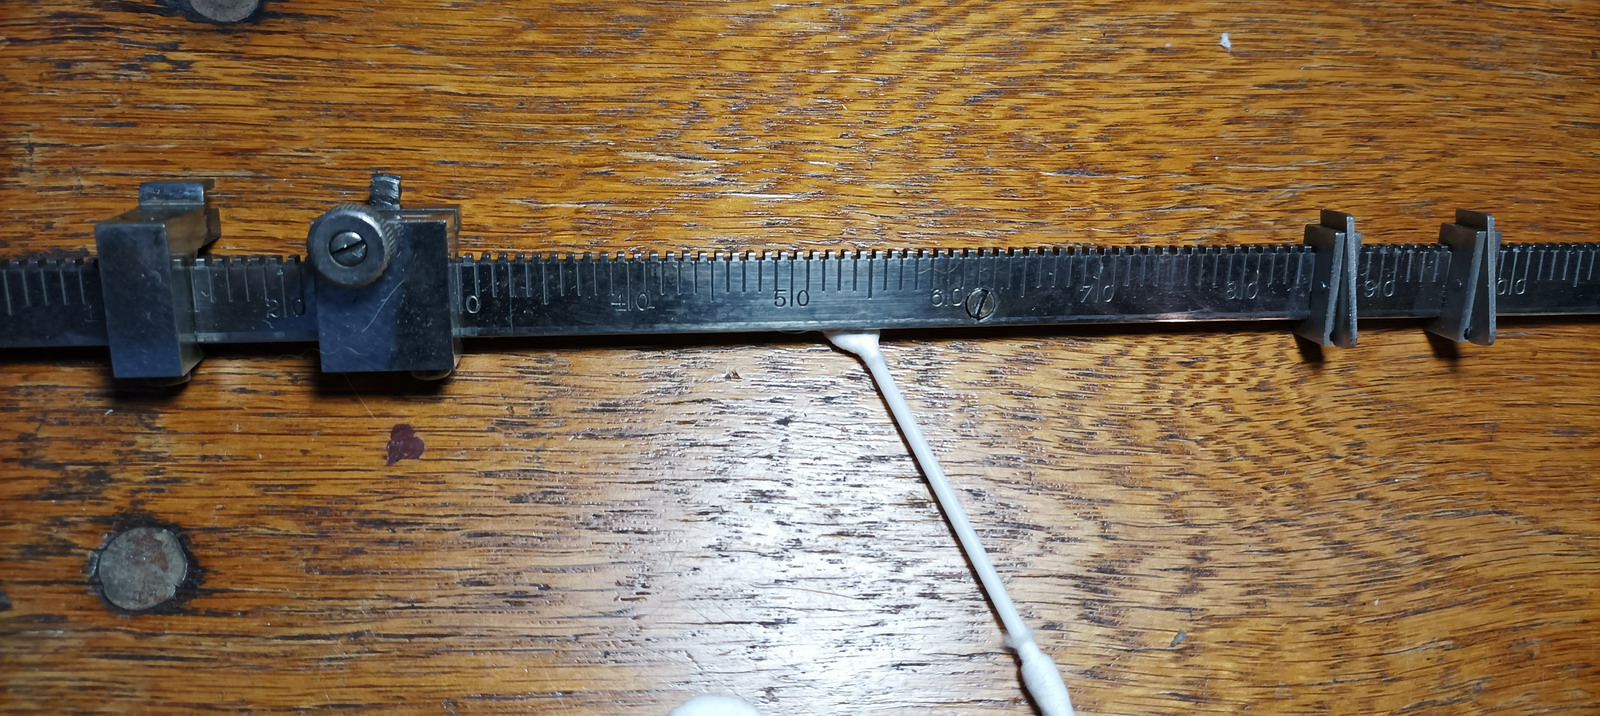
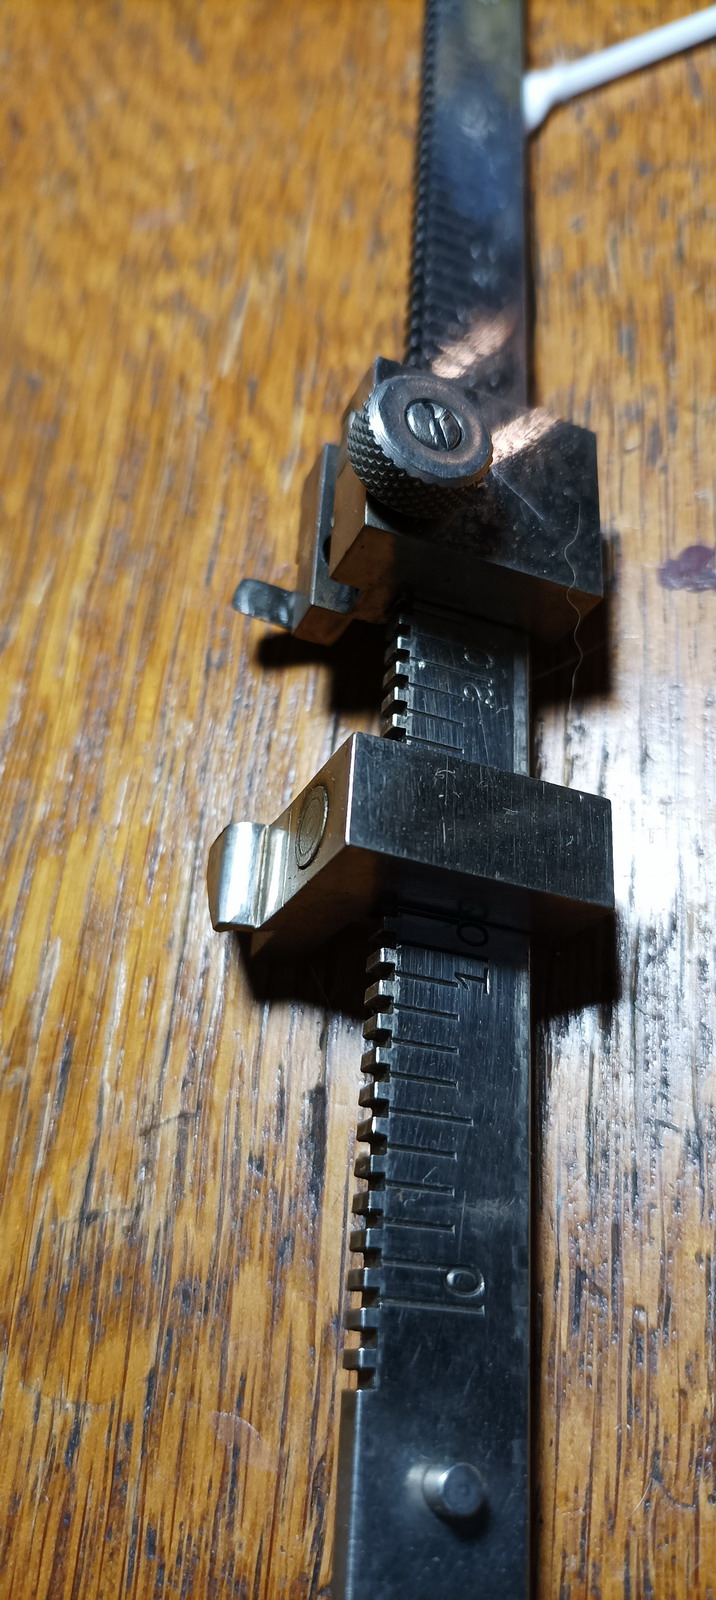
The architecture of the registers is such that of the front registers the machine normally interacts with, only one of the three is in the active position - they are simply sitting next to each other, so only one of them will be on top of the longitudinal bars. They can move laterally, and their lateral movement can be tripped by tripping blocks connected to the movement of the carriage, so that for example when moving past column 35 in the carriage, the register will be tripped from 1 to 2, and past column 45 it will be tripped so that register 3 is active.
There is also a single “rear register” in the back of the machine. This is always active and available for operations, it simply needs to be brought into engagement with the longitudinal bars.
Notice why the operating buttons can be a bit confusing - they each stand for a certain sequence of operations with a certain timing - reading happens when the longitudinal bars move to the front, there’s a print operation, then writing into the registers happens when the type bars move back to the rear.
This means numbers can also be transferred between registers - if you read out the rear register, the number in the longitudinal bars can then be put back into the active front register, or vice versa.
So at this stage, we have three registers at the front, only one of which is active, and one at the back, that is always active. We can add numbers into any of these, read out the result of any of these (which clears them), and put the result back into the same, or into a different register - e.g. we can make three columns, add numbers separately in each of them, then totalize each of the columns and add the totals in the rear register, which will then give a grand total when we read out and print what is in there. Neat, no ?
So that is also how we can start looking at the keys at the left side of the keyboard - we will concern ourselves with four of them - the ones labeled “front total”, “add CF” the little unmarked key behind that, and the key labeled “1st product”.
So on entering a number and pressing the motor bar, the number is printed and added into the active front register. This can be done as many times as necessary, the register accumulates the numbers. To read out the front register, no number is entered, the “front total” key is pressed down and locked into position. If the motor bar is now pressed, the front register is immediately brought into engagement with the gear racks, and hence read out into the typebars, the number is printed, at that point the key springs back up and the register is released, so it is then left clear and empty. The operator, however, can also hold the key down past the point where it would normally release - in that case the front register stays in engagement and the number is read back into it from the type bars.
Next is the “Add CF” key, that is also more aptly named the “rear register” key and sometimes labeled “RR”. This is locked down into position if the number set into the pincushion has to go into the rear register (of “crossfooter”) instead of the active front register. Operation proceeds normally, the number is read into the typebars from the setup register, but instead of bringing the front register into engagement, now only the rear register is brought into engagement, and the number is read in there instead. This can of course also be done as many times as necessary in order to accumulate totals there.
To read out the rear register, the “1st product” key is pressed, this reads, prints and clears the rear register in exactly the same way as “front total” does for the active front register. It can also be held down not to clear the rear register.
The confusing little unmarked key sitting above the “Add CF” is called the “eliminate” key. It allows to print a number entered with the red calculator keys without adding it to any register. In order to do that, the “Add CF” and “Eliminate” key are pressed and held together during the duration of the cycle.
Now for the interesting part - combinations of keys!
The separate operations can be combined - e.g. you could press “front total” and “add CF” together. This will clear the number out of the front register and put it in the rear register. Handy! If you hold down “front total”, the number is not cleared out of the front register either, so it is like a “copy-paste” operation on your friendly computerolator.
Since the keys latch, you can’t recover from an operation like that, so a special key had to be provided to unlatch things - the “error” key that sits vertically on the right side of the keyboard, and pushes in towards the rear of the machine. If this is pressed, all function keys are unlatched and spring up, and the setup register is cleared and returned to its starting position.
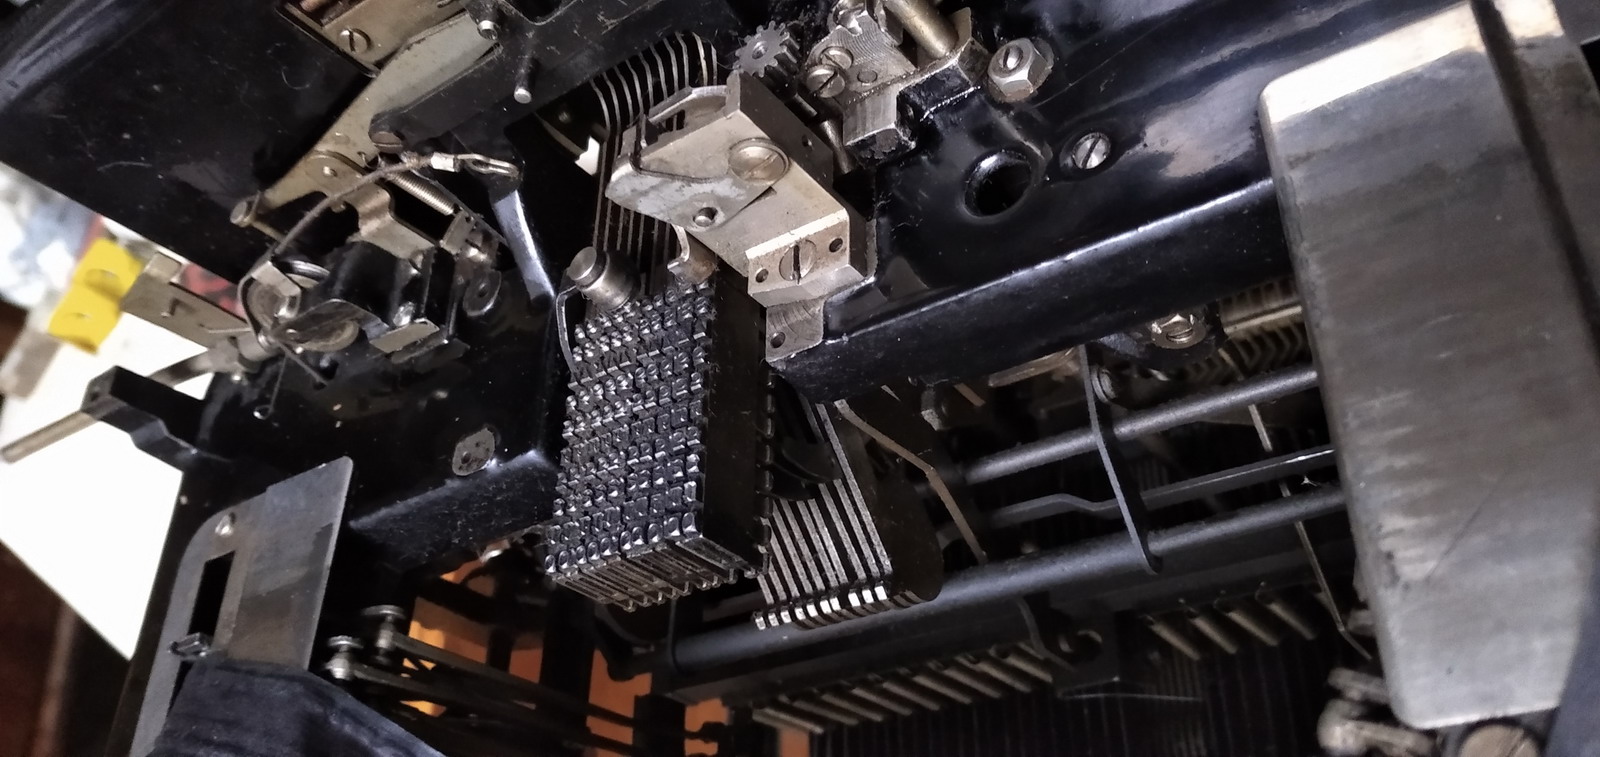
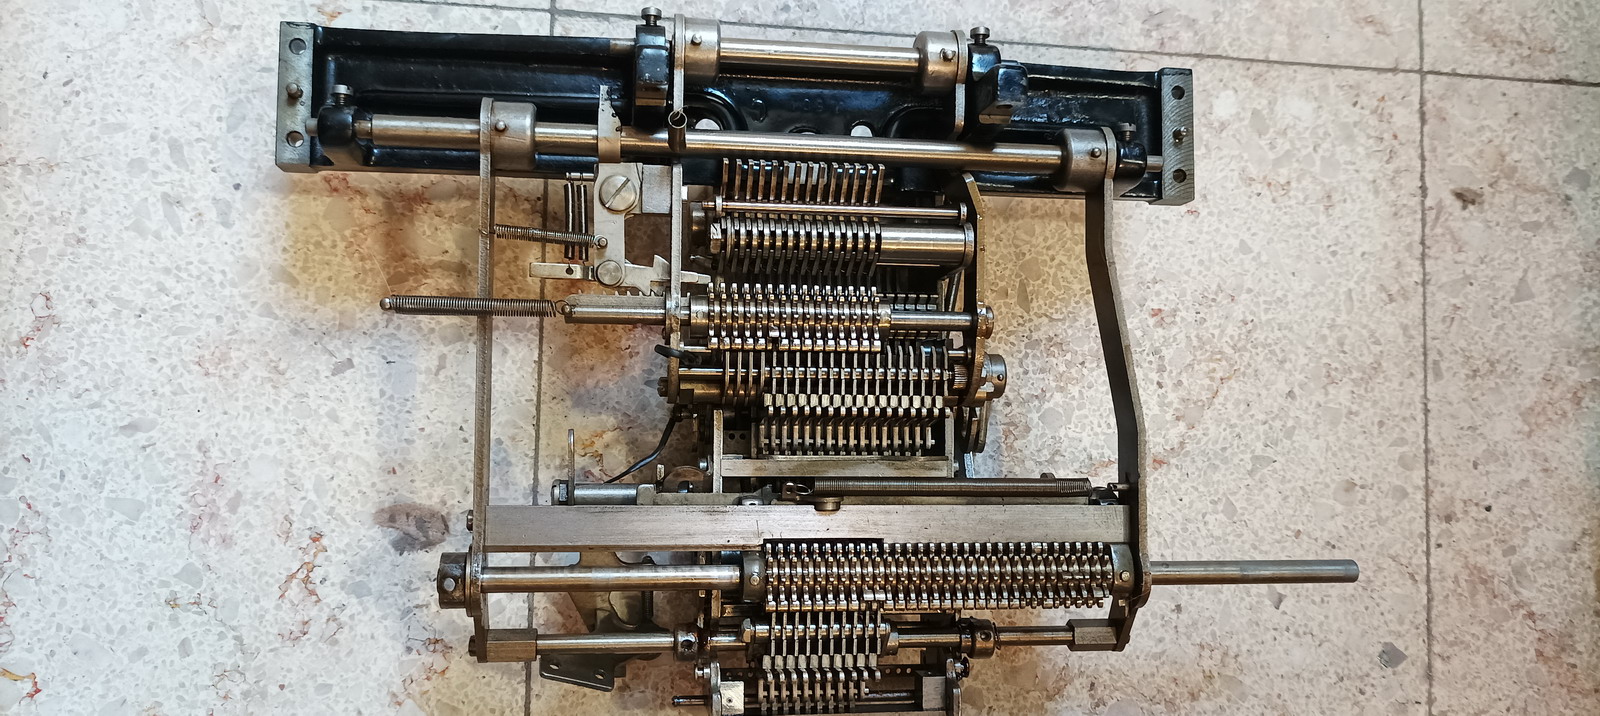
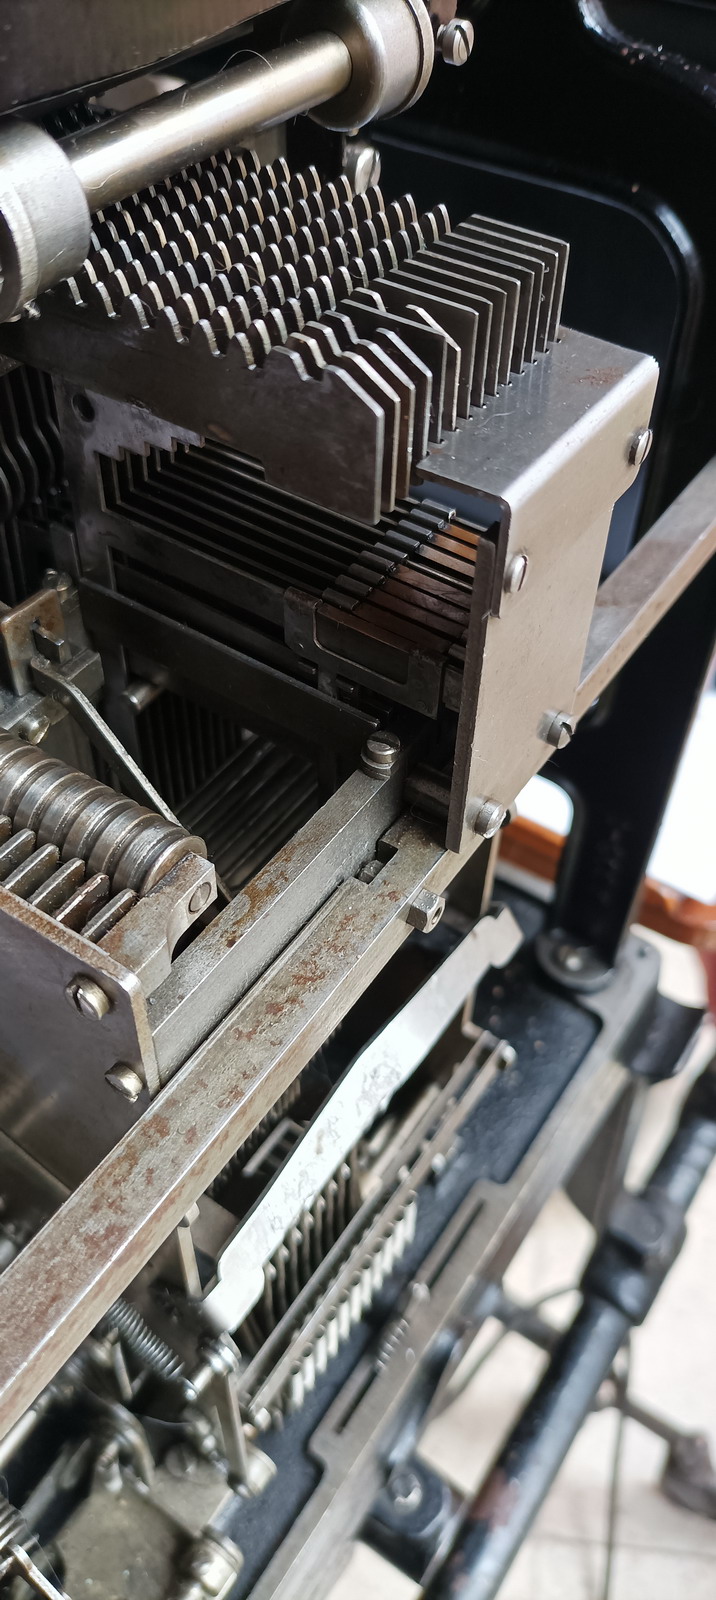
That leaves us with the “extend” and “subtract” keys, as well as to understand what “Final Product” does exactly. And in order to comprehend that, we need to move to the back of the machine, where a completely different calculating machine is attached, the “multiplier-subtractor”.
It lives here:
First of all, why is subtraction a problem ? Well, obviously, since numbers can be added to the registers in only one direction, with the typebars running backwards, and in the other direction every gear reaches a hard stop when it comes to zero, it is impossible to subtract directly. To solve this issue, a number to be subtracted needs to be entered as its complement. (e.g. subtracting 000123 is the same as adding 999877). But it would be very annoying to have to manually convert a number to its complement, so that is actually done by the machine in the back.
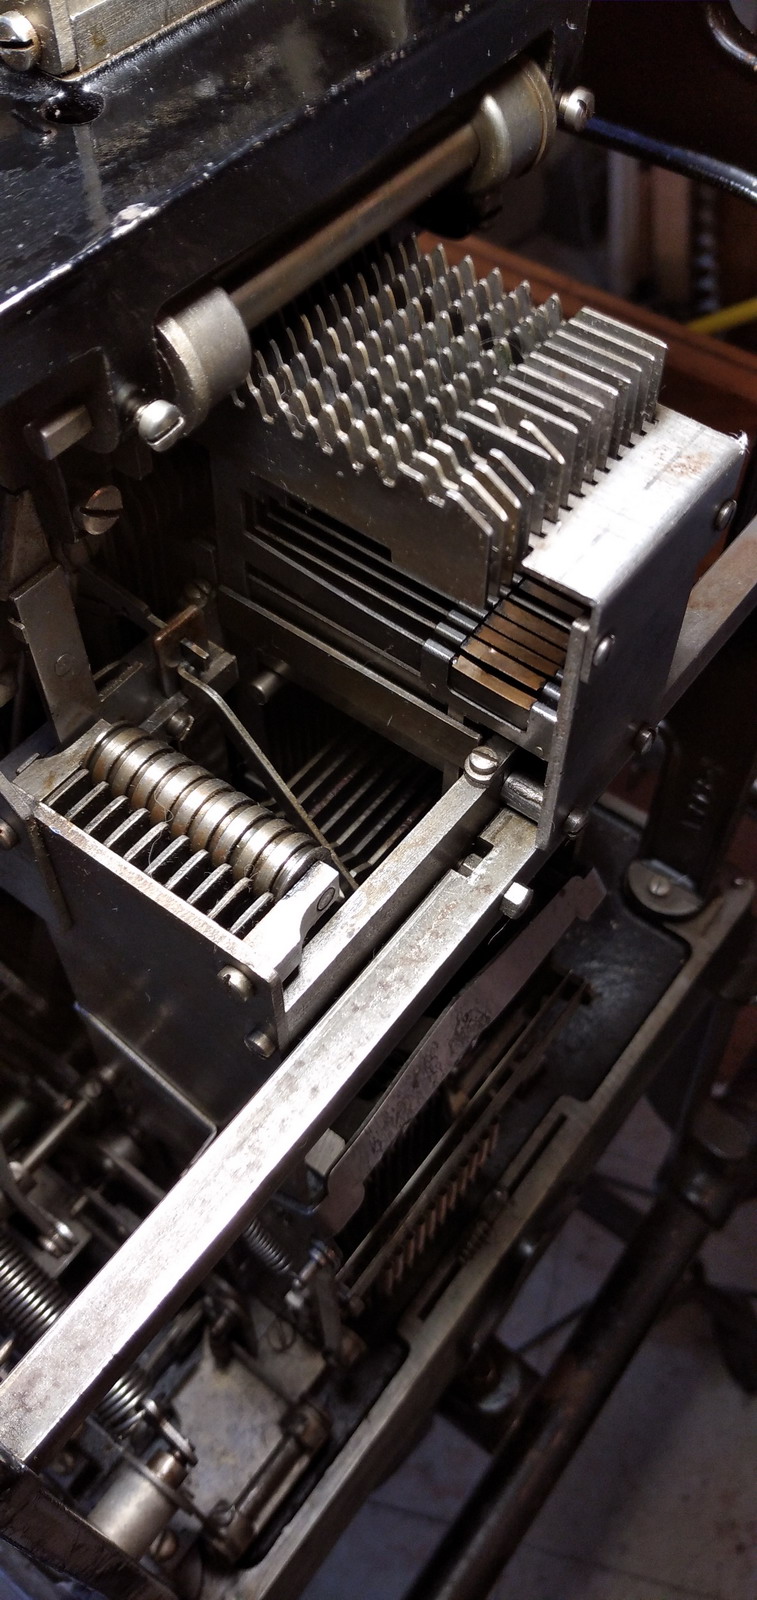
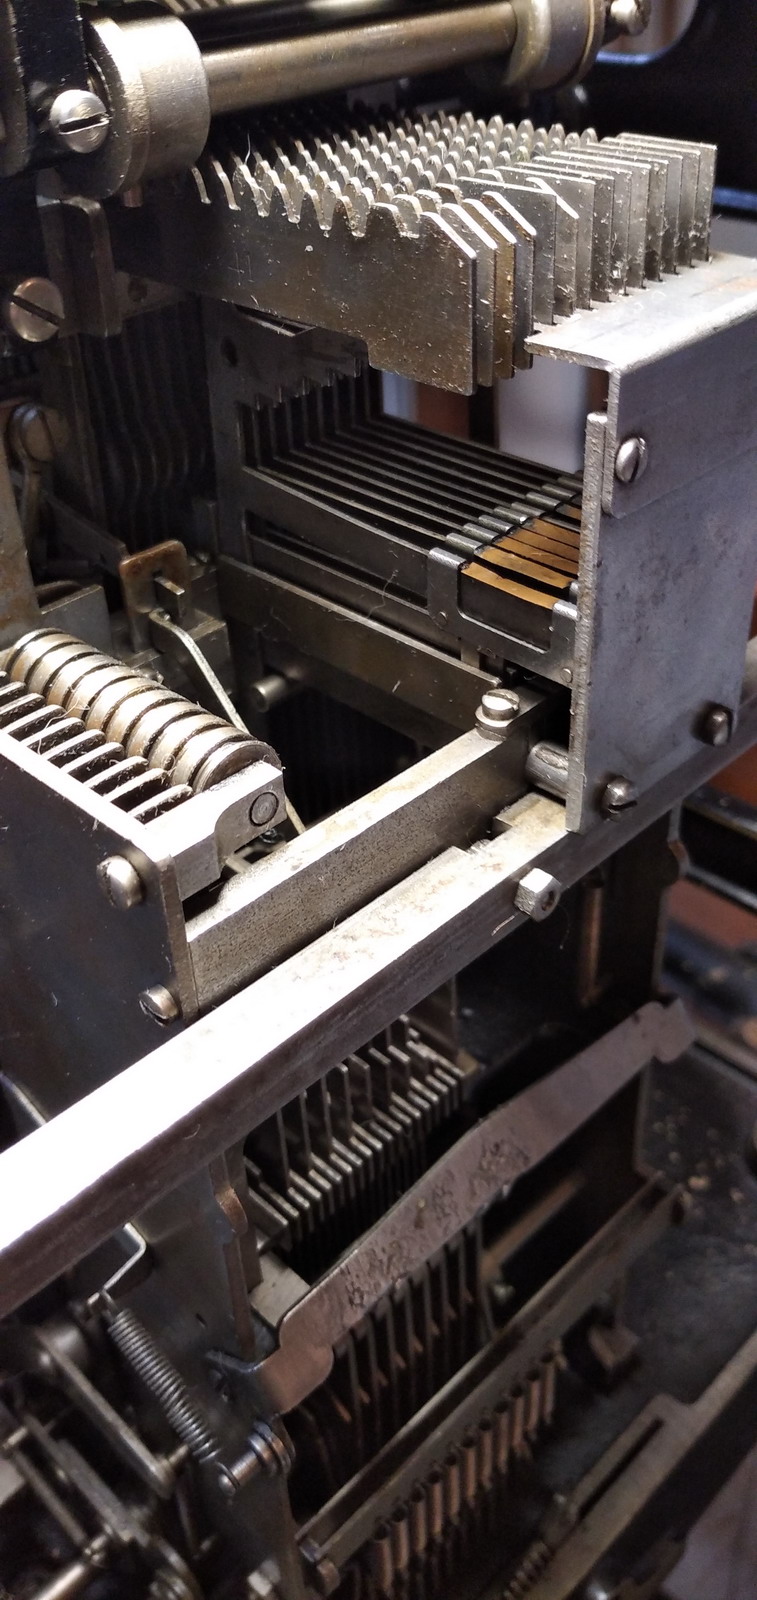
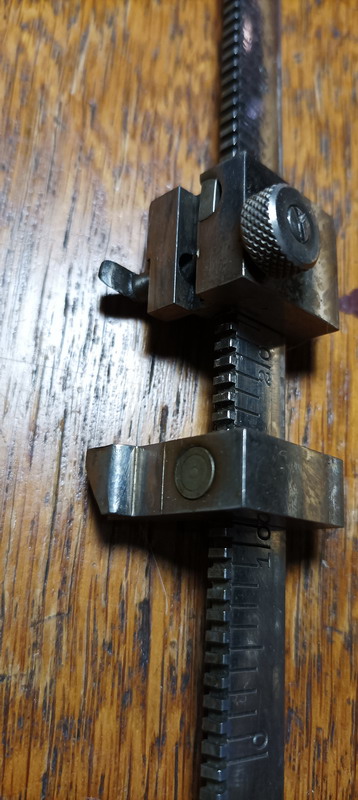
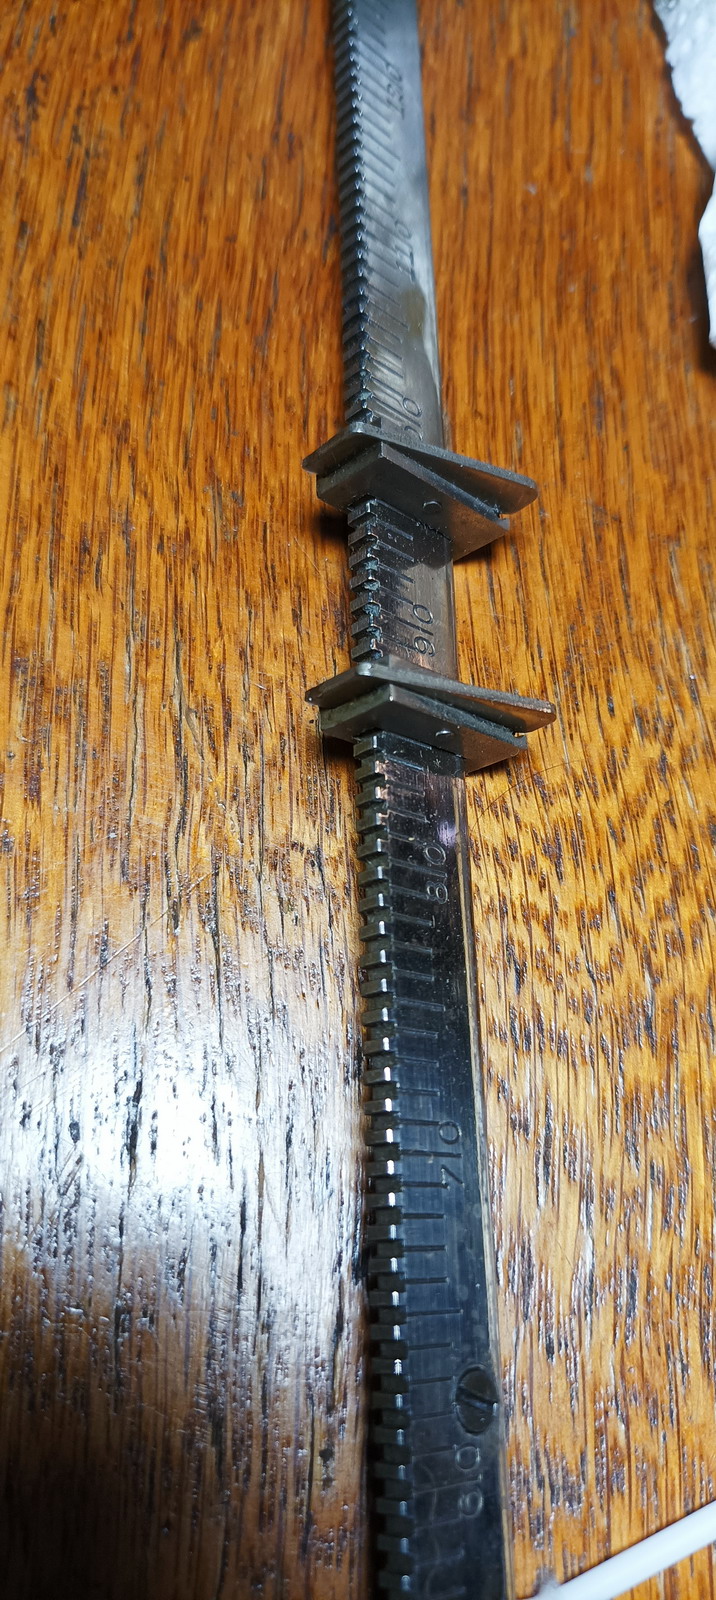
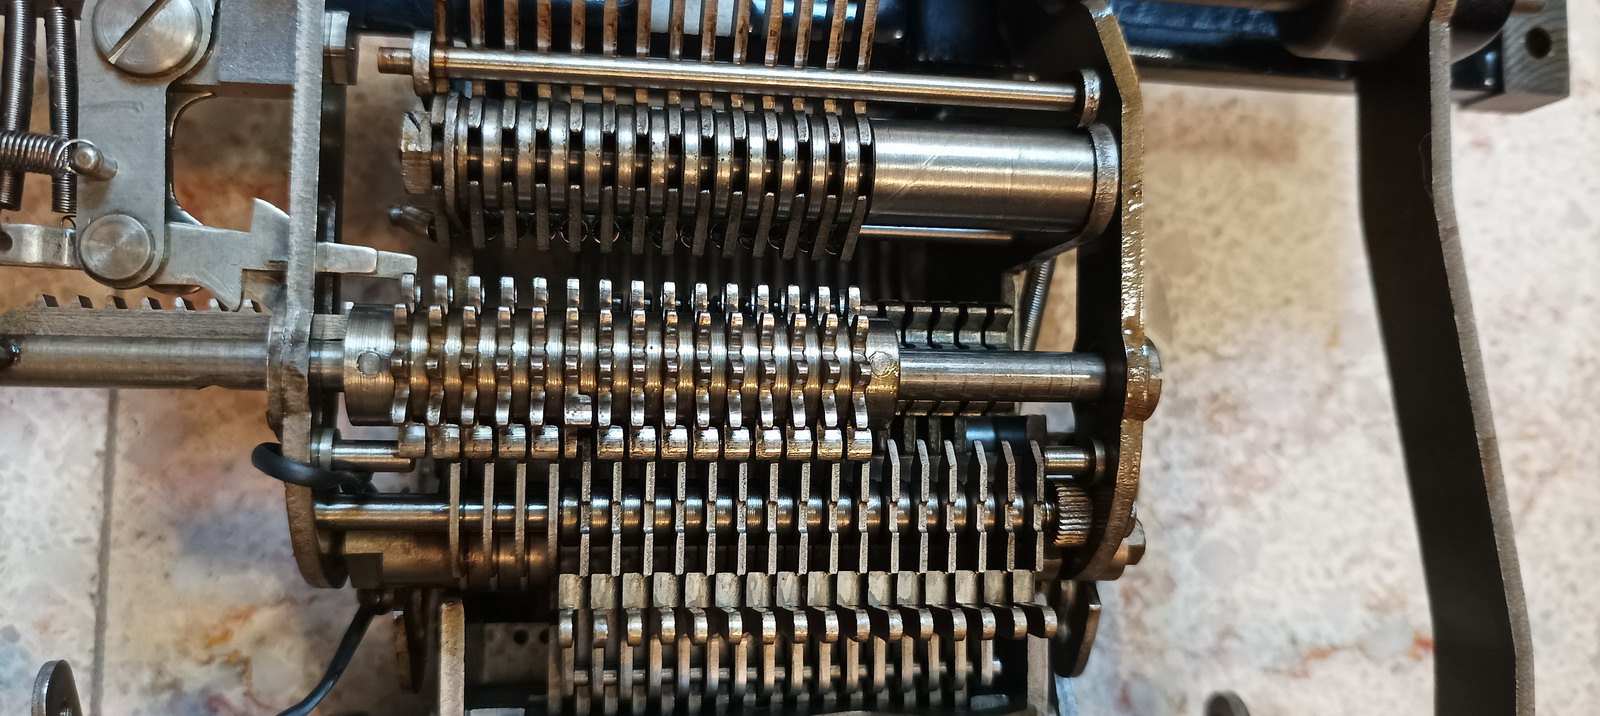
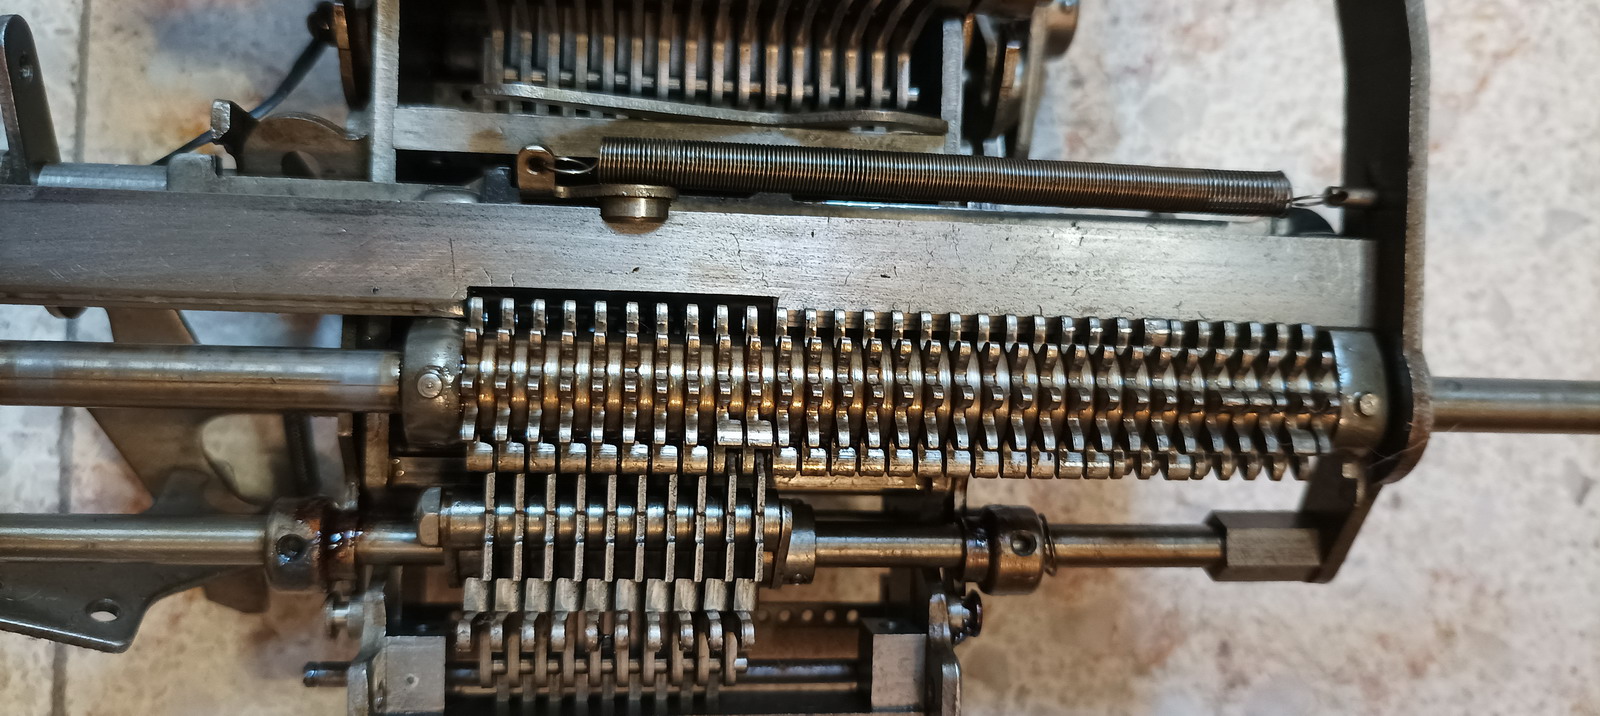
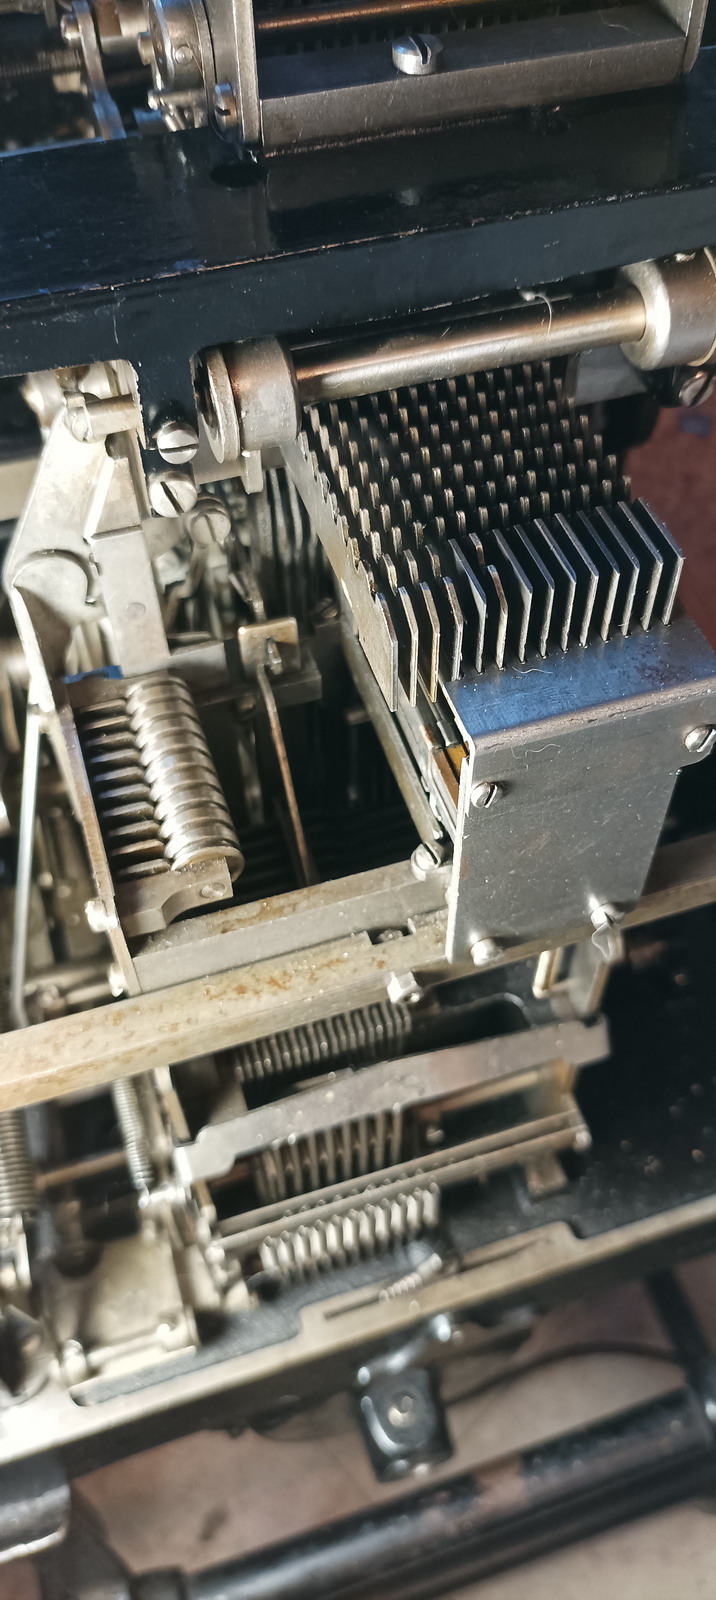
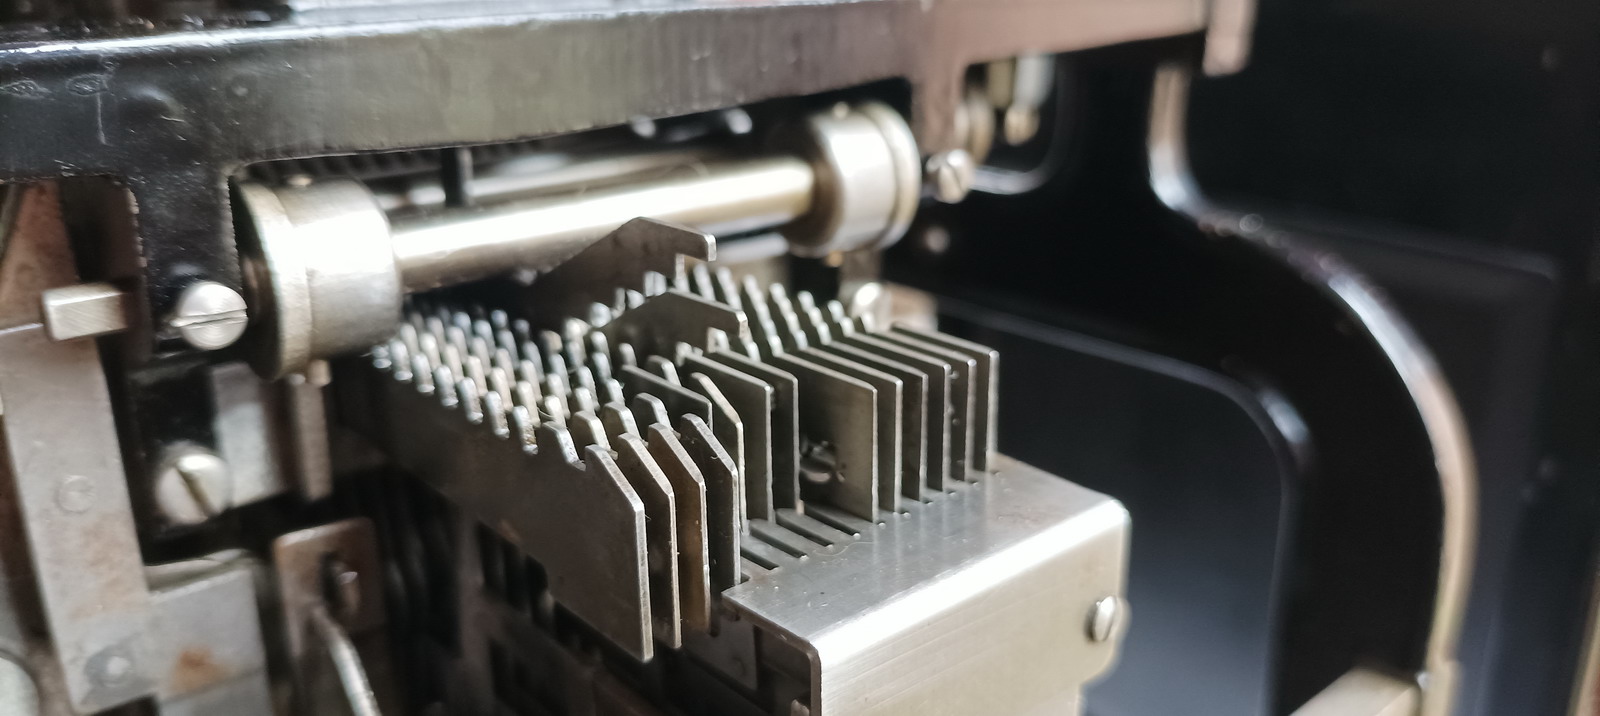
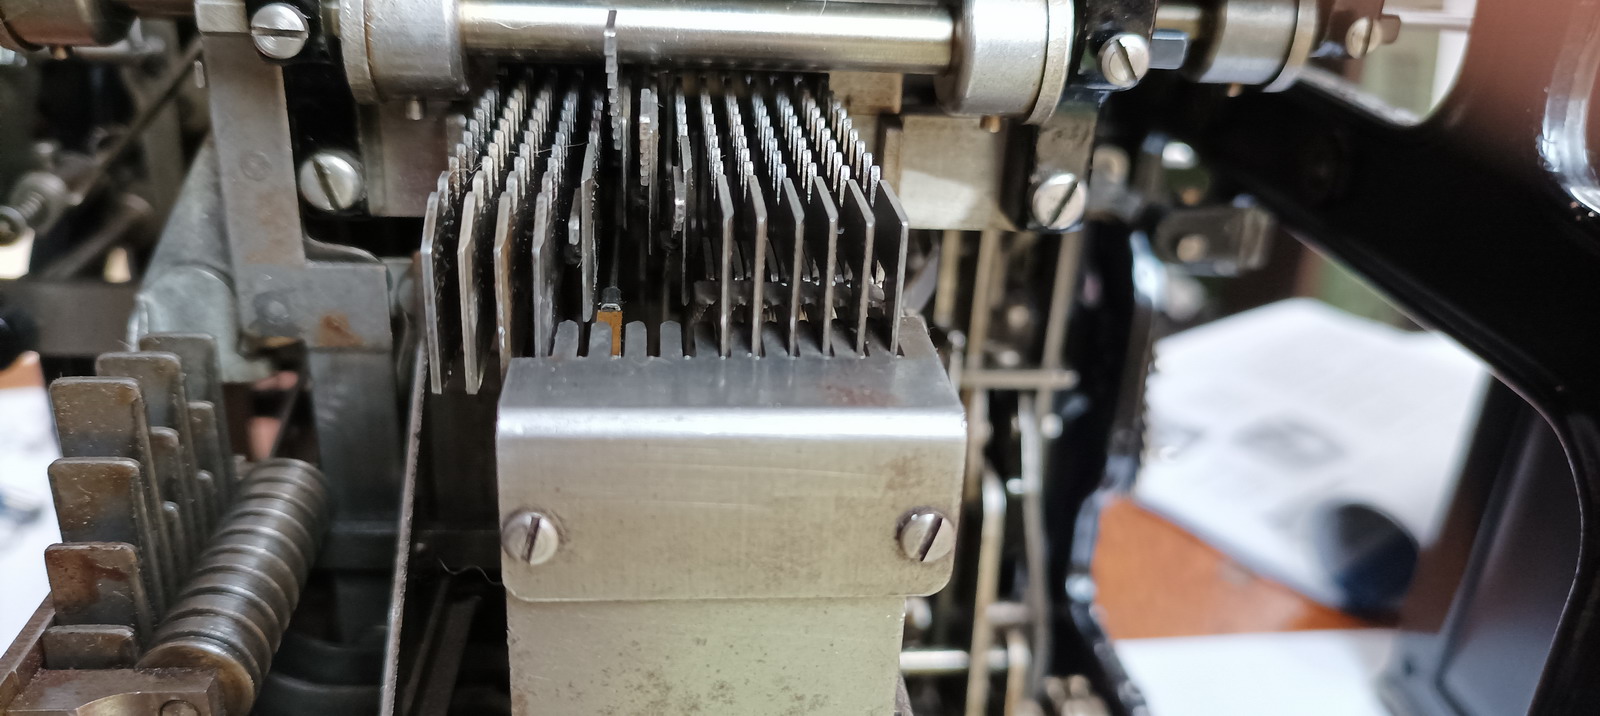
It also has a register to store numbers, which works completely differently than the other registers in the machine. It does not consist of gears, but instead of sliders, that slide forward on a bar over a certain distance proportional to the number that is being entered. This register is also connected to the longitudinal bars that run the length of the machine, so numbers can be entered in the multiplier from the pincushion, or out of any active register, front or rear - if you can print it, it can go into the multiplier. See the video on the multiplier-subtractor below for more details.
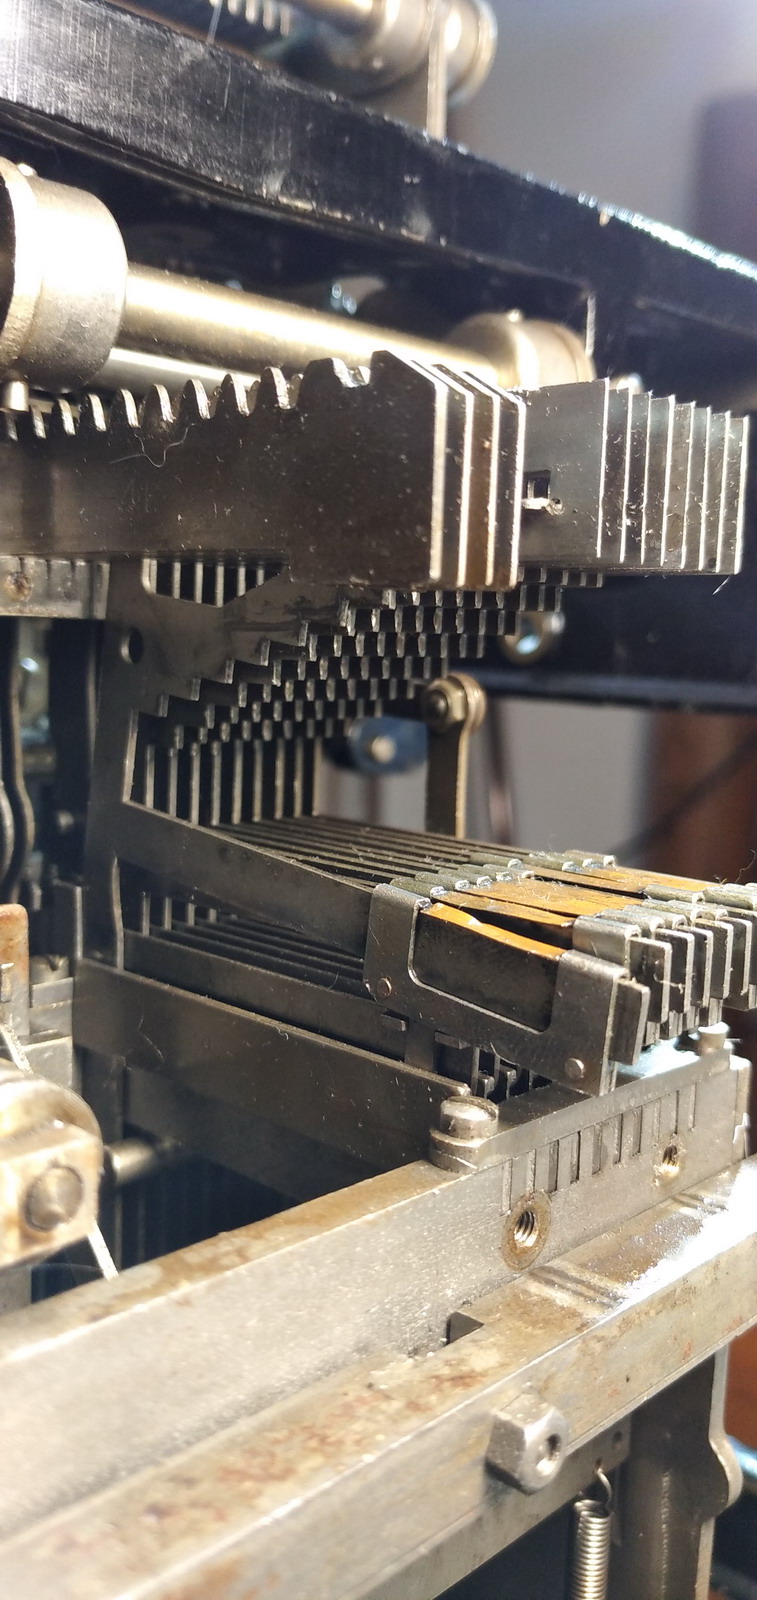
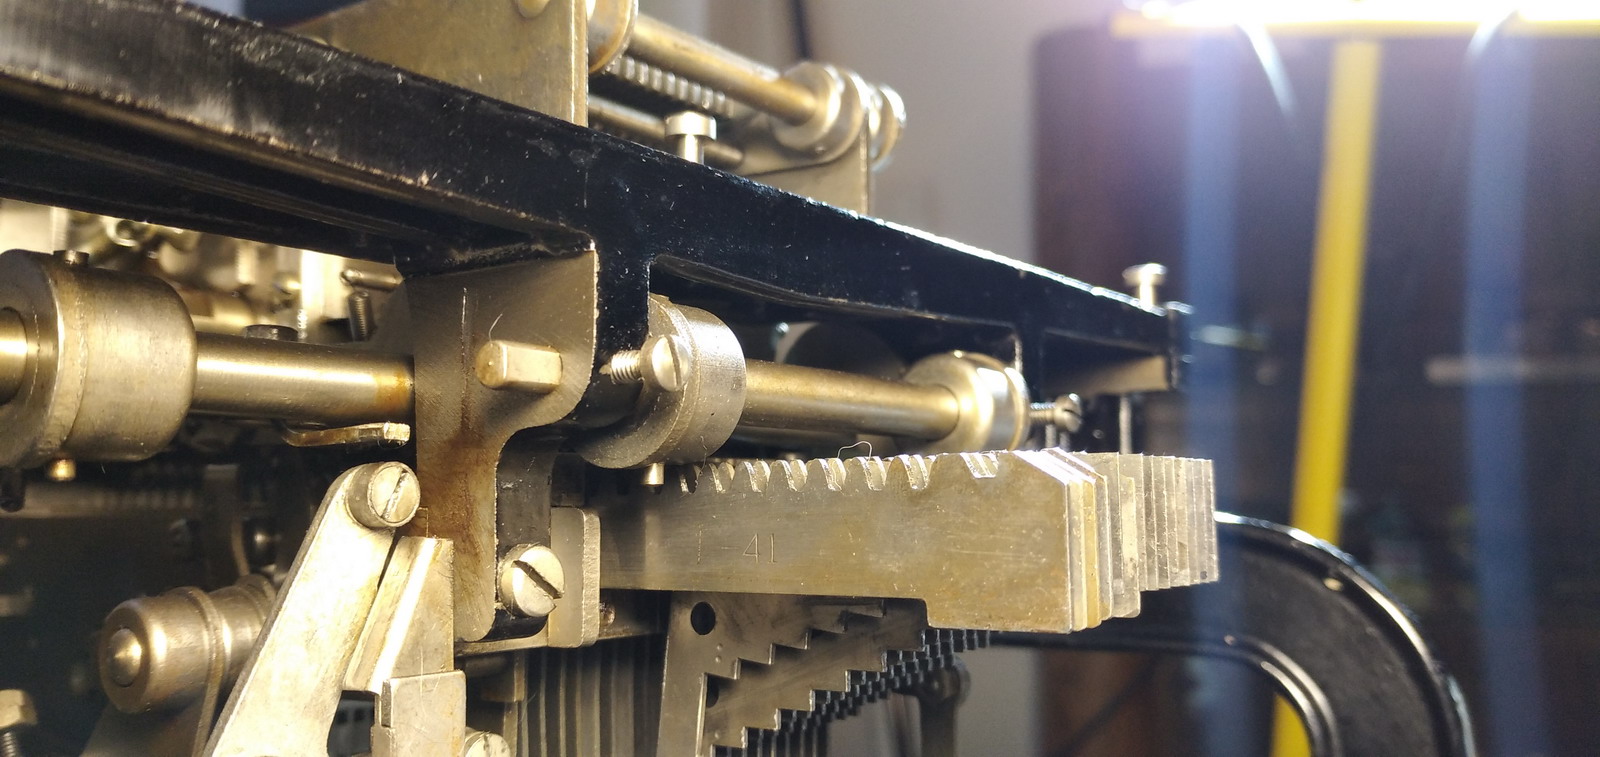
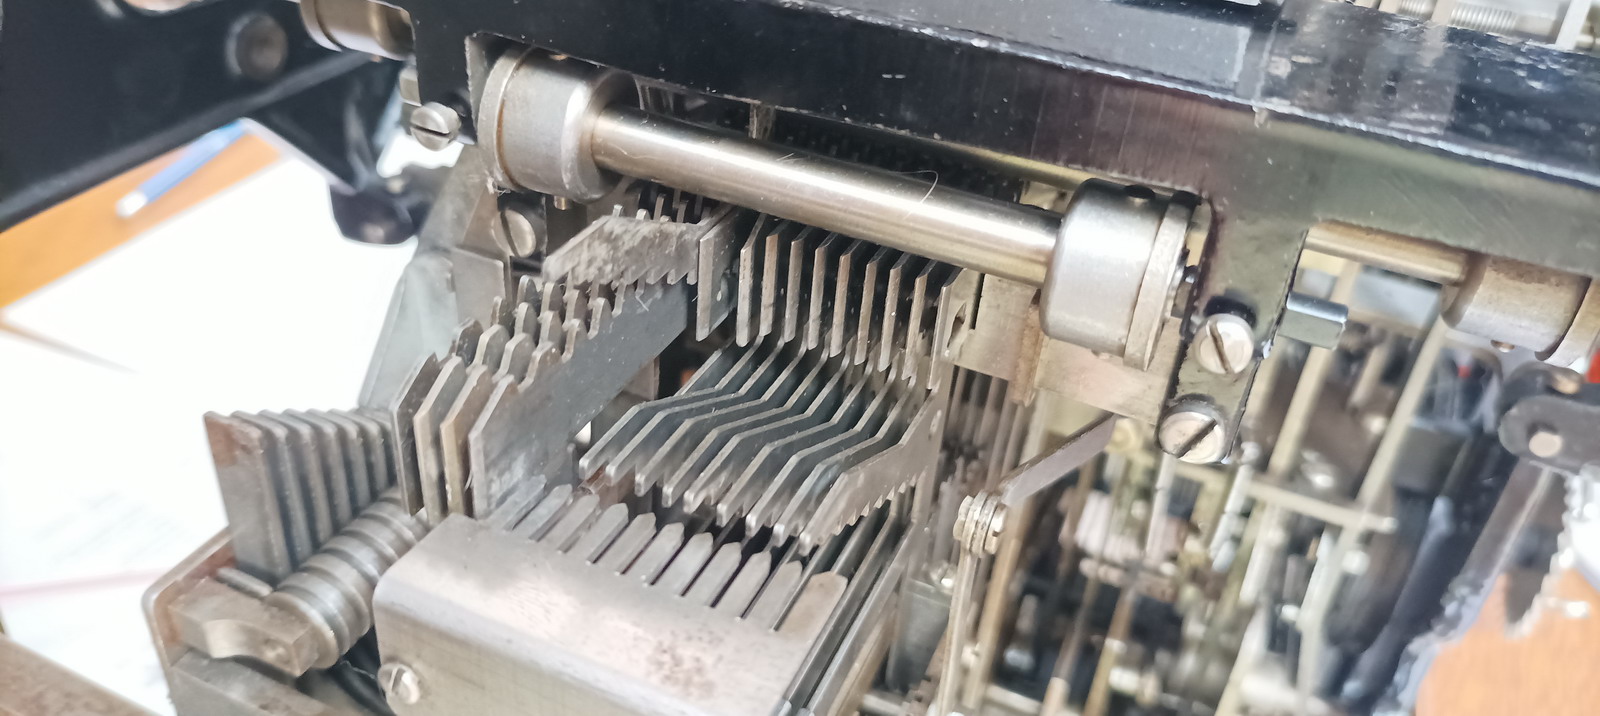
Once the number made it in there, it can be made to interact with a mechanical lookup table that contains the multiplication tables. Selecting these tables is the only function of the black keys on the right side of the Moon-Hopkins keyboard - they interact directly with the multiplication table in the multiplier. So pressing a key, e.g. the black “3”, will immediately start the motor for two cycles - in the first cycle, it will lift the plate that represents the "tens” digit of the table of three, i.e. 000111222, as in the pictures below


This plate will then lift transverse bars, that will in turn interact with a tail that comes off the underside of the sliders in the register, that slide perpendicular to these bars.
In that way, if a digit is at four, the slider in the register, complete with the bar it slides on, will be lifted to a height of 000*1*11222. If it is slid forward further to represent a 7, it will be lifted to a height of 000111*2*22.
Now we divert our attention to the top of these sliding bars - where there is a construct that is stair-shaped, lifting up inbetween the longitudinal bars that operate all machine functions. The higher the sliding bar is lifted, the further the inner surface of the stepped cutout later allows the horizontal bar to go. Nothing is printed at this stage, but the typebars, when running backwards, do enter the number into the rear register.
The machine then runs for a second cycle - the moveable rear register is shifted one space to the left, and in the second cycle, the plate for the “unit” position in the table is lifted - this, for the table of three, consists of 369258147. So the slider set at 4 now is lifted to a height of 369*2*58147, and the typebar stops at 2, which is then read into the rear register, one place to the right of where the 1 from the first cycle was read in - so the result in the register will be 12 - or 3 x 4.
The register in the picture contains the number 1234, so the 4 is the plate closest to the camera. You can see the 1 2 and 3 bars being lifted to a height of 3 6 and 9 respectively, and the type bars running in until they stop against the respective “stairfront”.

For multiplication by 0 and 1, the machine only runs one cycle.
That is the one weakness of the machine - whereas the multiplicand goes into the multiplier register, the number to multiply by can not be pre-set - it needs to be keyed in digit by digit and can also not be printed directly, so it must either be written with the typewriter or printed by the calculator separately, without being processed automatically.
And then finally, now you understand how the multiplier works, it is also clear how it can convert numbers to complements - that is done by the “complement plate” - if the “subtract" button is pressed, then the multiplier immediately springs into action, and by raising a plate that reads 987654321, converts any number in the multiplier into its complement and adds it to the rear register - so it effectively subtracts the number from it. Here I have set 00000001 - so that is converted to 99999998
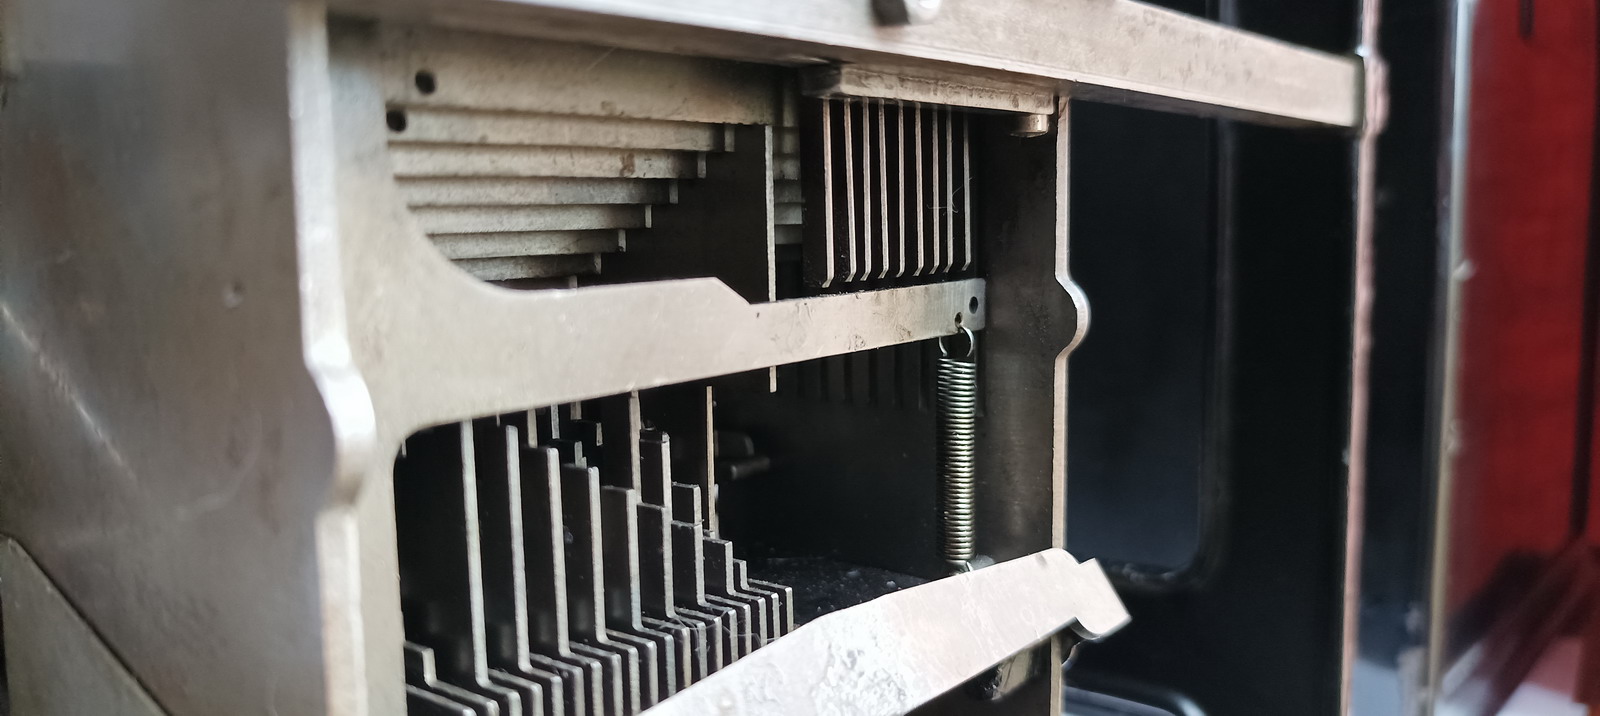
What may be confusing is that a 9 can be set in two different ways - either by the slider being raised all the way to the top of the multiplier, or by not raising it at all. If a zero needs to be set then the sliders are all raised slightly which keeps the typebars in their fixed position. So in fact the readout of the typebar on raising the height of the slider bars is 90123456789. This prevents the very extensive/excessive movement of the slidebars that would otherwise happen when converting numbers to complements.
An important consideration is also that the subtract button starts the entire process by operating the tens carry in the lowest digit of the rear register, so that the missing “1” in the units column (the complement of 123456 is not 876543 but 876544!) is also added.
The “Final product” key does exactly the same thing as the “First product”, however, in addition it also clears the multiplier and it not only prints the amount present in the rear register and clears it, but also transfers it to the active front register.
There is NO provision for transferring from the rear to the front register WITHOUT clearing the multiplier, even though that could also be very useful. Having the “First product” key work like that was a factory option and a special order, but this machine is not configured in that way. In that case I assume the “1st Product” key is configured to read, print and transfer the number, and the “Final Product” key to read and print and NOT transfer, but it does clear the multiplier. Identical operation of the Final Product key as configured in this machine can then be recovered by pressing both 1st and Final product keys together (which the manual alludes to in some places).
There are three more somewhat mysterious keys on the keyboard - “point off”, “decimal discount” and a large key next to the motor bar, that is unlabeled, but according to the manual, is the “full cents” key. What definitely doesn’t help is that this machine is not set up for fractions. You could buy a Moon-Hopkins machine where there would be an extra column to the right of the normally used register that would do either decimal fractions (tenths) or eights, and that would not normally be printed, unless it actually contains a fraction. In this machine there are four extra longitudinal bars to the right of the hundreths column, that only interact with the rear register, but have no printing type at the front, and also don’t interact with the multiplier. In the better equipped machines these woudl do the fractions. There are then special ways to access this column (that involve keying in a number with the rear register key pressed down), and the full cents key would then be used to round off the fraction in the fractions column to the full cent in the first “normal” decimal column. This machine does not have fractions, that is to say, the decimal indicators and decimal pointer are in fixed positions in the registers - the register always reads 10.000.000,00. This makes the examples of the use of the full cents key hard to understand, but after some contemplation, it indeed has its use, as will be explained after we go into multiplication a bit deeper.
The way the multiplier works means it always adds “full” numbers, without taking the decimal point into account. However, if you multiply two numbers with a decimal point, the decimal point actually shifts in the product ... e.g - if you multiply 3,20 by 4,50, the result will not be 1.440,00 (with two decimals, as the machine would depict/print if you did nothing about it) or 144,000 (with three decimals) but rather 14,4000 (with 4 decimals). The operation to correct this is called “pointing off”. The number of digits behind the decimal point is simply the sum of the number of decimals in the multiplicand and the multiplier - so there should be four (2+2) decimals behind the decimal point in the answer, and this means we need to shift the product by two spaces in order to get the correct(ly formatted) answer. This is precisely what is done directly, digit by digit, by the point off key - it tabs the rear register that has shifted to the left in the process of multiplication, back to the right, position by position. In this case, since we have an answer with 2+2 decimals, it needs to be pressed twice to obtain the correct result, with 2 decimals. So in the rear register we have:
1.440,00
point off once -
144,00
point off once more:
14,40
The “decimal discount” key is a special case of this - in order to figure discounts in a price, the machine lets you multiply by a fraction that is 1 minus the discount, i.e. if you want a 15% discount, you multiply by 1-0.15, that is 0.85. Because the discounted fractions are always smaller than 1, every significant figure entered adds to the number of decimals in the result. That means you can account for it automatically - the “decimal discount key” will shift the rear register immediately back to its starting position, and thus by a number of places equal to the number of digits that were entered on the black keys. E.g. if you multiply 12,34 by 0,37, two black keys have been pressed (3 and 7). The unmodified result would be 456,58 , so either you keep track of the fact that you need to point off twice, or you press the “decimal discount” key and this will automatically point off two places for you and give as the result 4,56.
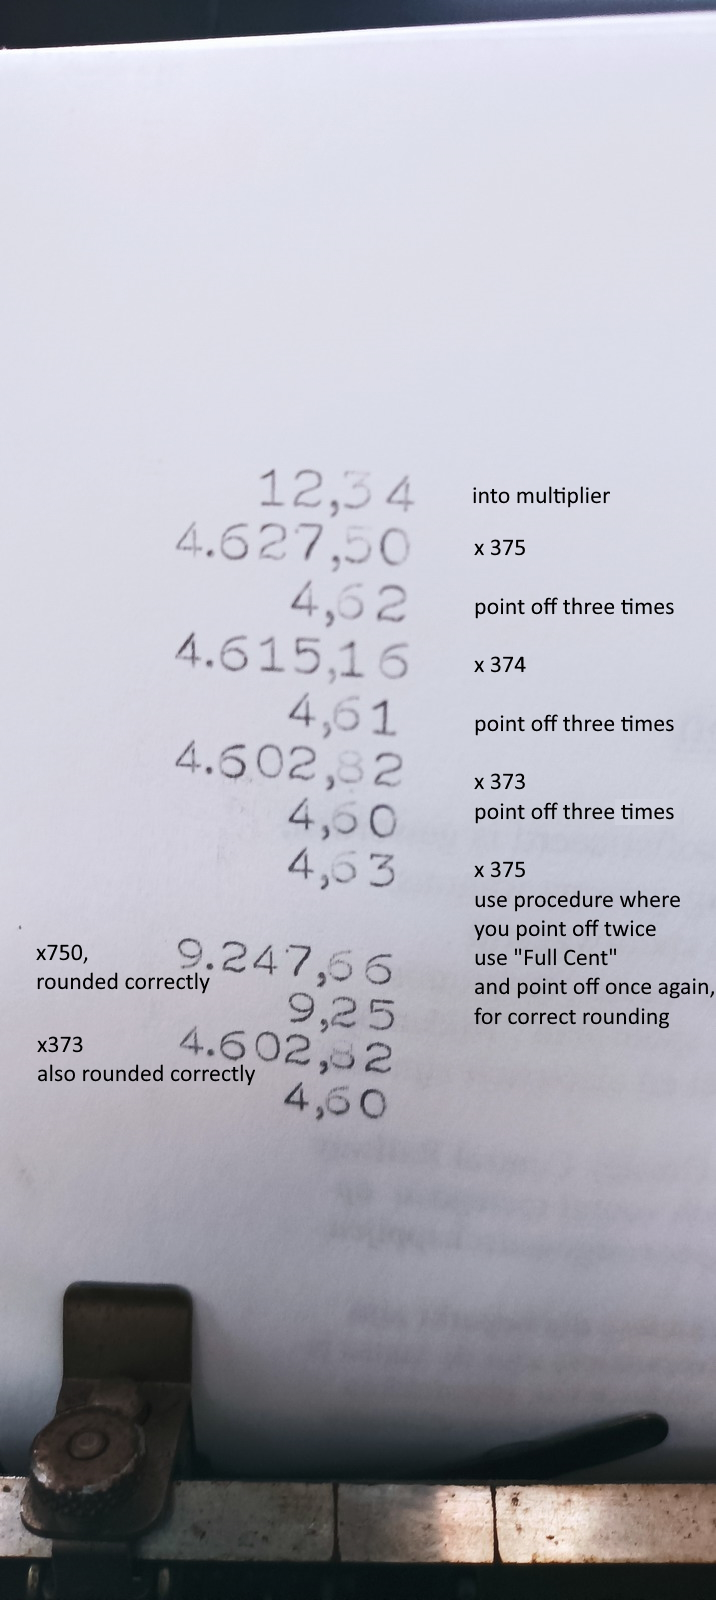
And there’s the rub, and this also shows the sensible use of the “full cents” key - because “pointing off” simply throws away what is behind the decimal point, there is no rounding being done. That is all nice and well if it is zeroes you’re eliminating, but if you throw away 99 without rounding up the next digit, that can cost your business a lot of money in the end. If you have the machine with the extra column with fractions, then that is what is always rounded - in this machine, however, things are a bit more complicated. You can’t use the decimal discount key in conjunction with the full cents key, and it will immediately become obvious why. What the full cents key does is related to the sticky-out bit that I soldered on to the slider bar in the units digit of the multiplier - The “full cent” key will immediately activate the motor to lift this bar to a height of 5, and hence add 0,05 directly to the rear register. This would all be good and well if that were the actual column that needed to be rounded, but it’s not, so a little more foresight is needed - I’ll show this with the example above.
Imagine you have 12,34 in the rear register that you want to apply a discount to of 62.5% - so you multiply by 0,375. The result in the rear register will now read 4.627,50. You know you need to point off three times, or use the decimal discount key, which has the same effect with one key press - but you will get 4,62 instead of 4,63 if you do it that way. So instead of using the decimal discount key, the rounding procedure involves pointing off manually twice (from 4.627,50 to 46,27). You then press the full cents key, which adds 0,05, to give 45,70. Then you point off once again, and end up with 4,57. The effect of adding 0,05 before the final pointing off operation is that of adding 0,005 to the final number. The final 5 thus provides a tens carry that rounds the last digit that stays in the machine up when it is five or higher, and down when it is below five (because the column that is pointed off then contains a number between 5 and 9, and no tens carry has taken place). This correct automatic rounding comes at the cost of the automatic pointing off.
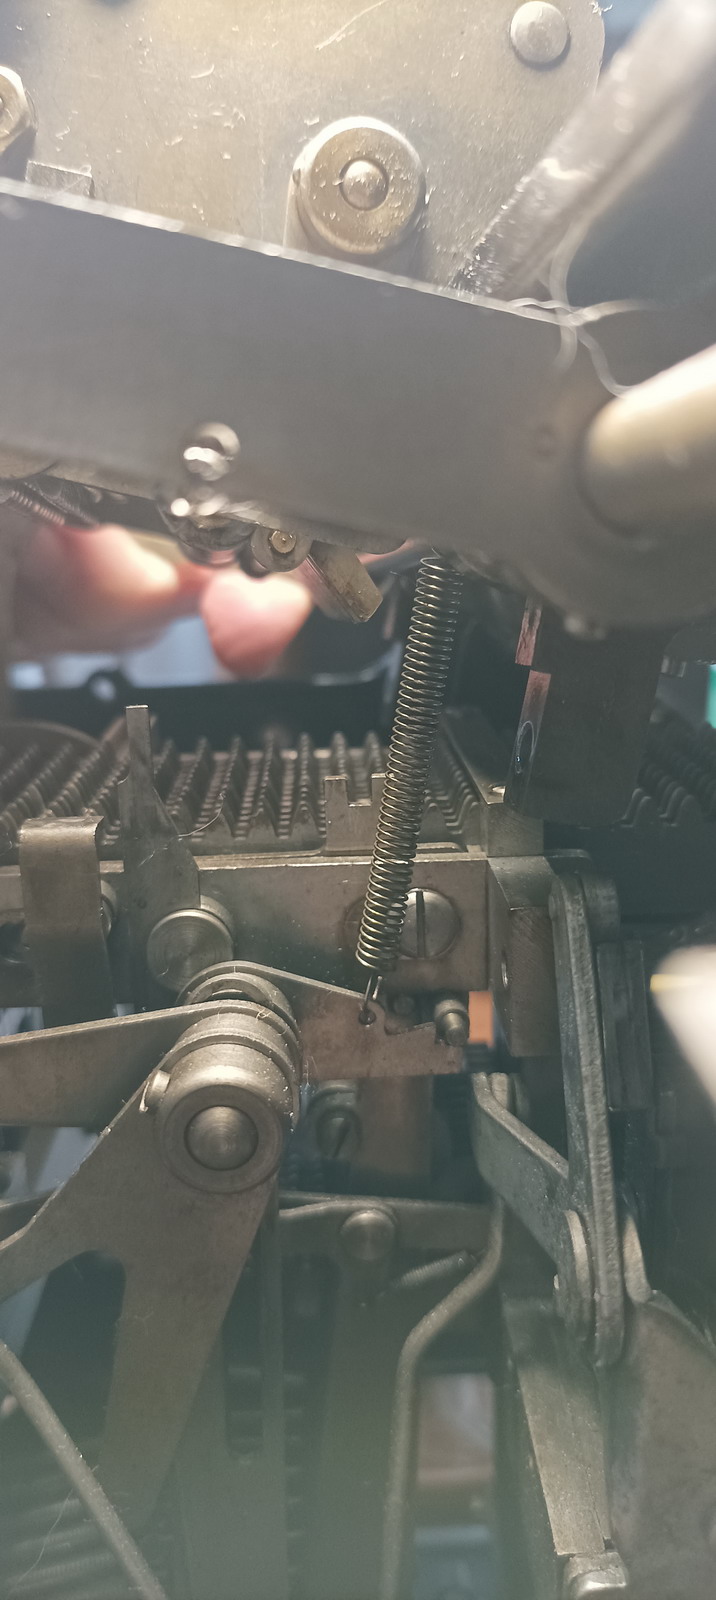
There are two more final doo-dads that affect how the machine operates - there is a tiny (but beautifully shaped) lever sticking out on the left side of the machine, above the ribbon-tensioner.
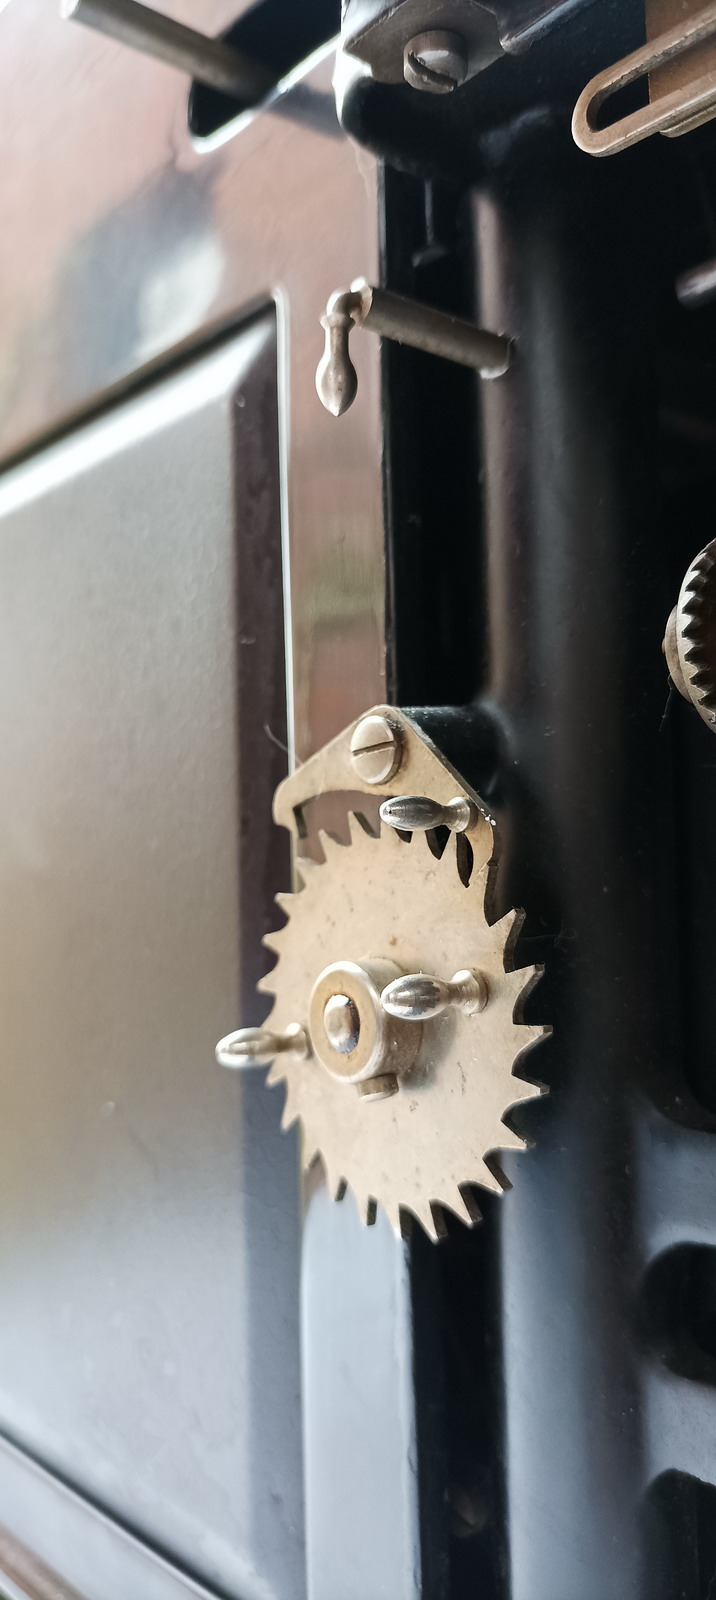
That determines whether the machine will line-space after finishing the printing operation by the calculator. That is very useful if you’re adding numbers in a column, but of course not so much when you’re adding numbers in a row - in that case the line spacing is taken care of after finishing the row by the carriage running back to the left. If the lever is up, the machine will line-space, if it is down, it will not.
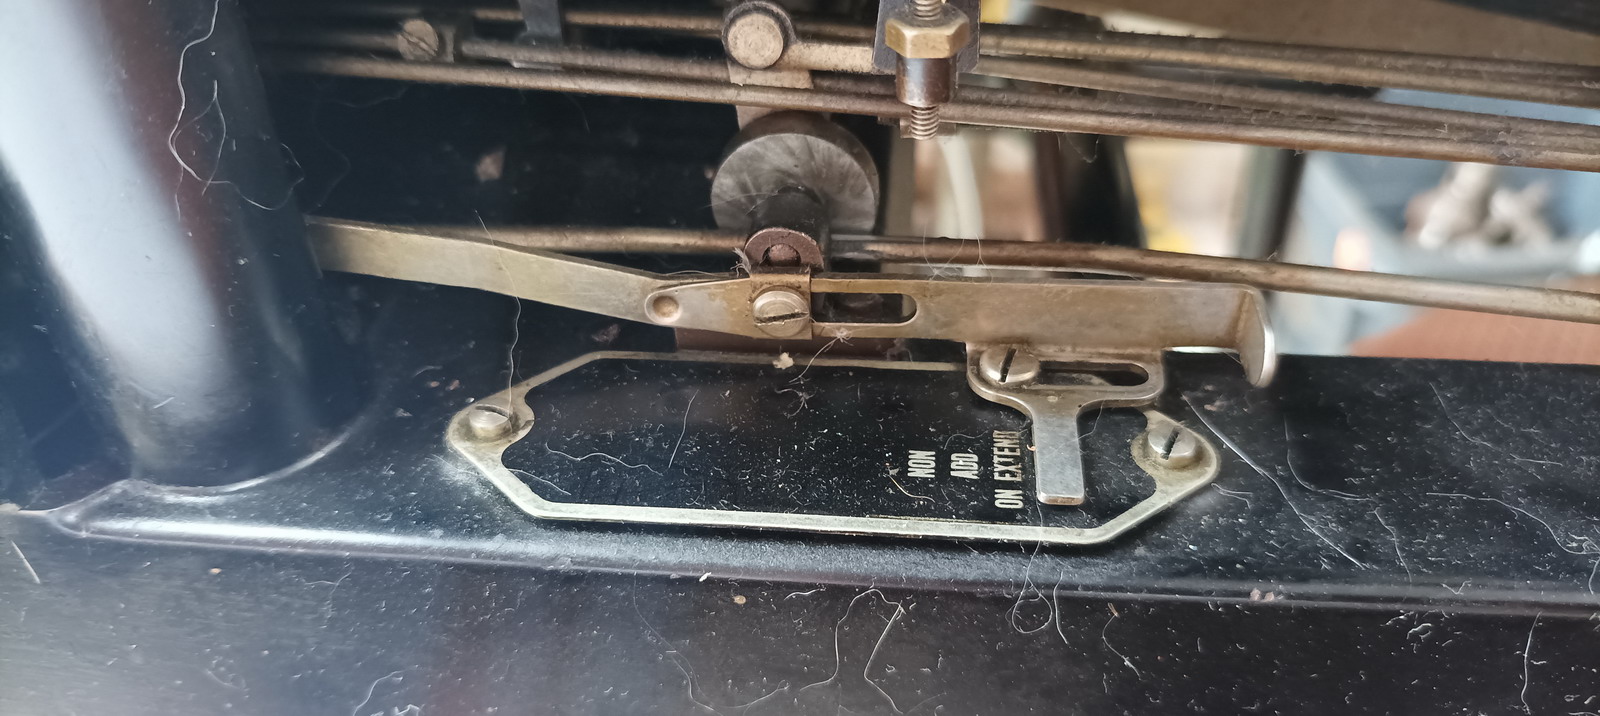
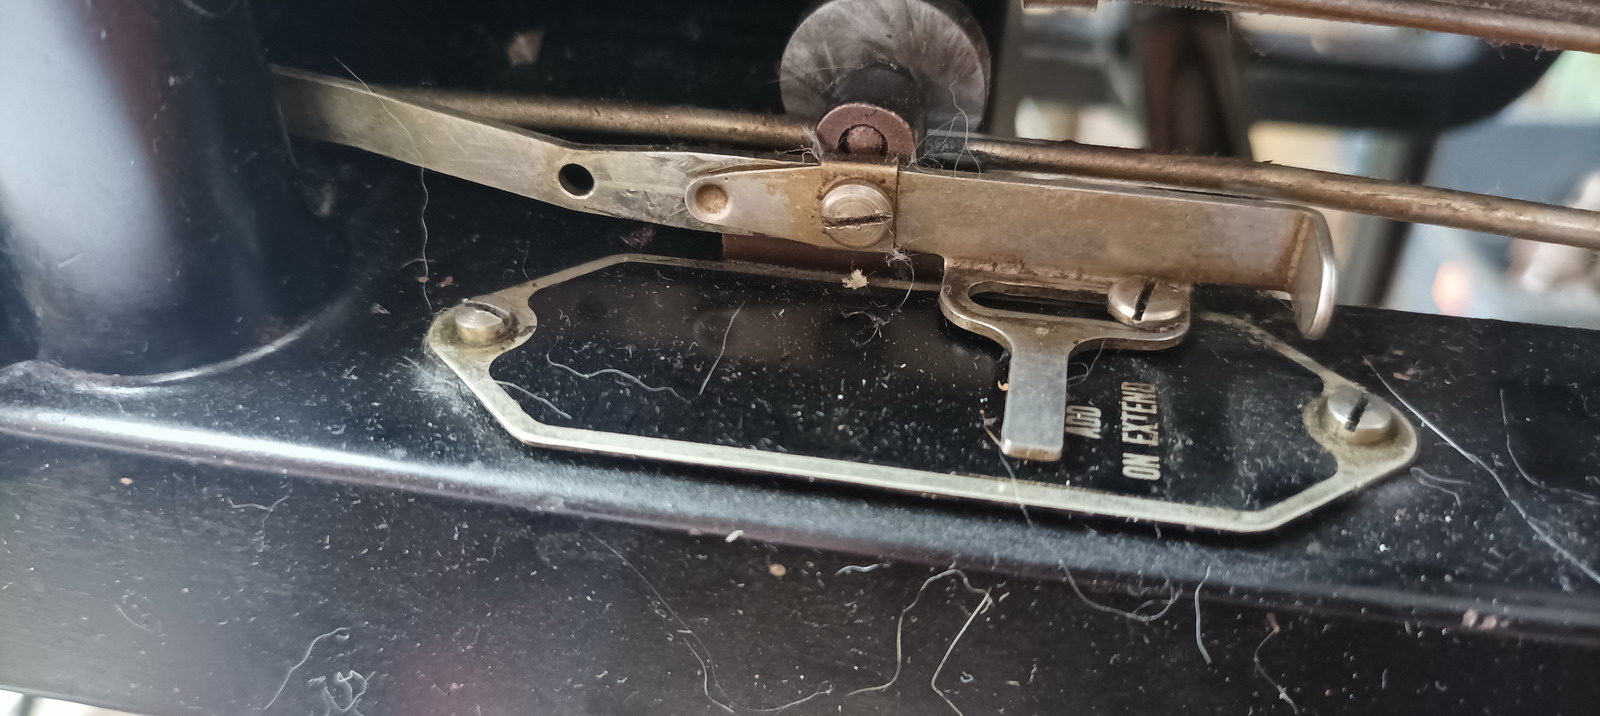
And then there is a slider on the base of the machine, that can be set to either “add on extend” or “non-add on extend” (excuse the dust ...). If you want to have the numbers that go into the multiplier added up in a front register, you should switch this on (e.g. you are listing weights of commodities that will then get multiplied by a price, but you need for example the total weight at the end in order to calculate shipping ...). But it may also be that this would throw off the total you are keeping up with in the active register, because you need all three front registers for your calculation and can’t spare one - so it is very useful to be able to turn this functionality off.
And finally, I have some pictures and explanatory video:


Intro part 1:
Intro part 2:
Example calculations part 1:
example calculations - invoicing (an “ex-ham-ple”)
That last video warrants a bit more discussion, because it shows quite well what kind of combinations of operations the machine is capable of. This is the invoice as it comes out of the machine:
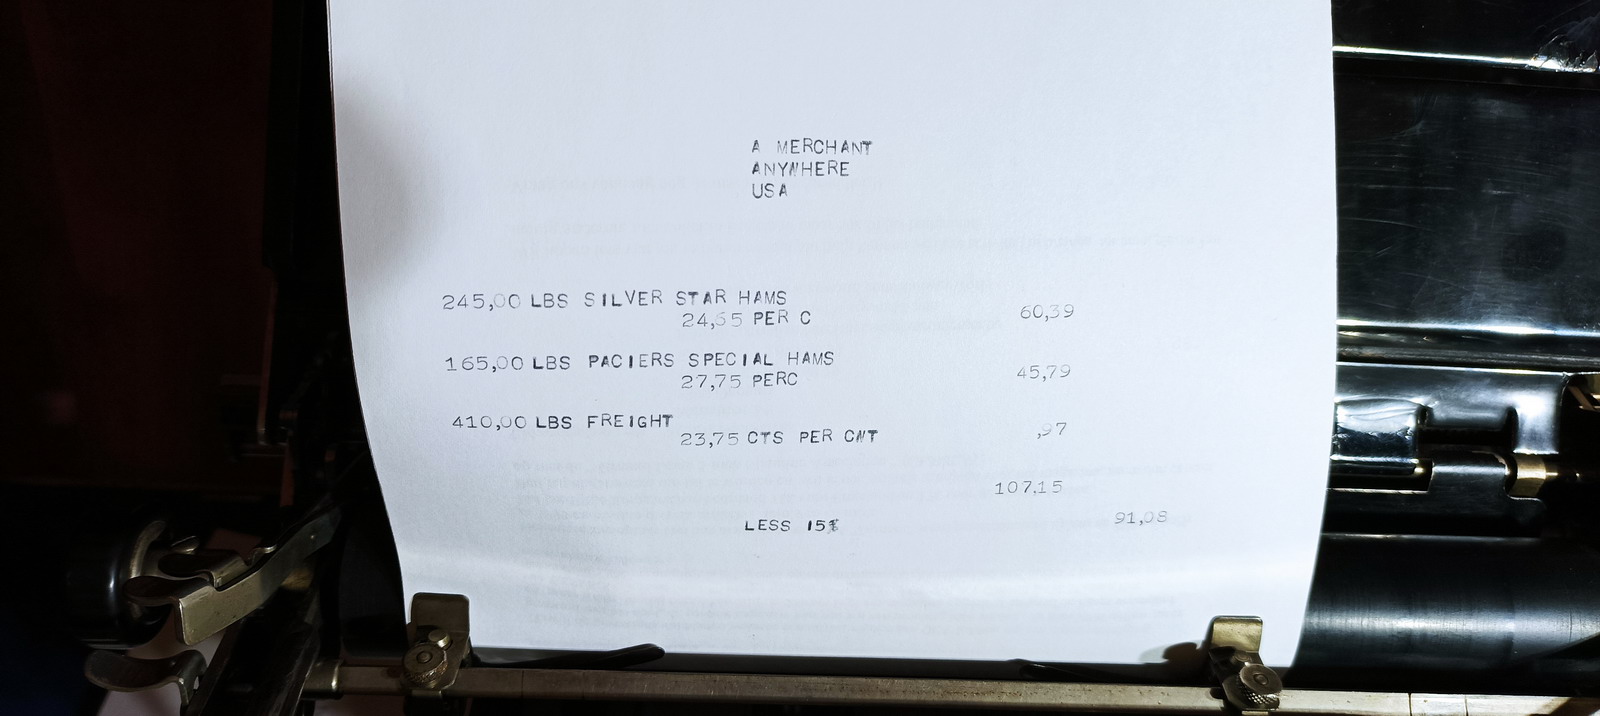
And this is the annotated invoice that shows the operations going on during invoicing
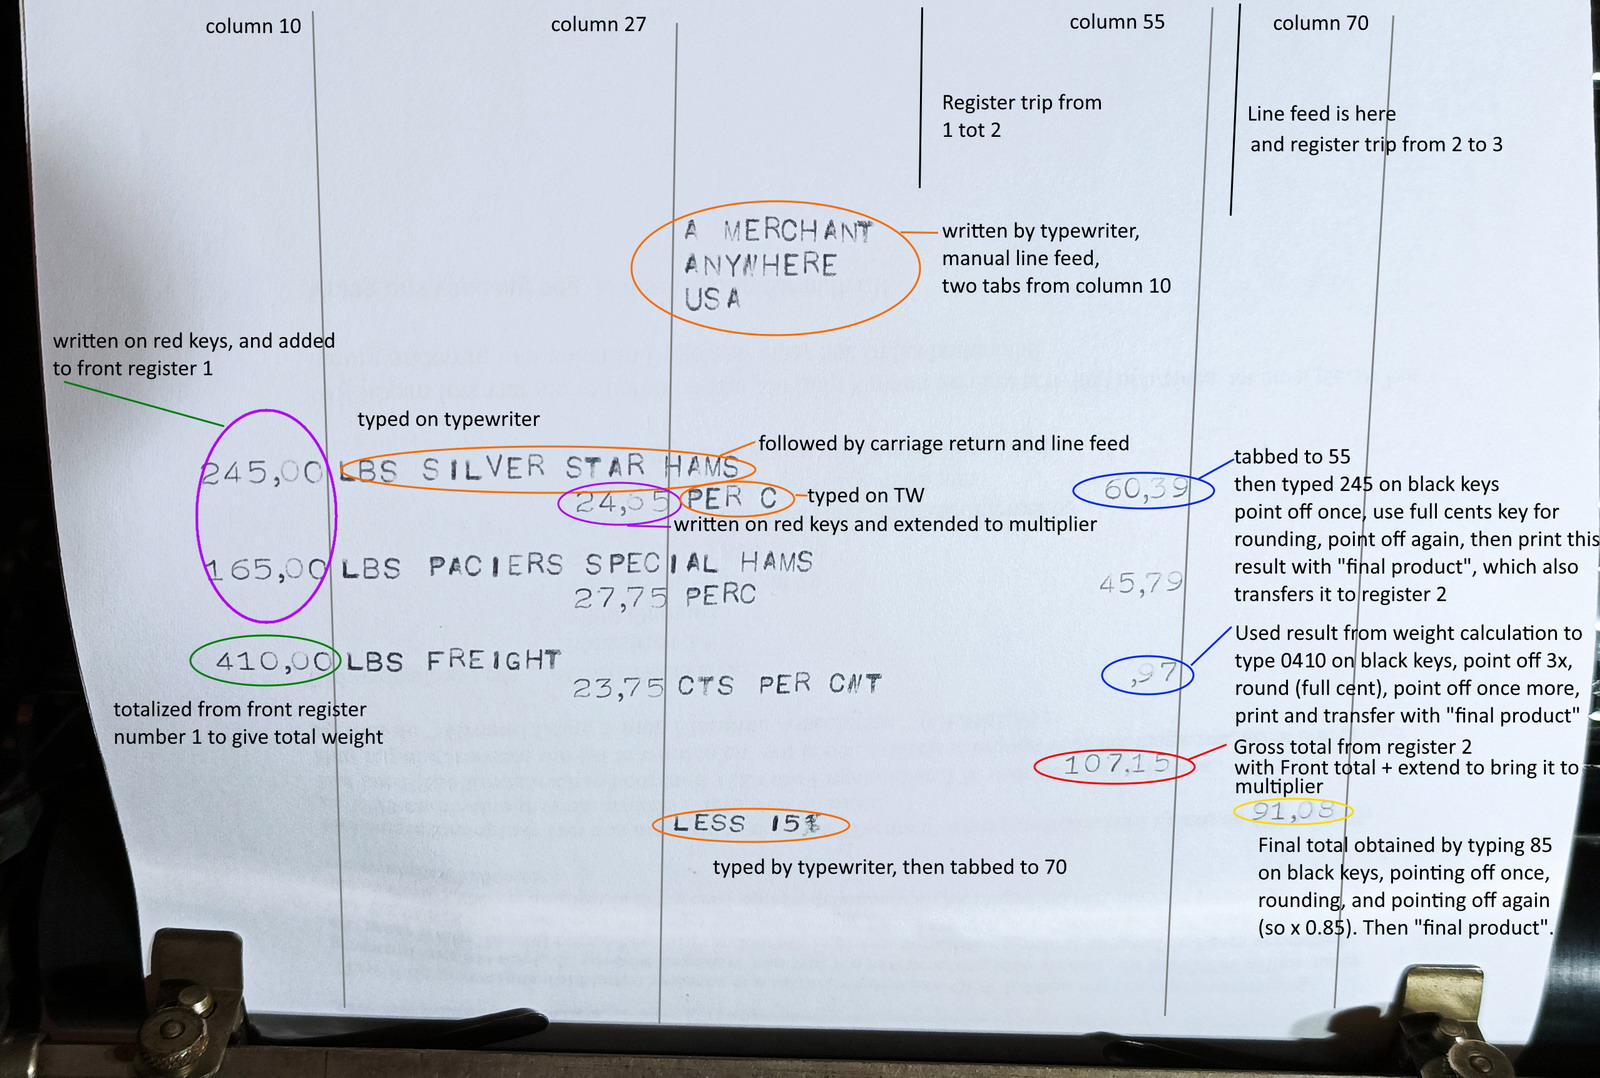
The one interesting detail about pointing off is that in this case, because of the particulars of the operation, we need to apply a trick for the price of the freight. You can see that the total weight to be shipped is 410 lbs. The price of shipping is 23.75 cts per cwt - so every hundred lbs shipped costs 0.2375$. We only have 2 decimals avaialble in the register, so we can only type 23.75 , hence the “cts per cwt” - but we do want the correct answer. Mentally putting the decimals in the correct position, we have 4 positions behind the unit position for the price, and 2 for the weight as expressed in cwt (4,10). This will lead to 6 decimal positions in the product (2 + 4), but the rear register only tabs when you touch a black key. So if we key in 410 and then need to reduce the result from 6 decimals to 2, we do not have the necessary positions in the rear register to be able to do this. Hence we have to precede the multiplier by a 0 in order to get the result in the correct position for adding it to the rest of the gross total, and the procedure is to point off 3 times, then round with “full cent” and point off once more.

You can do the exact same calculation in a spreadsheet (although with higher precision, and also with some trickiness to the number of decimals required, i.e. using 2,45 instead of 245 etc) and it is clear that everything is correct, including the rounding. The numbers in red would have been rounded incorrectly when just pointing off with the “decimal discount” key.
Now the machine can go back to the Arithmeum for inclusion in their permanent exhibition. If you have one of these contraptions you want to sell to me for my collection, at this point I can probably be tempted ...