
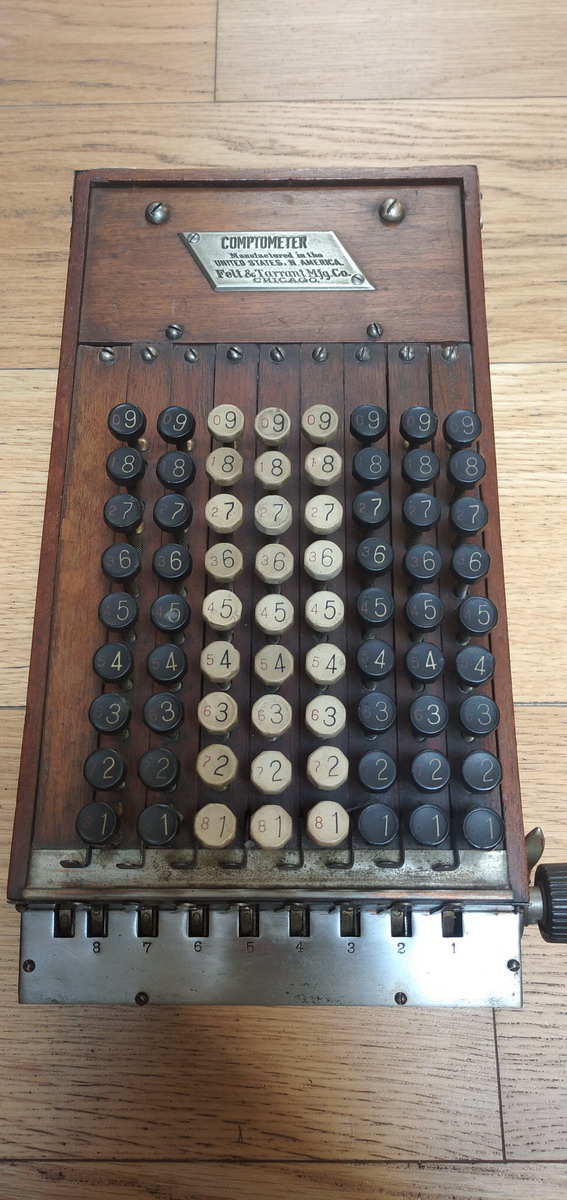
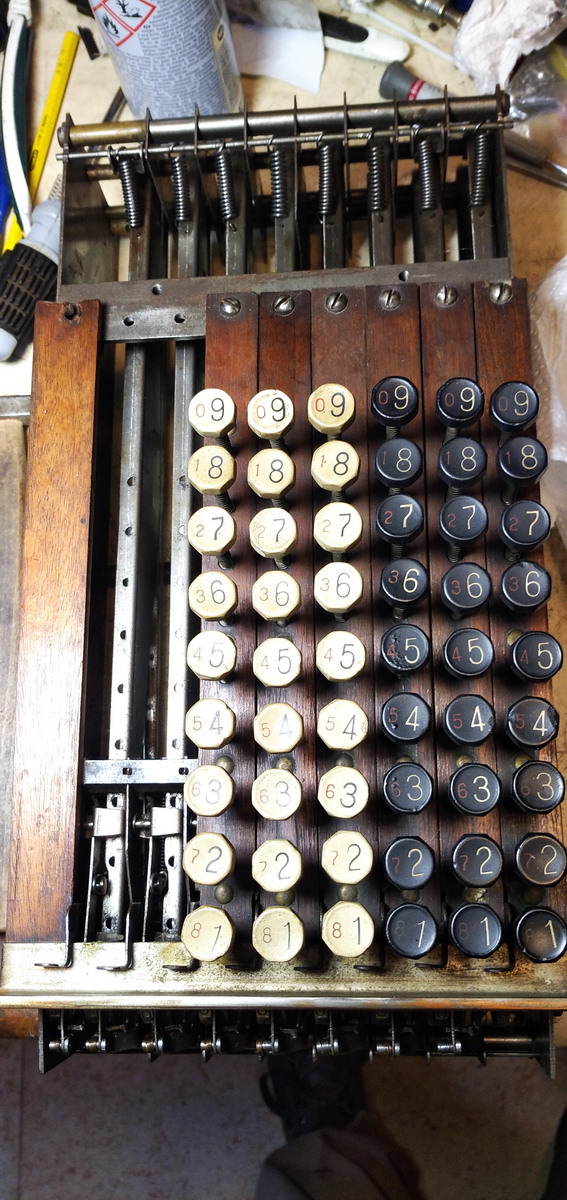
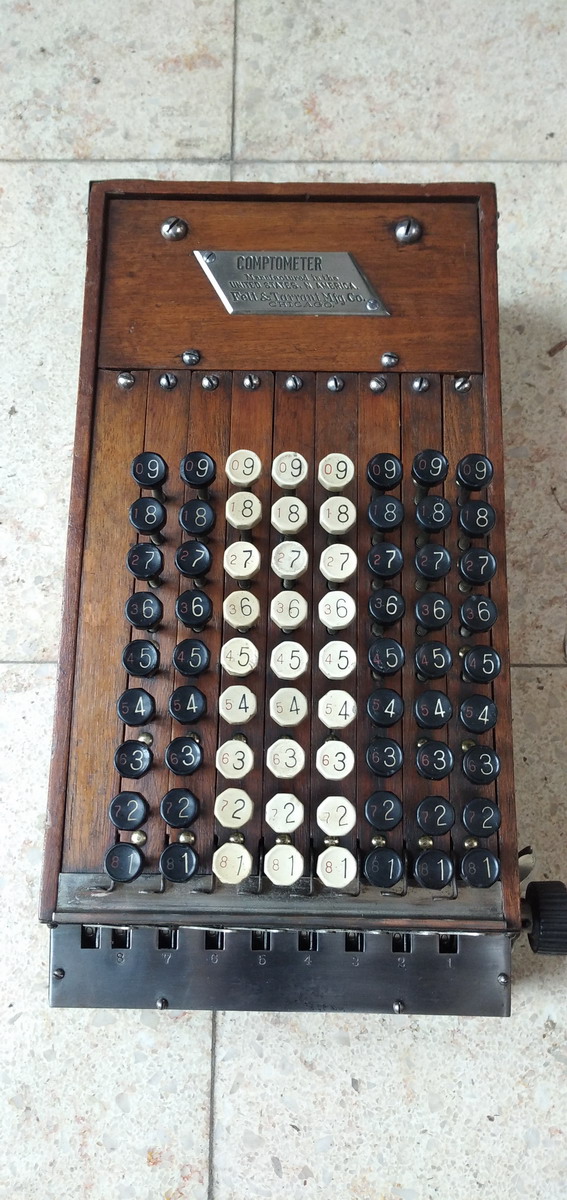
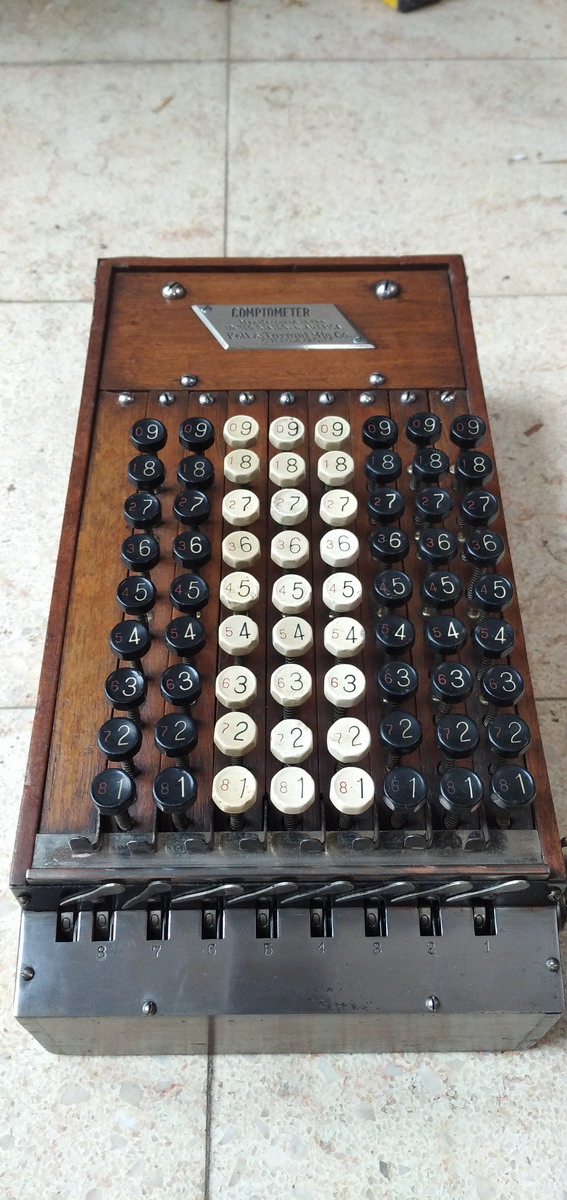
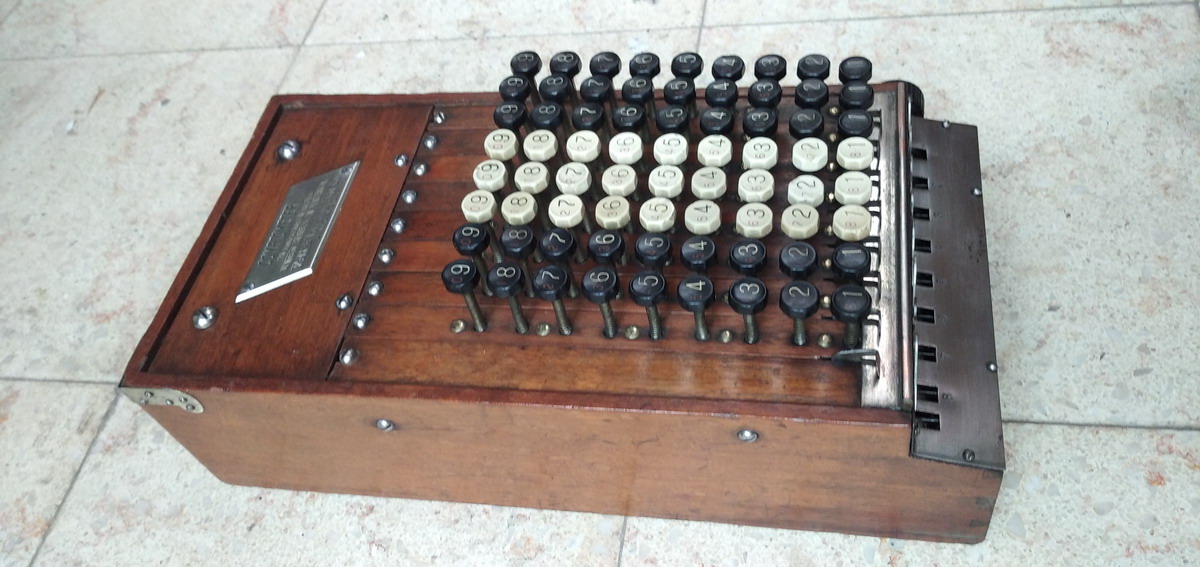
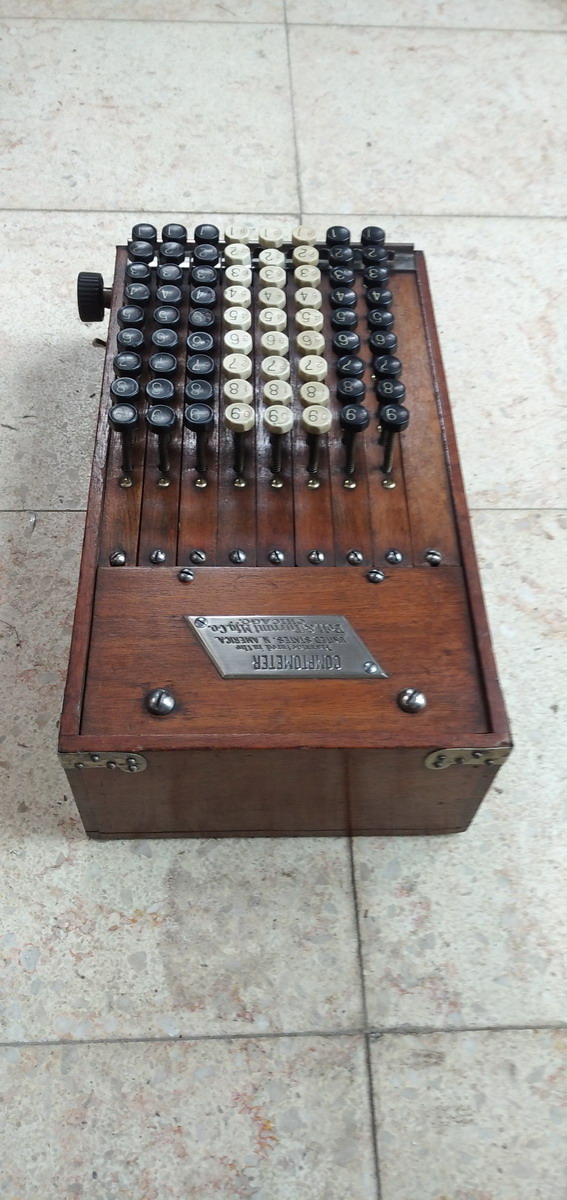
Wood-cased comptometer
I bought this wood-cased comptometer, s/n 5591, for a very reasonable price from a German collector, who had found it on a flea market at the end of the 1980’s, had had it standing around for about 30 years, and now finally decided to sell it. It dates back to late 1902 or early 1903.
It was basically working but “had some problems with the clearing”. That should be easy to fix, right ?
Right ...
So the machine arrived here, and was indeed as described. It would function, but looked and felt quite dirty and sticky, and the clearing would not function, as some rows would not clear entirely, or get stuck at 8, and since the clearing mechanism relies on carries to happen, if one result wheel misbehaves, this also screws up the rest of the clearing. That should simply be a question of opening up the machine, giving it a good clean and oil, and all should be hunky dory!
... right ?
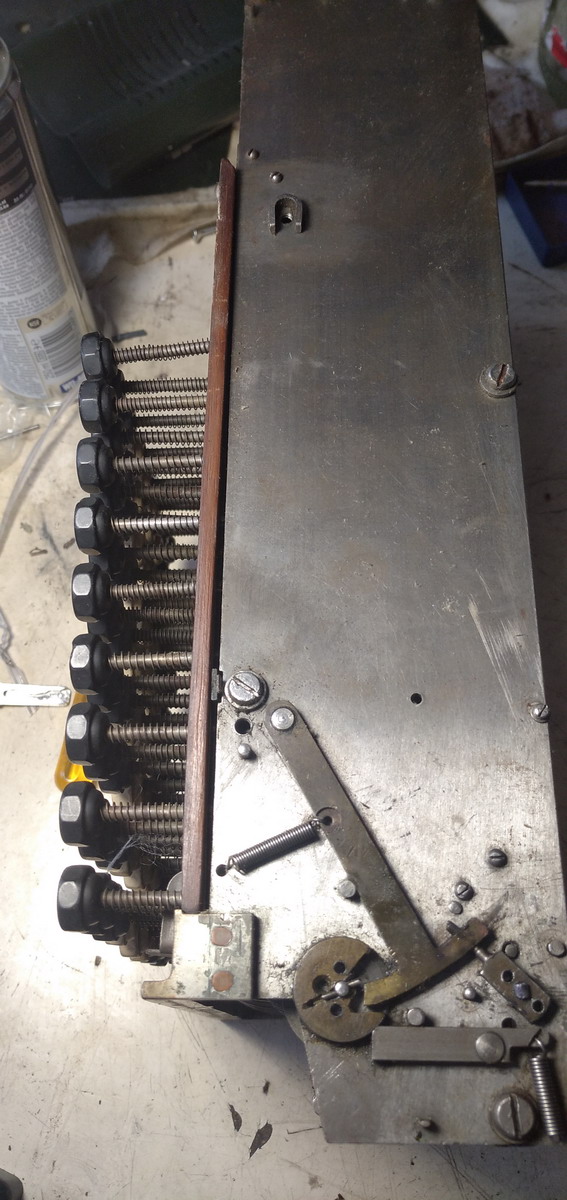
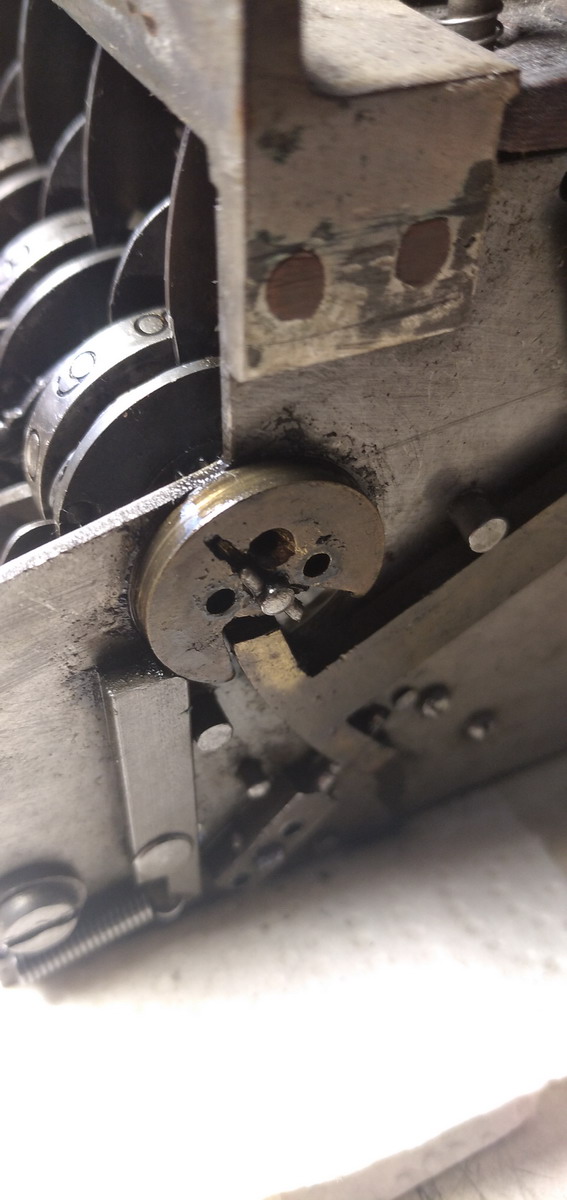
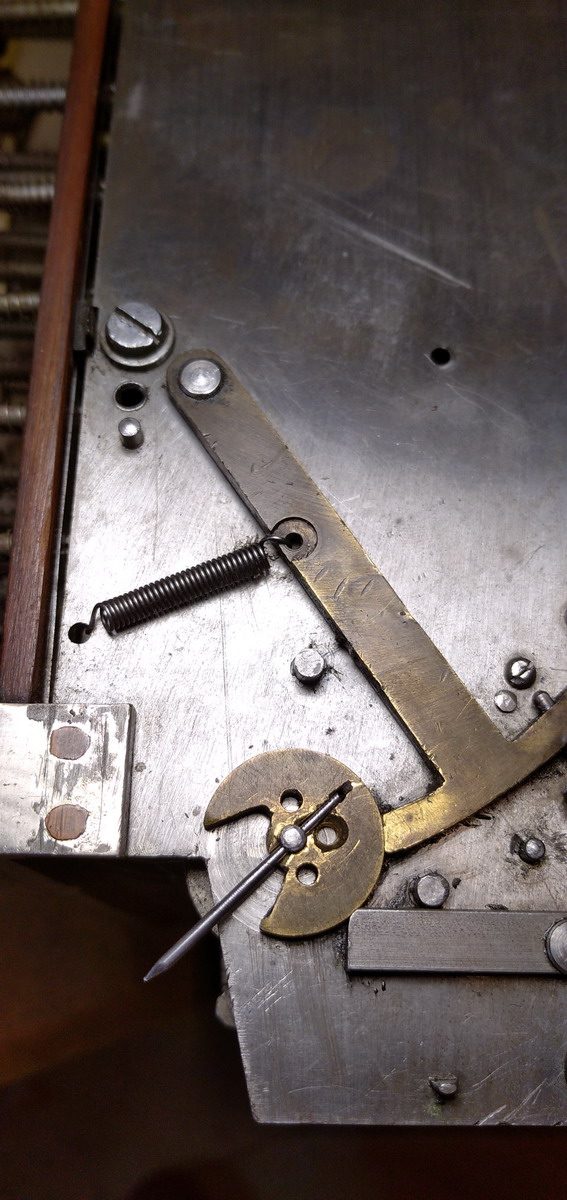
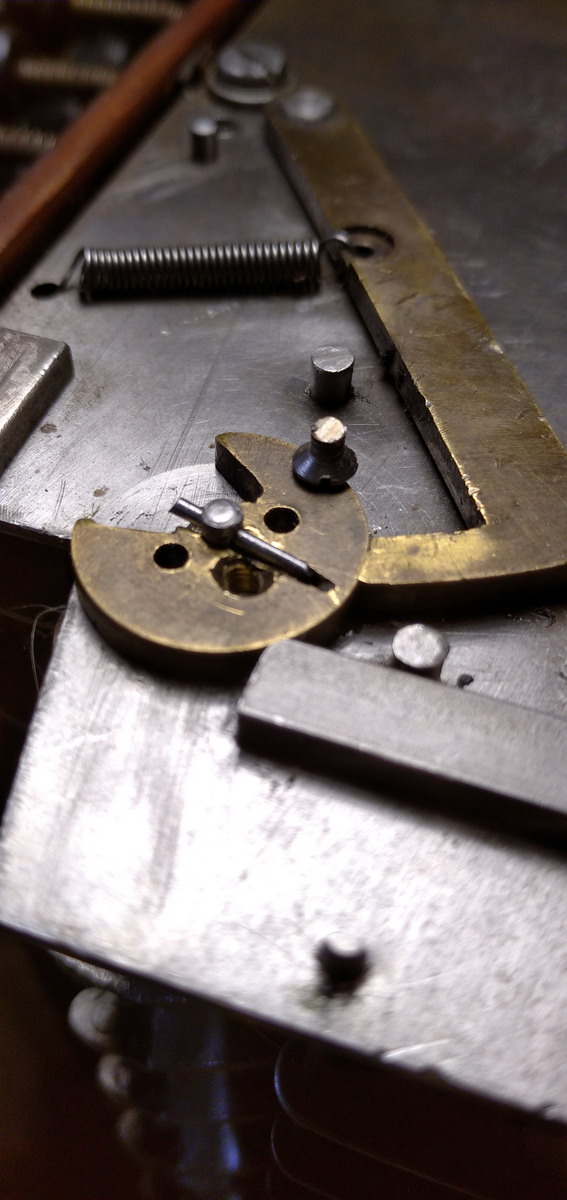
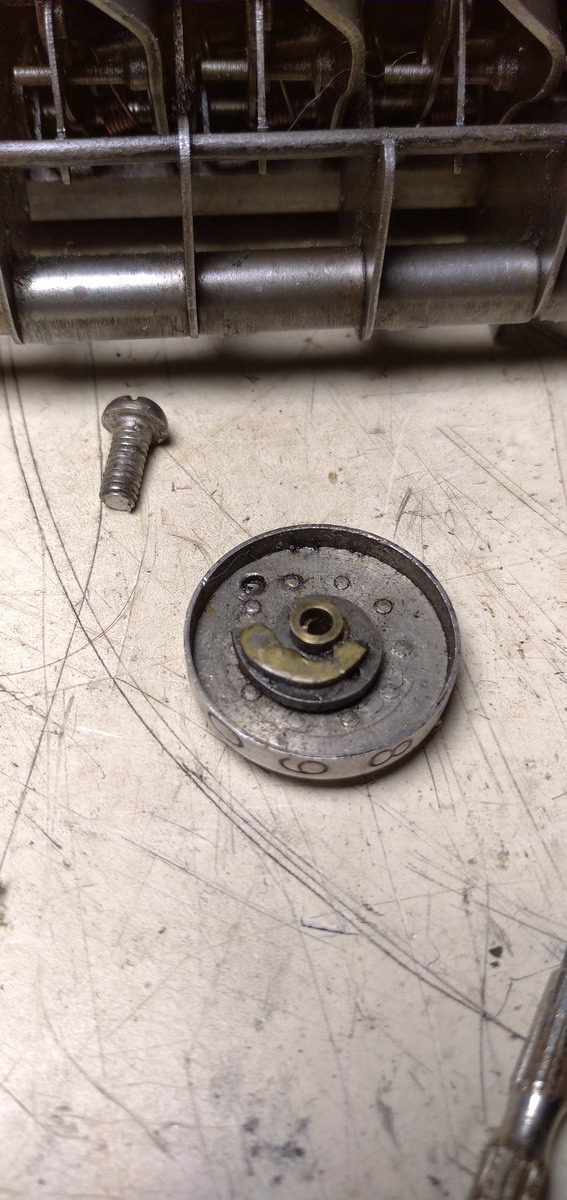
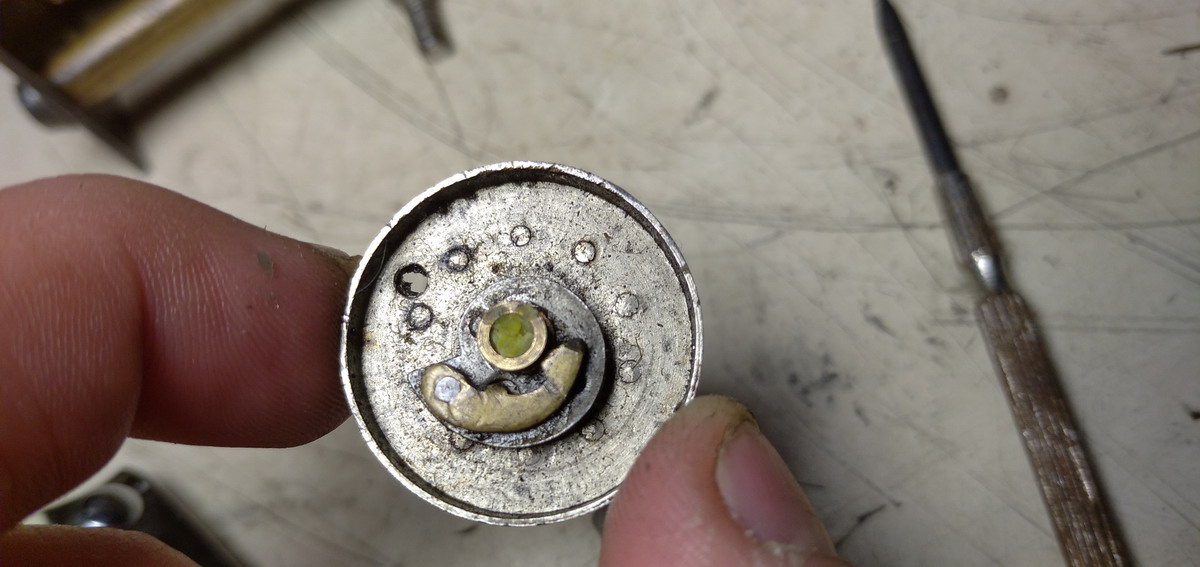
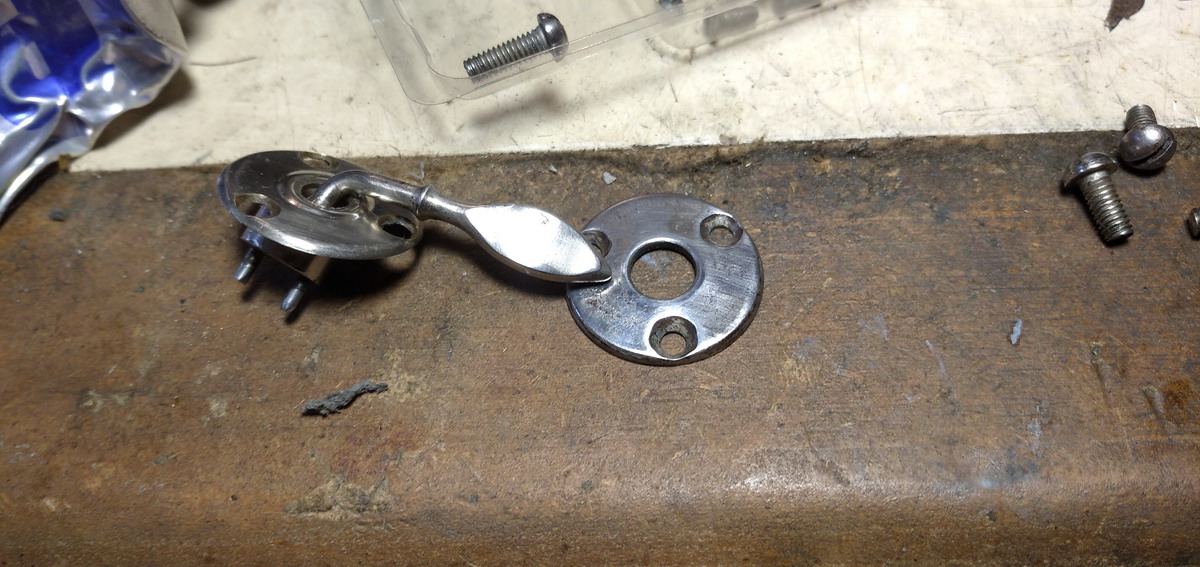
Well, the machine was indeed rather filthy inside, and definitely one of the things wrong was the control wheel for the clearing at the right side of the machine, which had a broken pin and a missing locking screw, which screwed up the timing of the clearing.
Aha - a simple fix! With that fixed, there were still strange misalignments of the result wheels when clearing.
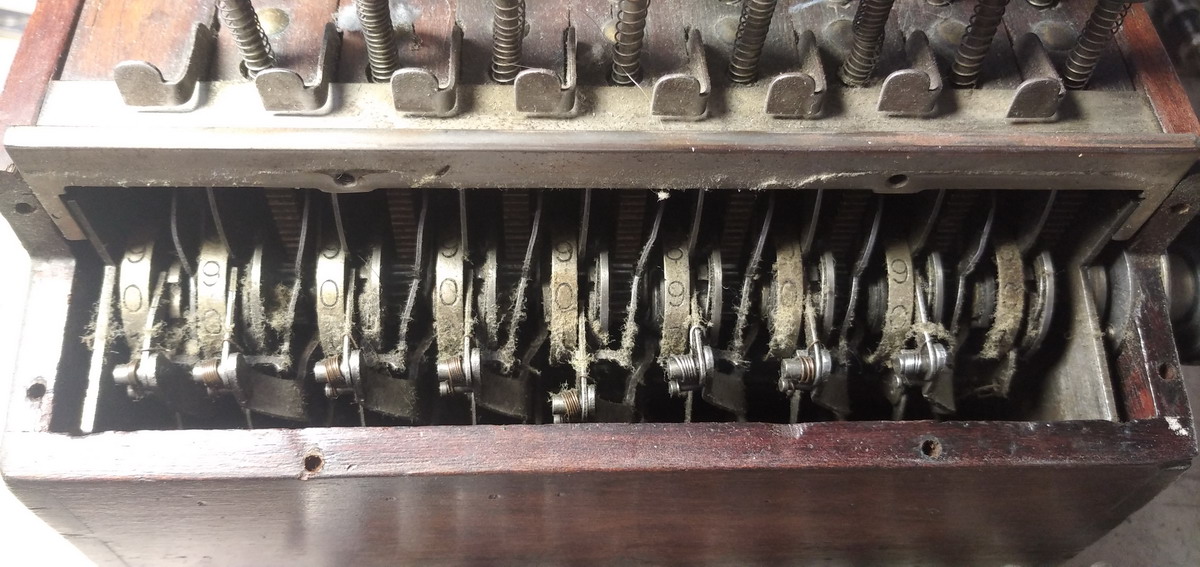
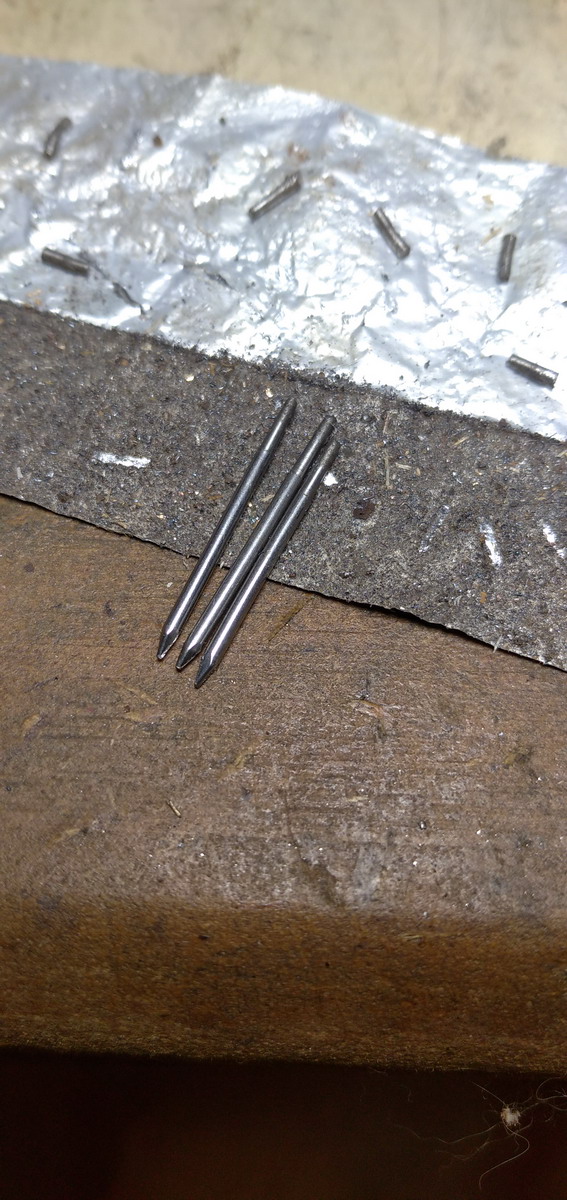
After looking at the patent, it turns out that the shaft running through the result register is drilled for steel conical pins, that are in fact serving as clearing teeth - but this also means they must be removed in order to take the central axle out of the register, and this is a rather fiddly job - they can only be reached with the result wheels in a particular orientation, and the shaft in a particular orientation, and even then they are nearly impossible to photograph. But perseverance pays off, and luckily they are only lightly tapped in place. Once the pins were removed, it was quite clear what the issue was - they were all completely bent to hell.
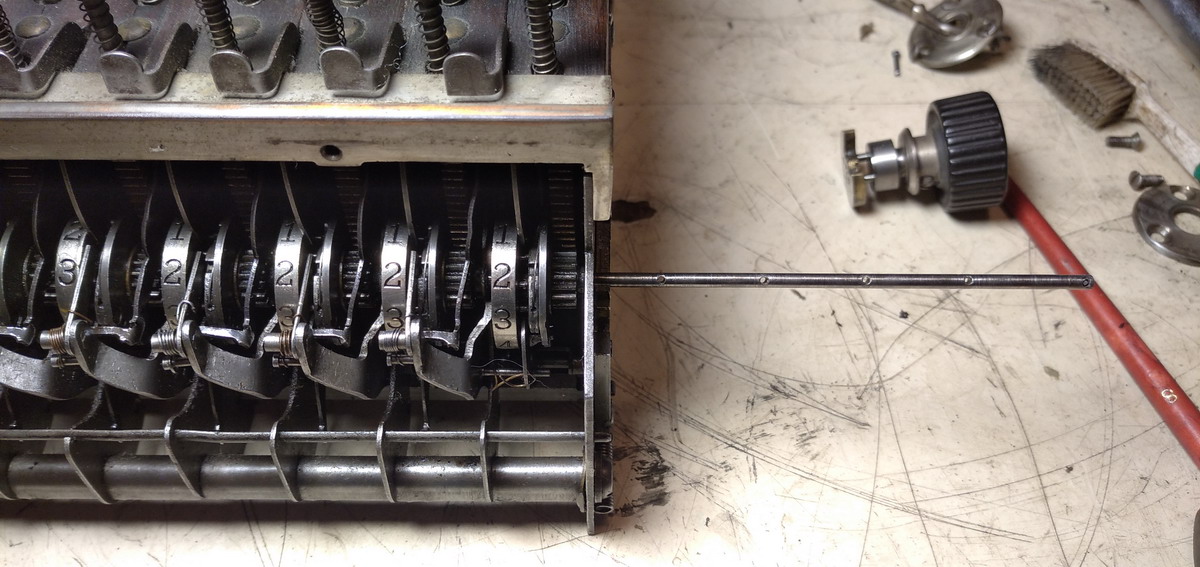
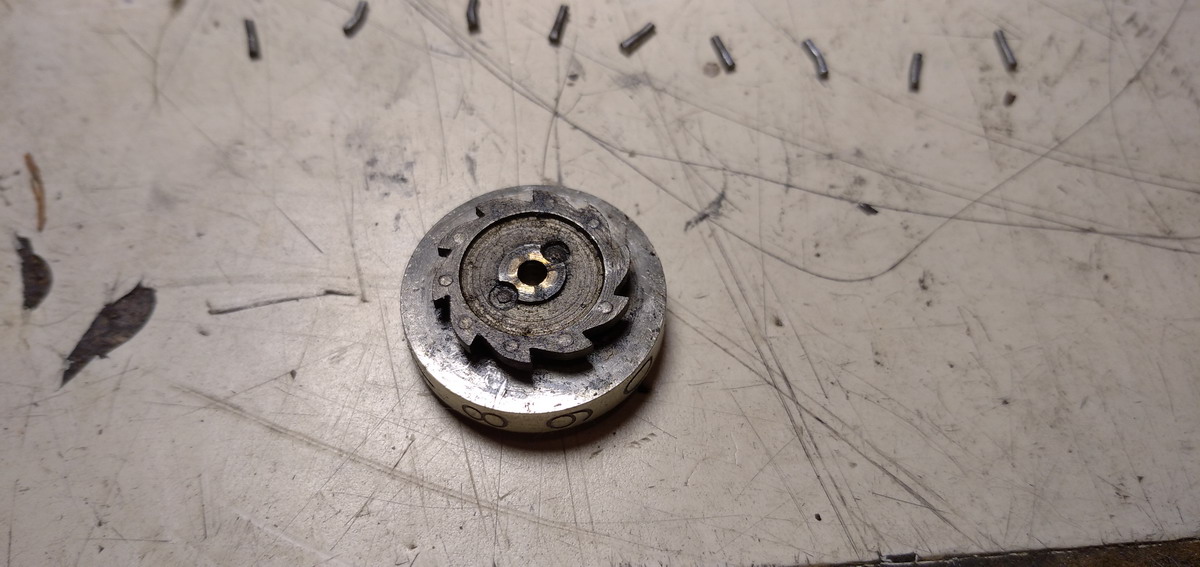
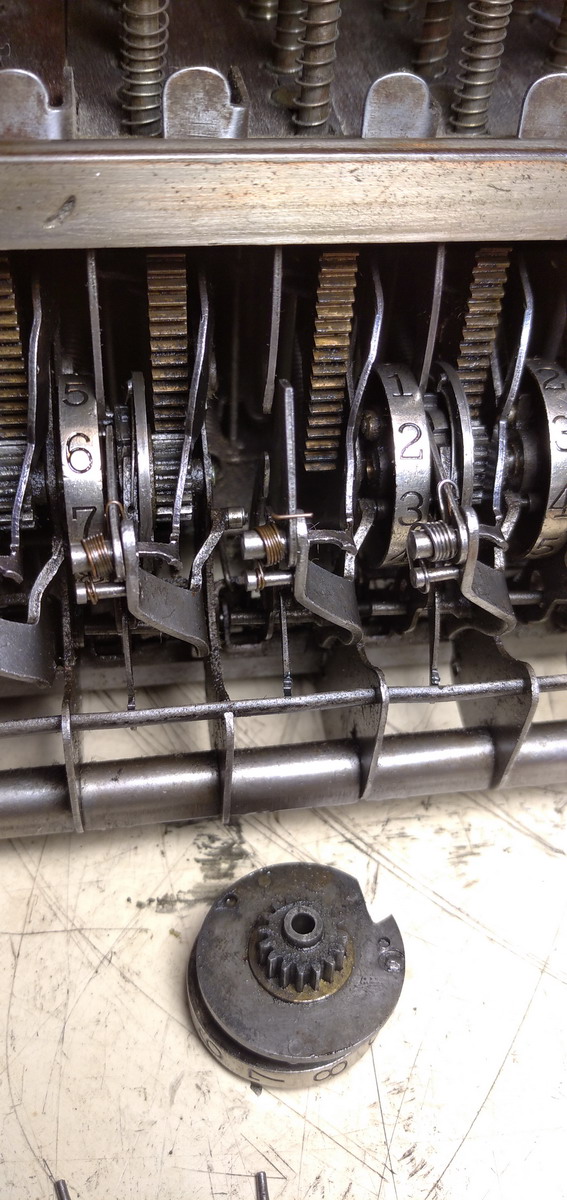
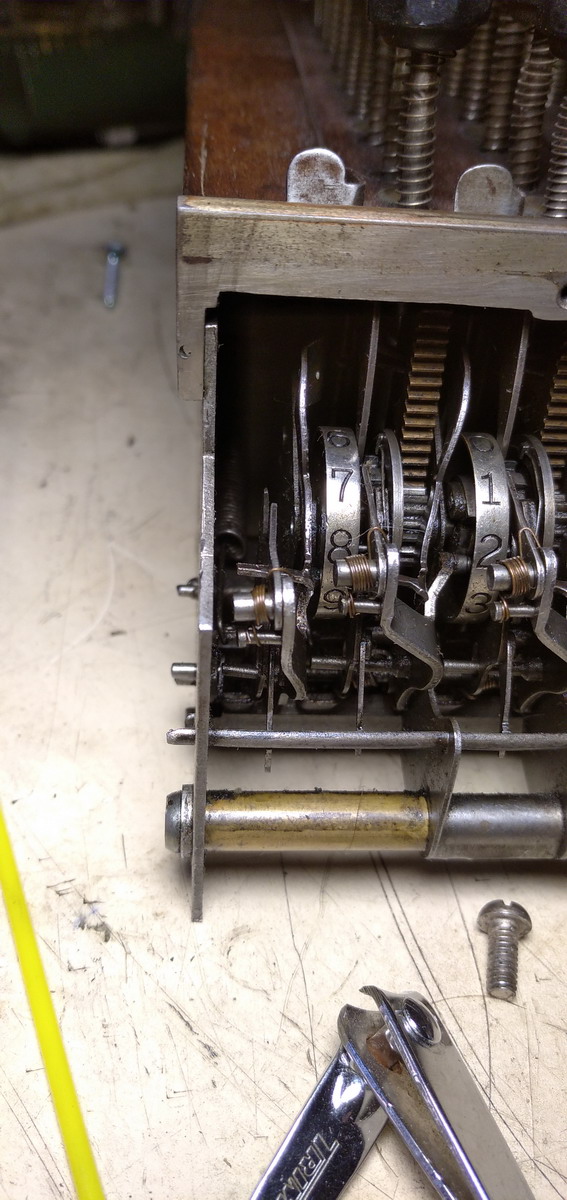
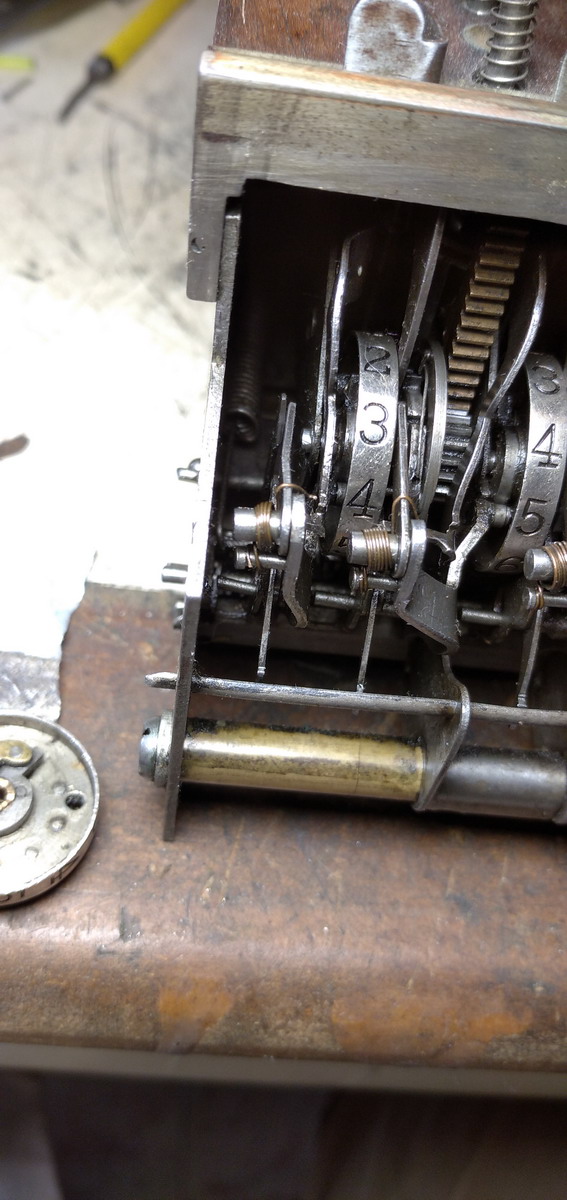
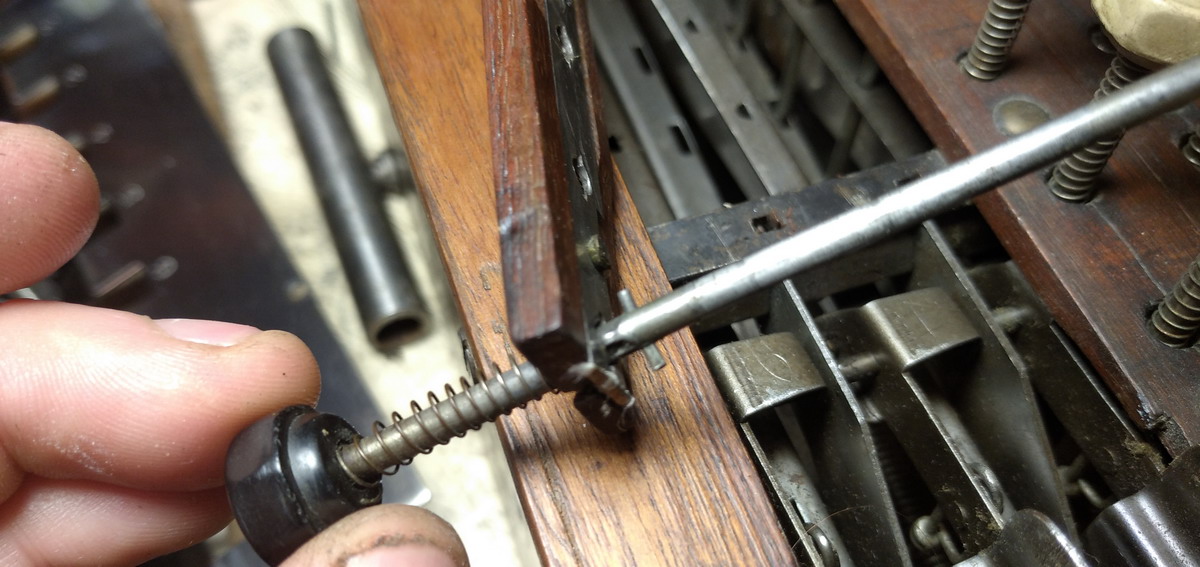
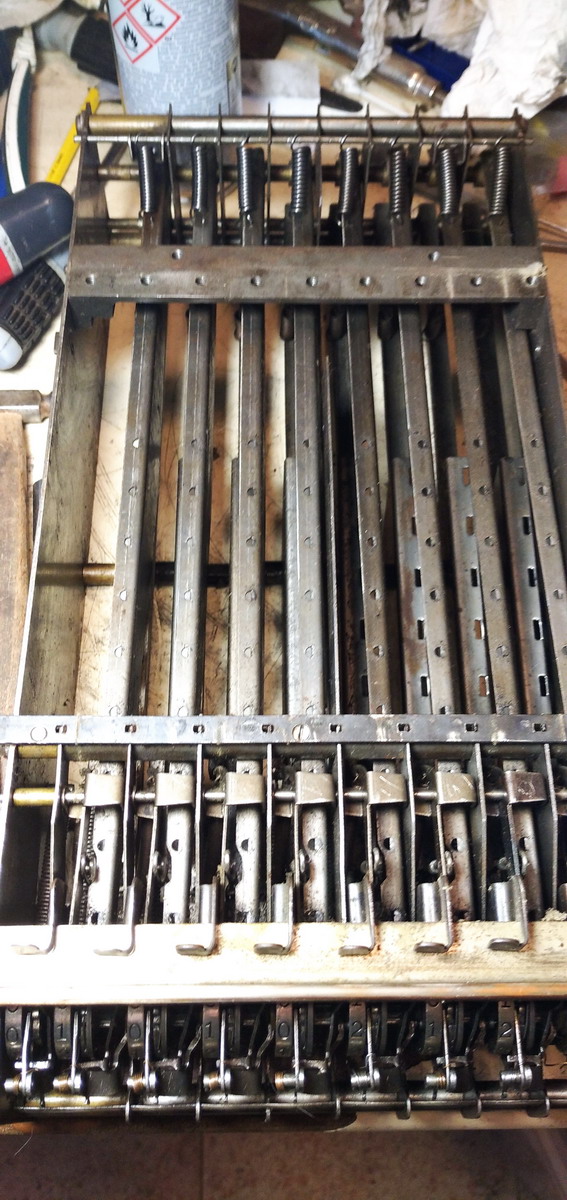
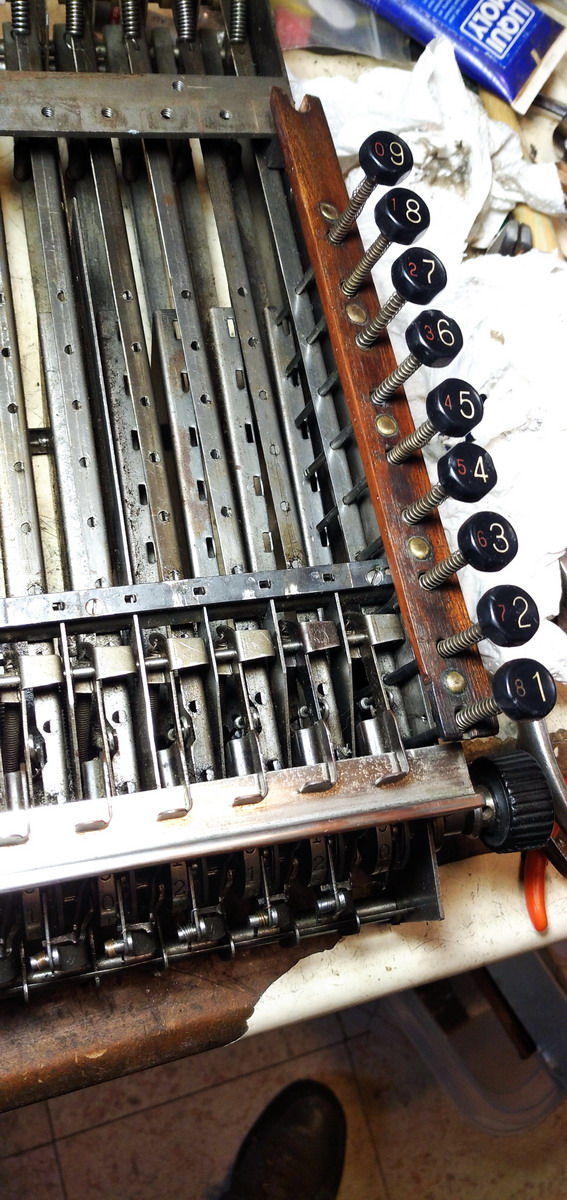
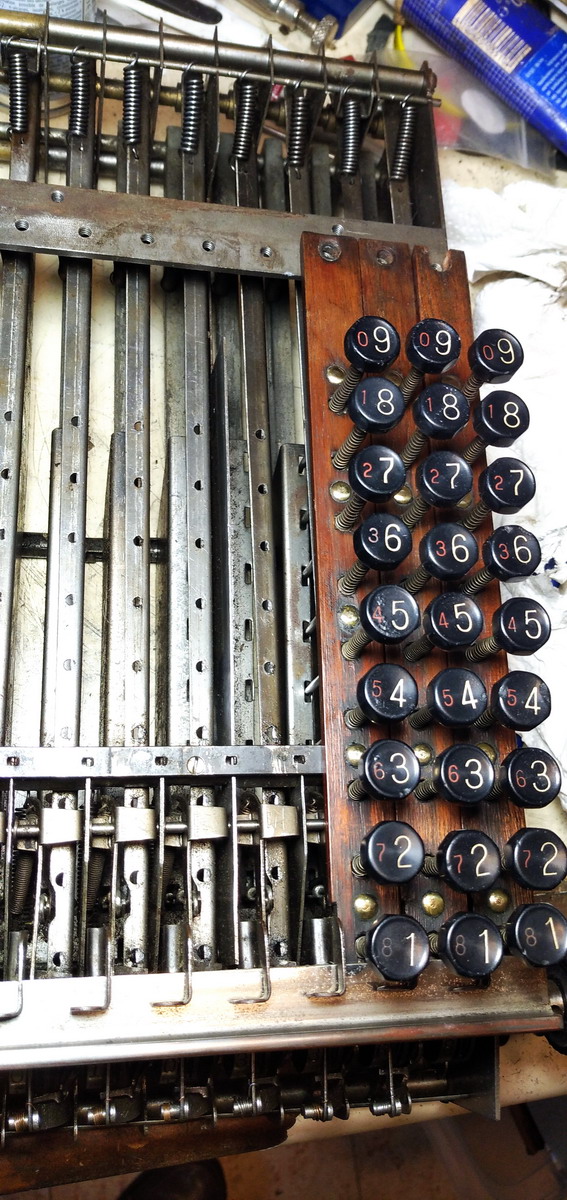
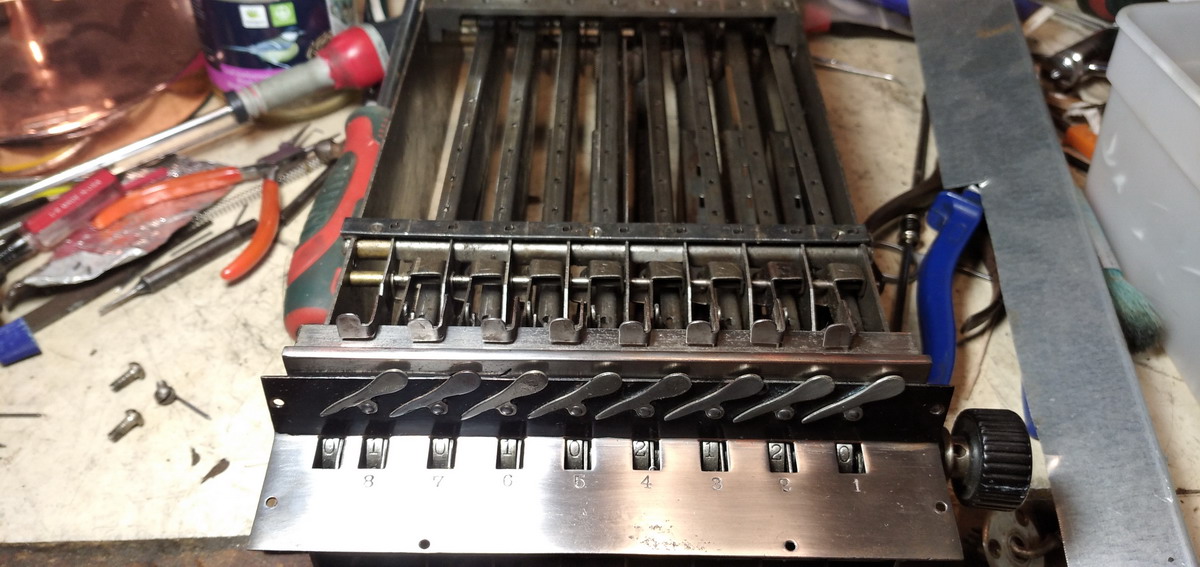
In the next few pictures you can more or less see how an early comptometer functions - the rack operated by the keys is pushed down and rotates the setup wheel to a certain orientation corrresponding to the number on the key. When the key is released, the rack and setup wheel rotate back until the stop of the setup wheel, taking along the numeral wheel via the ratchet system on the left side of the setup wheel.
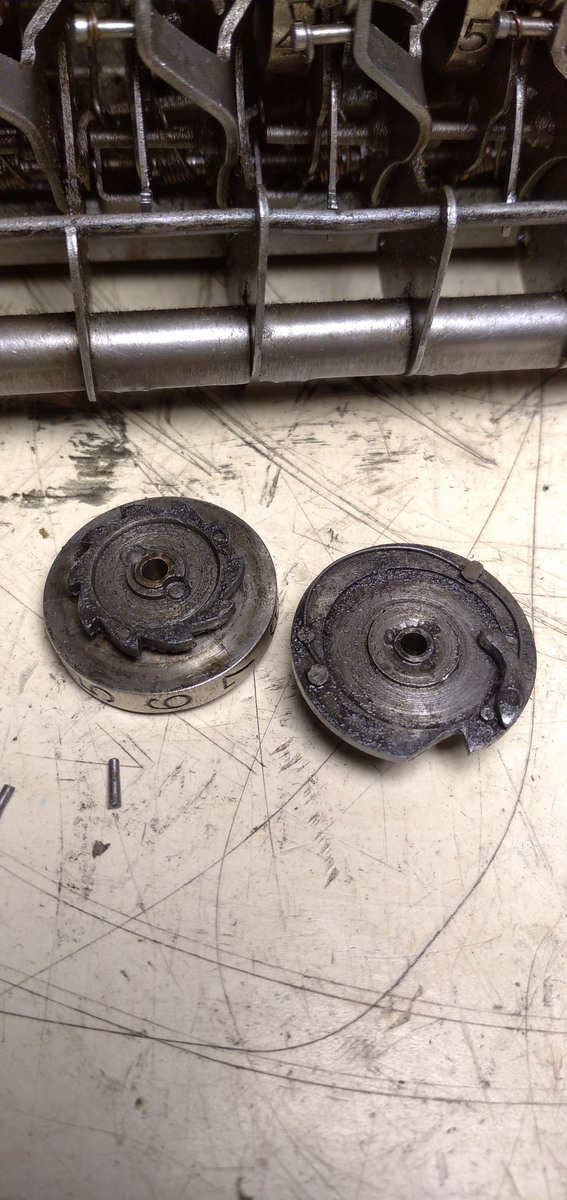
The other (hollow) side of the result wheel shows the second ratchet which interfaces with the conical pin on the central axle, which is rotated for clearing.
The keys are kept in their correct orientation by their shaft being half-ground away, which goes through a corresponding half-moon-shaped hole in the rack. The length of the ground-away part determines how deep the key can be pushed (the end comes up against a hard stop in the bottom of the machine), and the location of the step determines how much the rack moves by pressing the key.
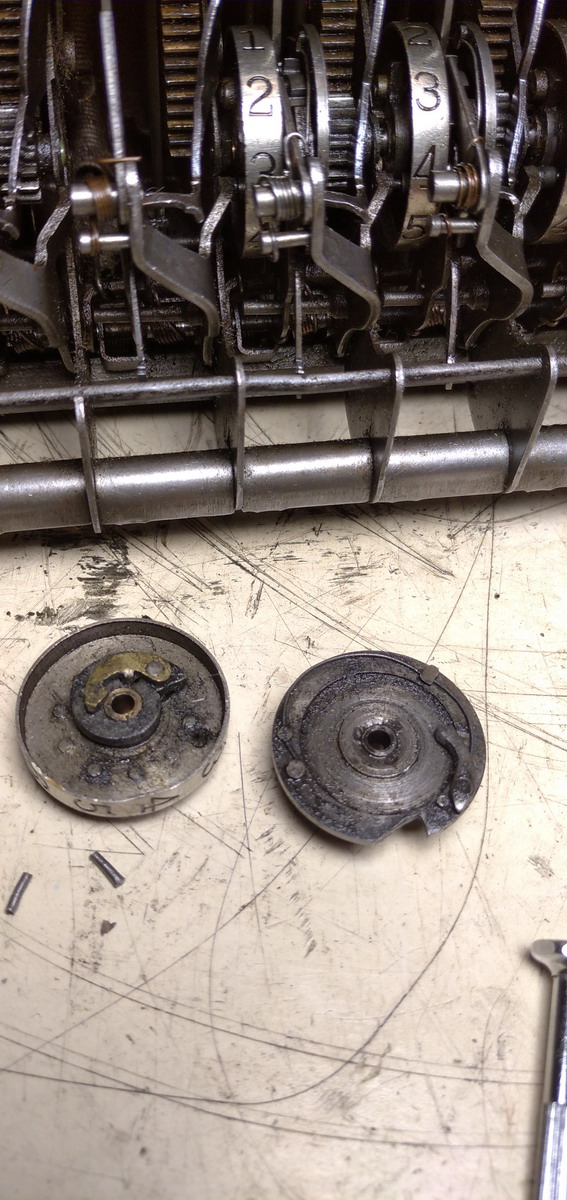
The last result wheel is much simpler, as it doesn’t need to be operated by a key, it just serves as an indicator for carries from the next to last wheel, which makes it much simpler
On the other hand, it makes the conical pin for clearing it, which is sitting snuggled right up to the left side plate of the machine, nearly impossible to reach, to take out, and especially to put back ... the fact that there is a tiny brass spacer in between that needs to be put in place too doesn’t make things easier either.

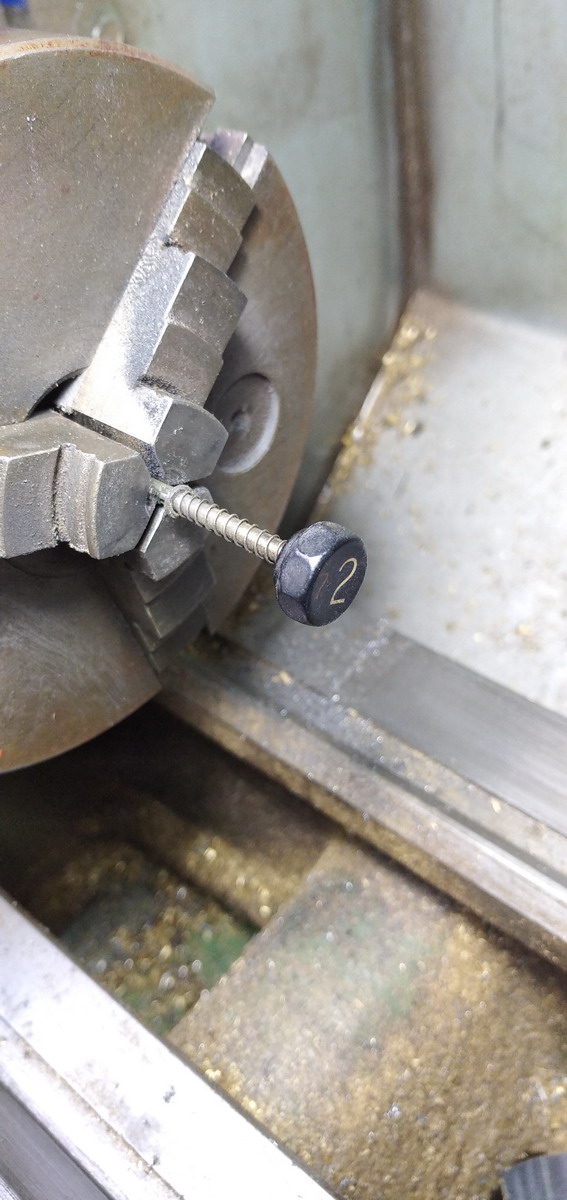
But once the register was reassembled, I could set about remaking and replacing the steel pins for the clearing. This was a process taking several hours where a conical pin was turned on the lathe, cut off, inserted to determine how much needed to be ground off the length to make it not catch anything else than the ratchet tooth of the clearing ratchet, grinding it to length, then reinstalling and testing. Lather, rinse, repeat, if the test was not succesful.
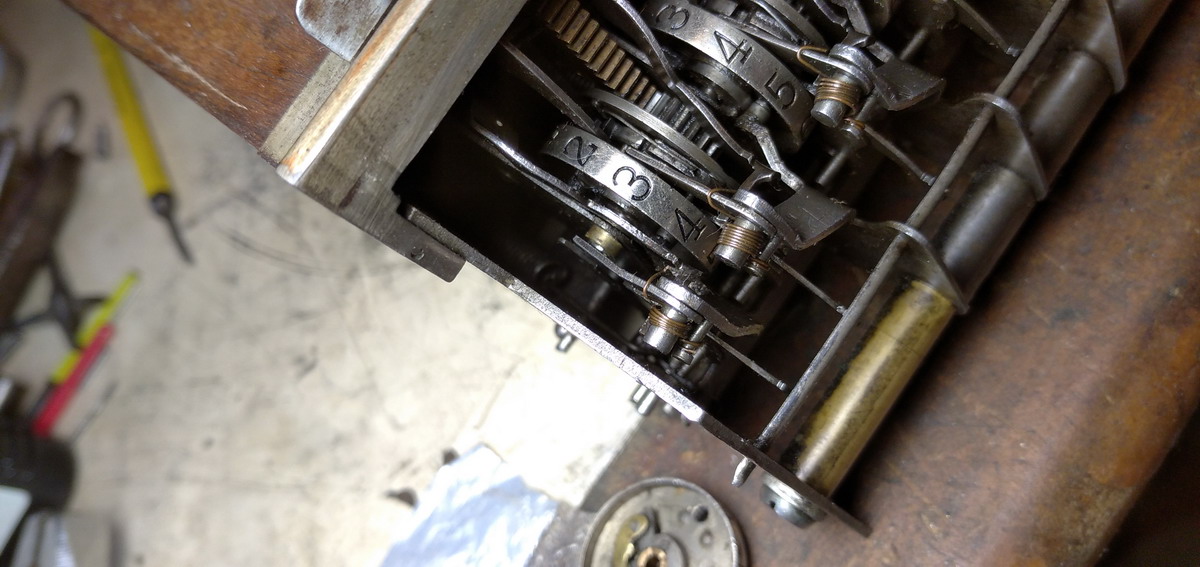
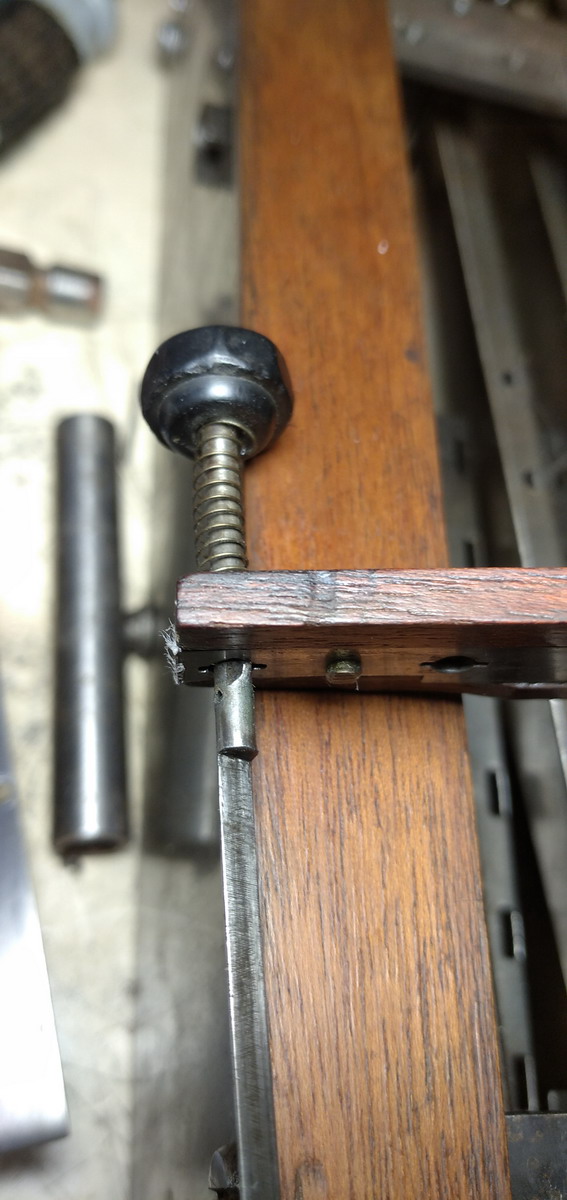
This went swimmingly, until I arrived at the middle of the register, where one of the wheels (column nr. 5, the one that I took out - this in itself is generally a bad omen ...) would consistently clear to 1 instead of zero, because of an “extra” tens carry that happened for some reason or other. After continuing to install all the pins, I returned to this issue. It is very hard to determine exactly what is going on with the carries, because the carry arm is spring loaded and no matter how slowly you trip it, the carry process is lightning fast. But looking very carefully it became clear that the rack was not returning entirely to its zero position, and also that the setup disk was oriented incorrectly with respect to the rack. See the picture above. This would mean that the result wheel and setup disk somehow needed to be disconnected from the rack, and if the disks were to move, that meant the axle had to come out, and for the axle to come out, all the conical pins would have to come out too ... something I didn’t really feel like doing, especially since I had continued installing them all the way through to the left of the register, including the very difficult one at the far left.
The other option was to disconnect the rack at the back, shift it back to disengage it, then bring the setup wheel into the correct alignment, and push the rack forward again to engage with its now correctly oriented gear. This took a few tries, because there turn out to be several things that you need to watch at once, but in the end it worked fine, and no painfully installed conical pins had to come back out. Phew.
After verifying the machine now worked and cleared correctly, it was on to cleaning.
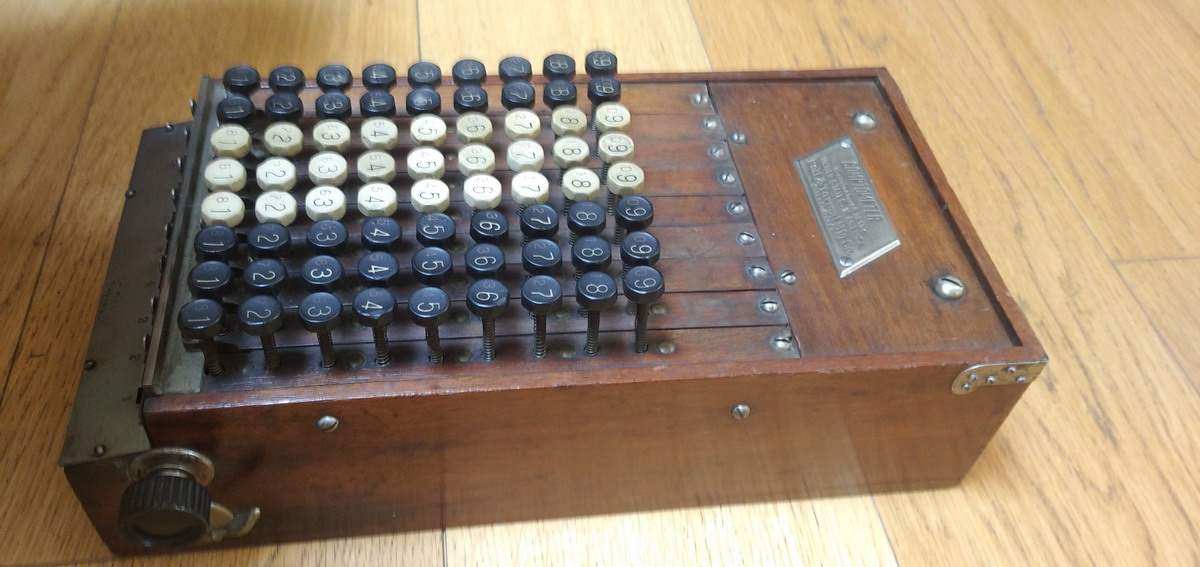
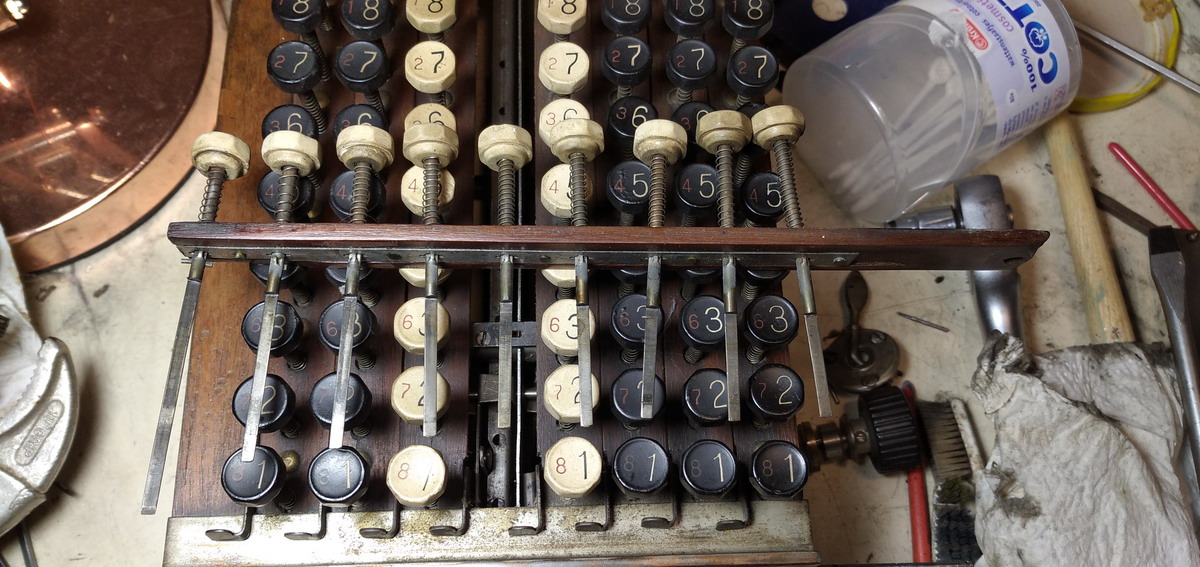
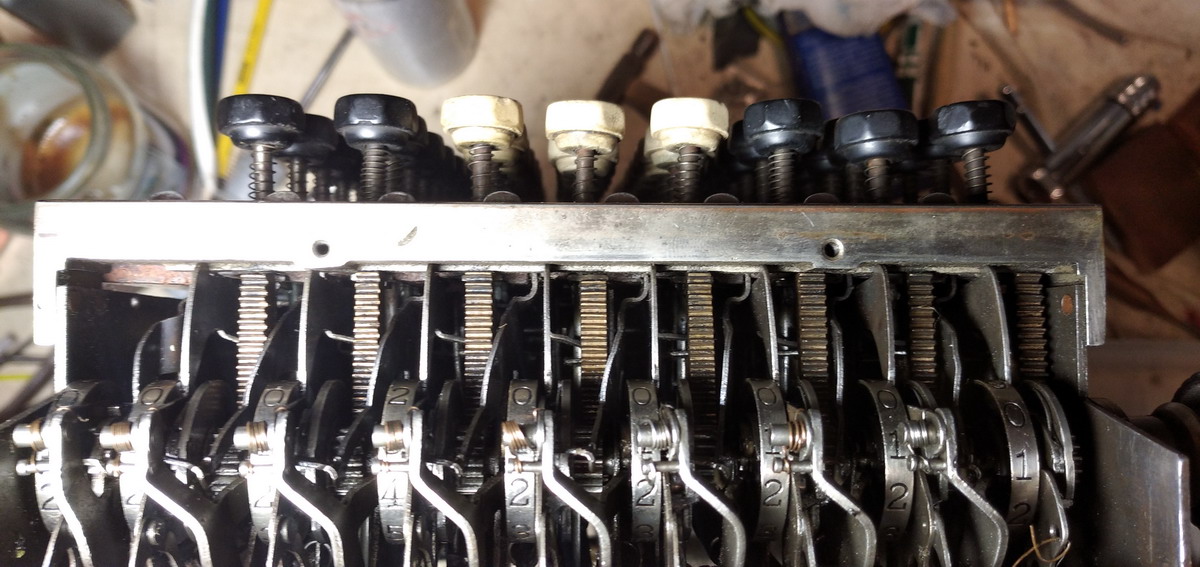
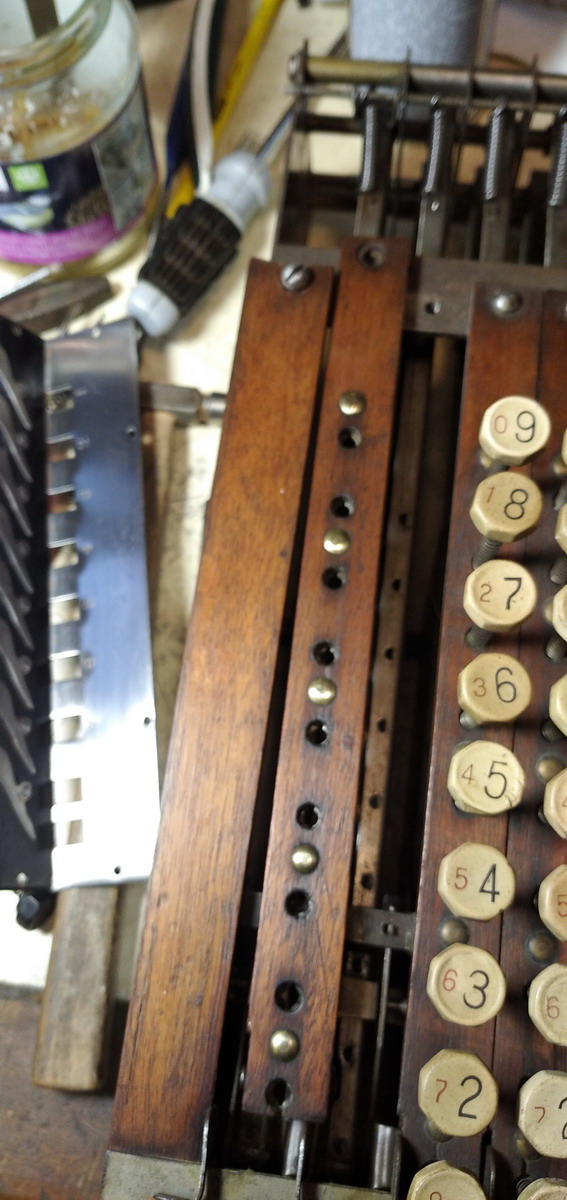
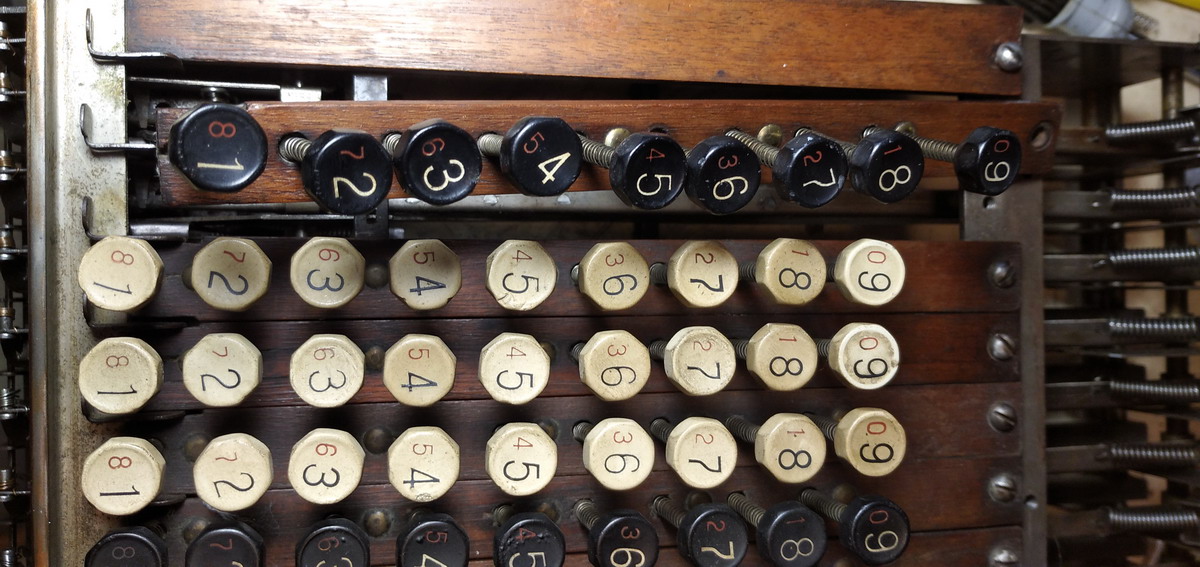
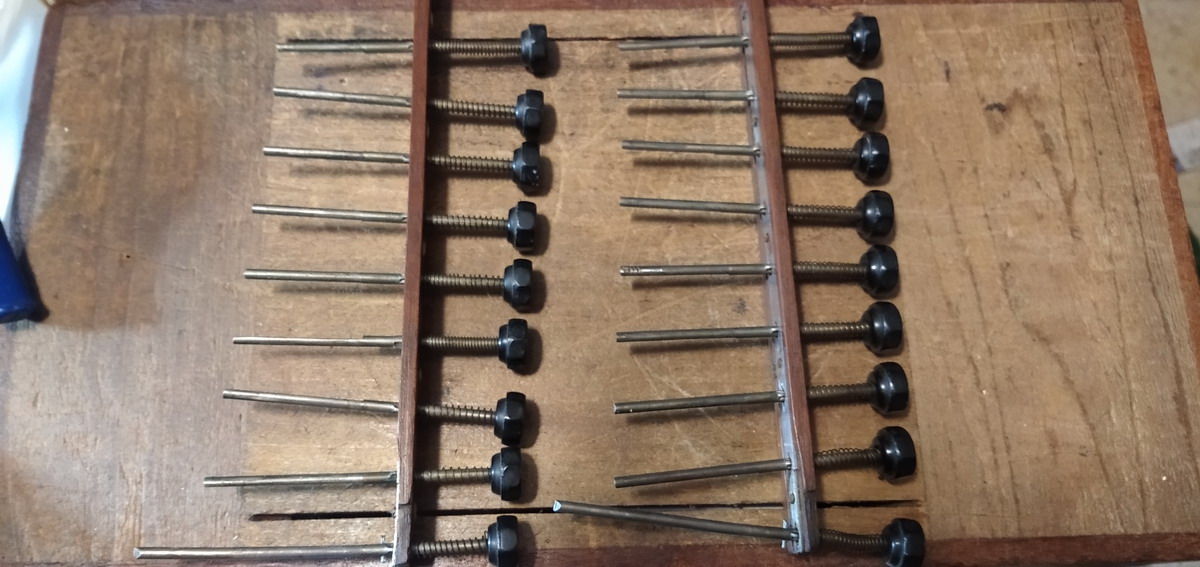
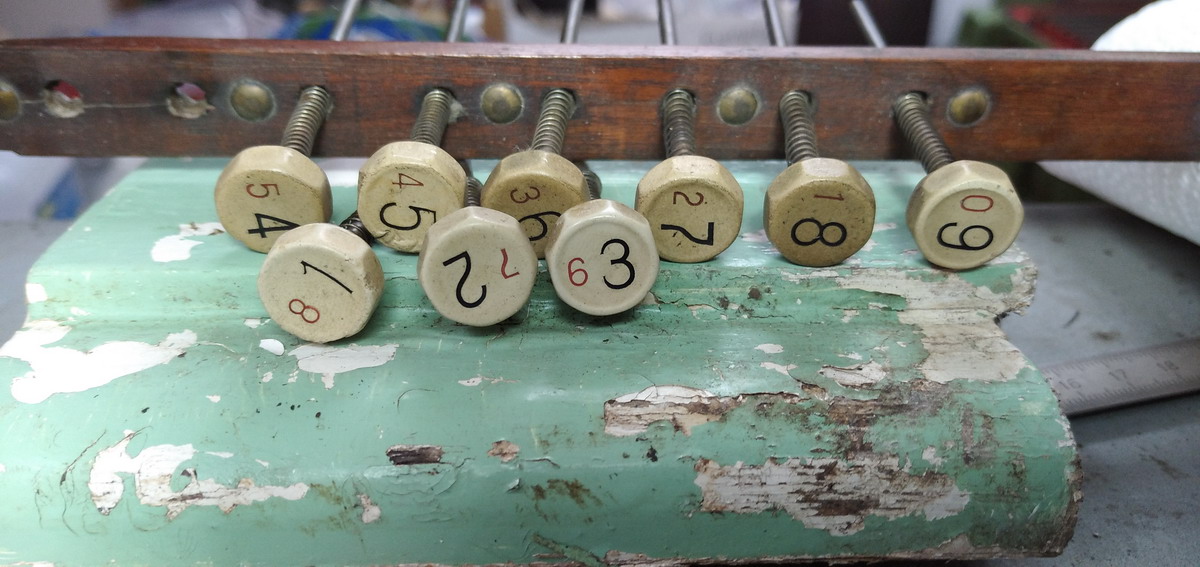
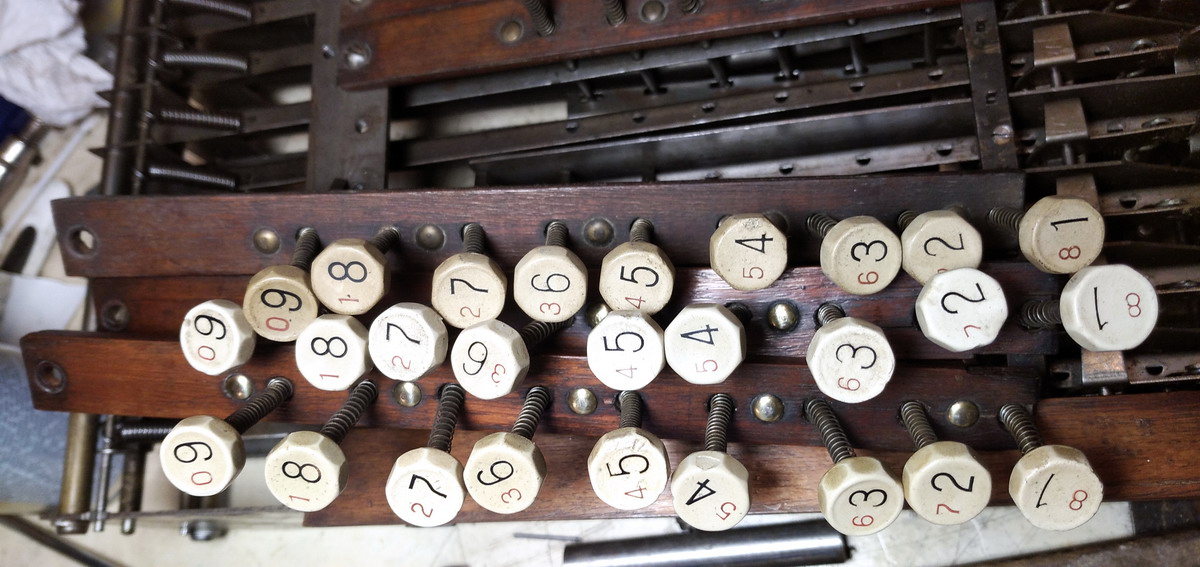
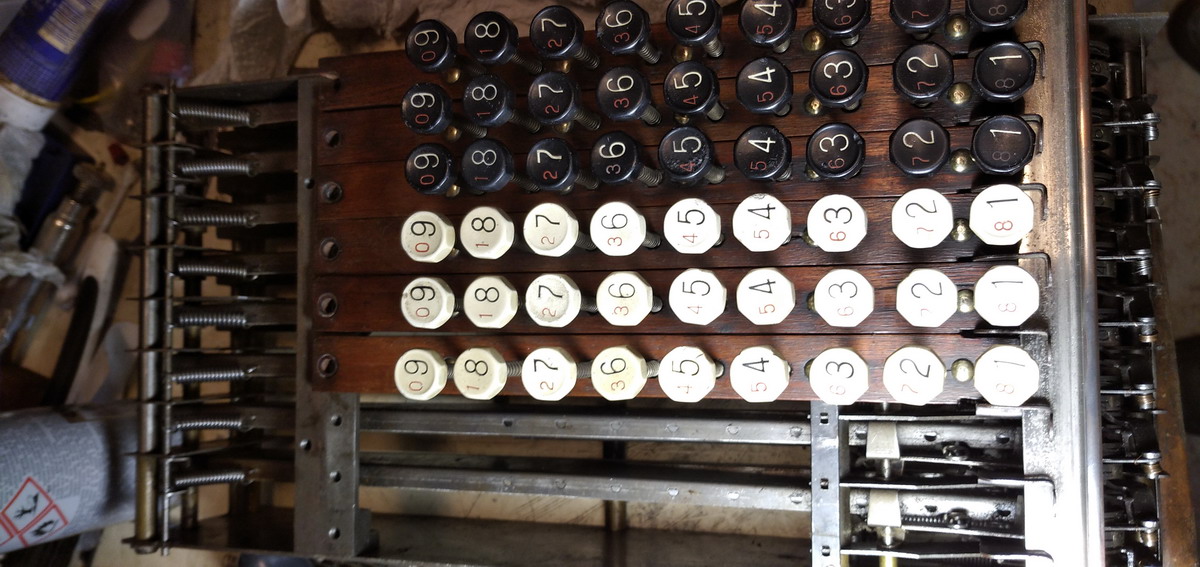
That, however, took a while. In order to properly clean the keys, they needed to come off. In order to do that, you undo the screw at the back of the wooden slat, push down on the tilt bar under the key set, and then you can wriggle it out of the machine. Reassembly is the reverse of disassembly, as any good technical manual will tell you, but in this case, it is true, and there are no hidden bear traps or crevasses. The “1” key has a hole drilled through the stem with a pin, which needs to be taken out. The keys then need to be rotated 90° in order to slide through the capital-phi-shaped hole in the metal plate that sits under the wooden slat.
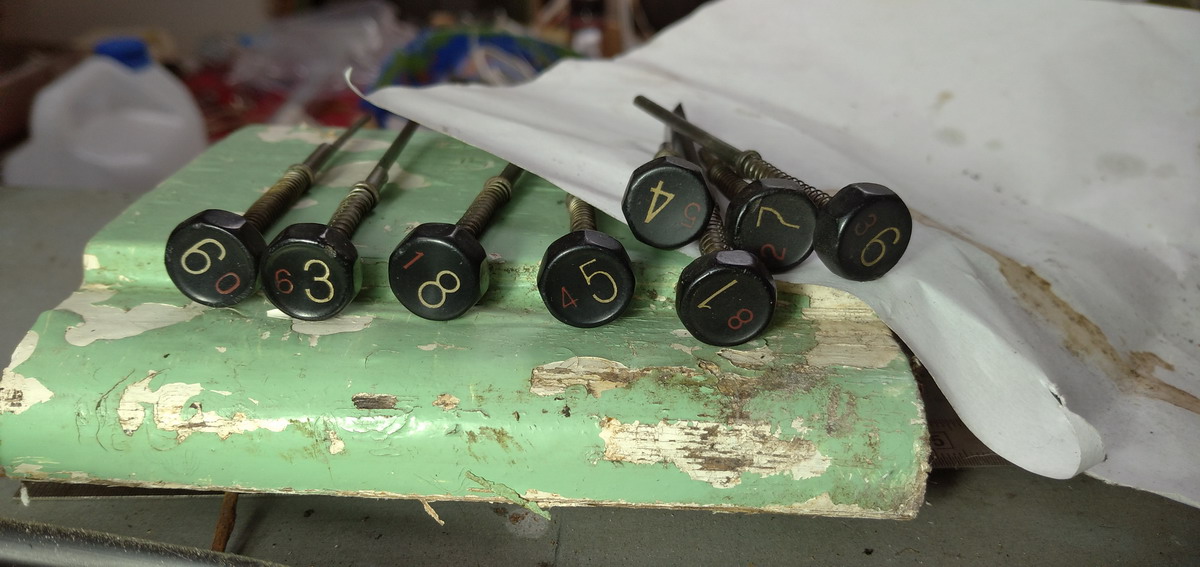

I then chucked them (technical term...) in the lathe, and cleaned them all up, all 72 of them. The wood was also cleaned and waxed.
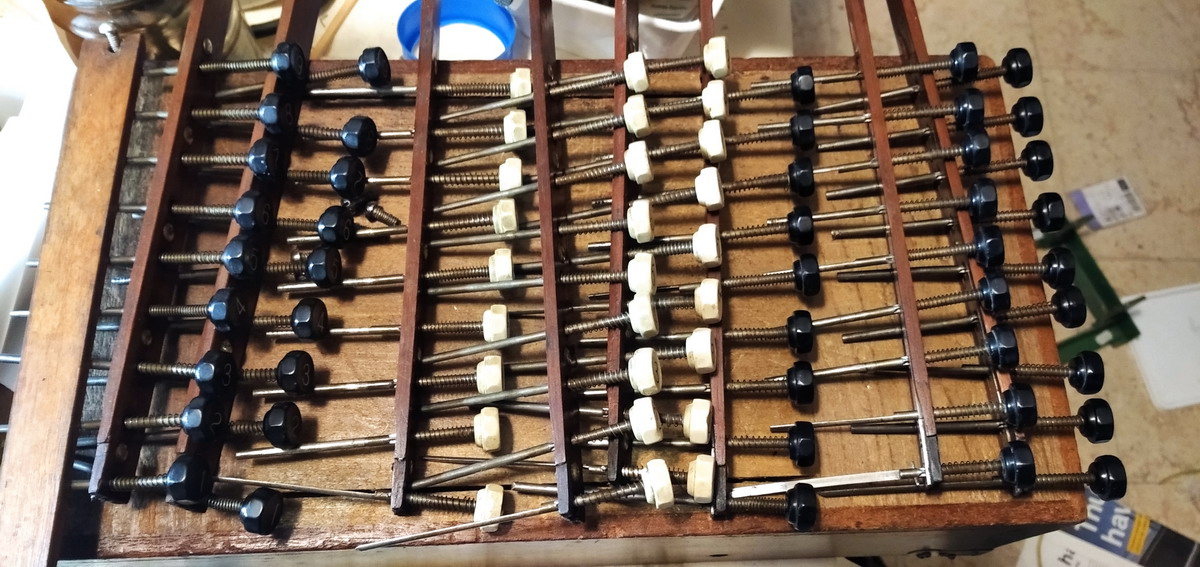
After all the columns were put back into the machine, they were all tested, as were the carries and the zero-setting of the register. After some adjustments, it all worked, and the rest of the metalwork could be polished.
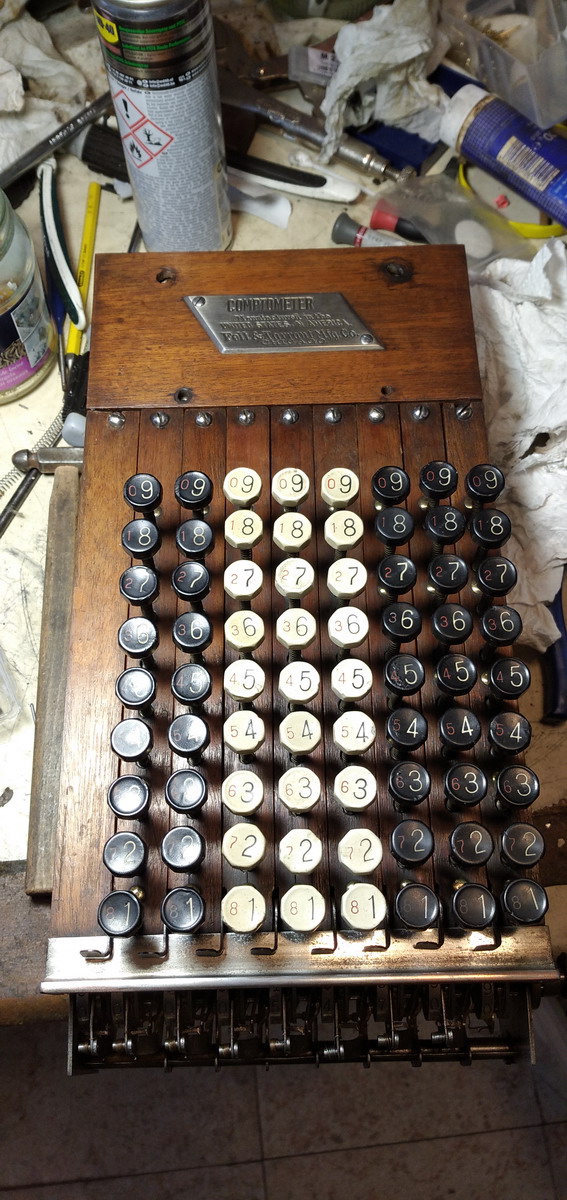
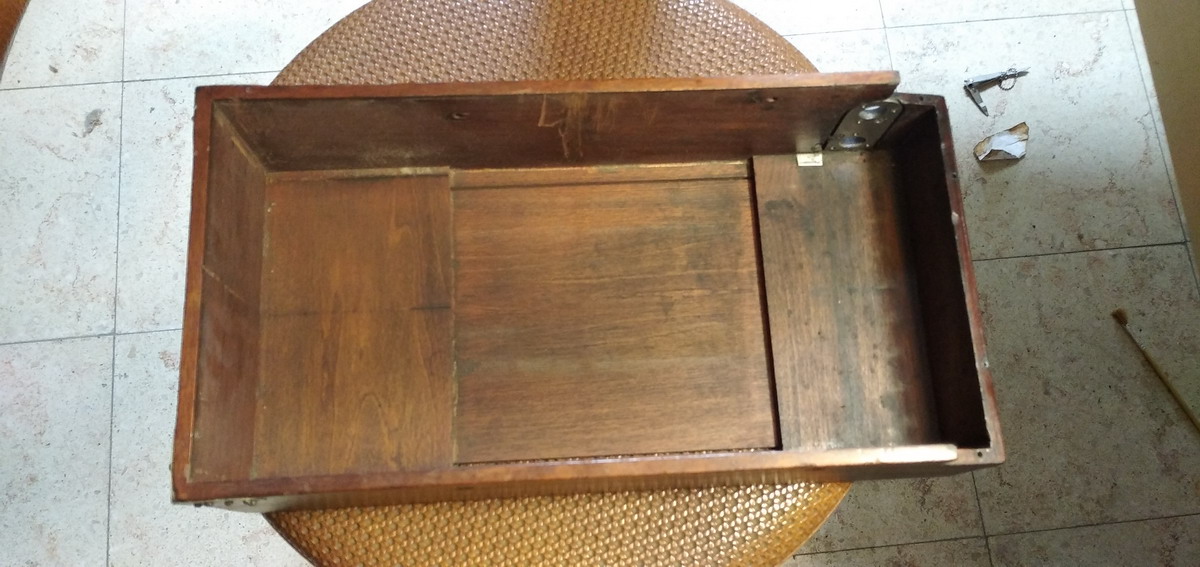
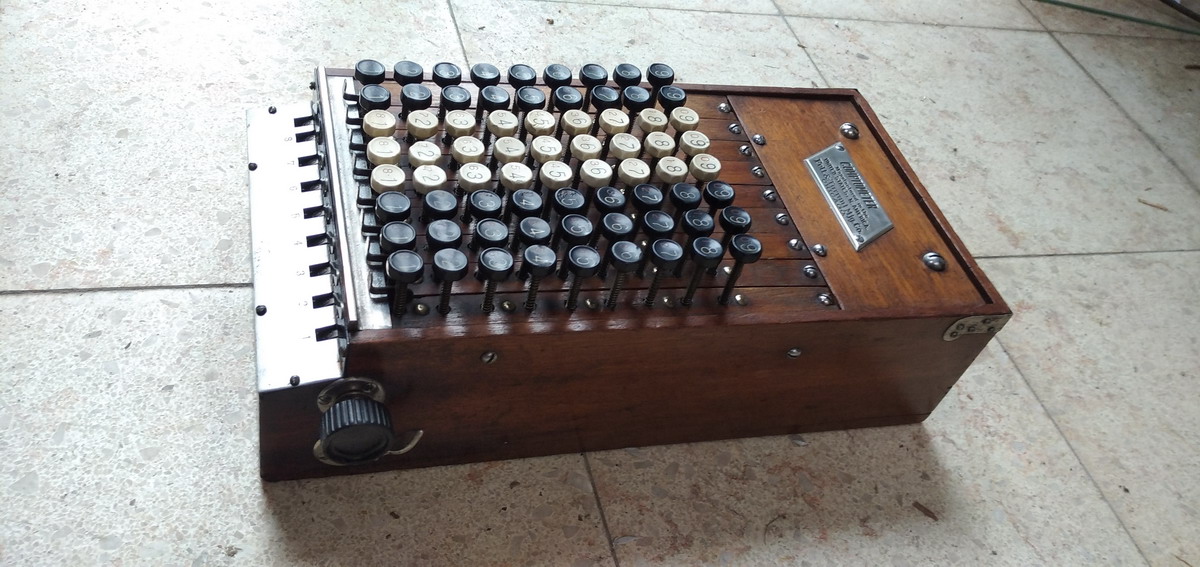
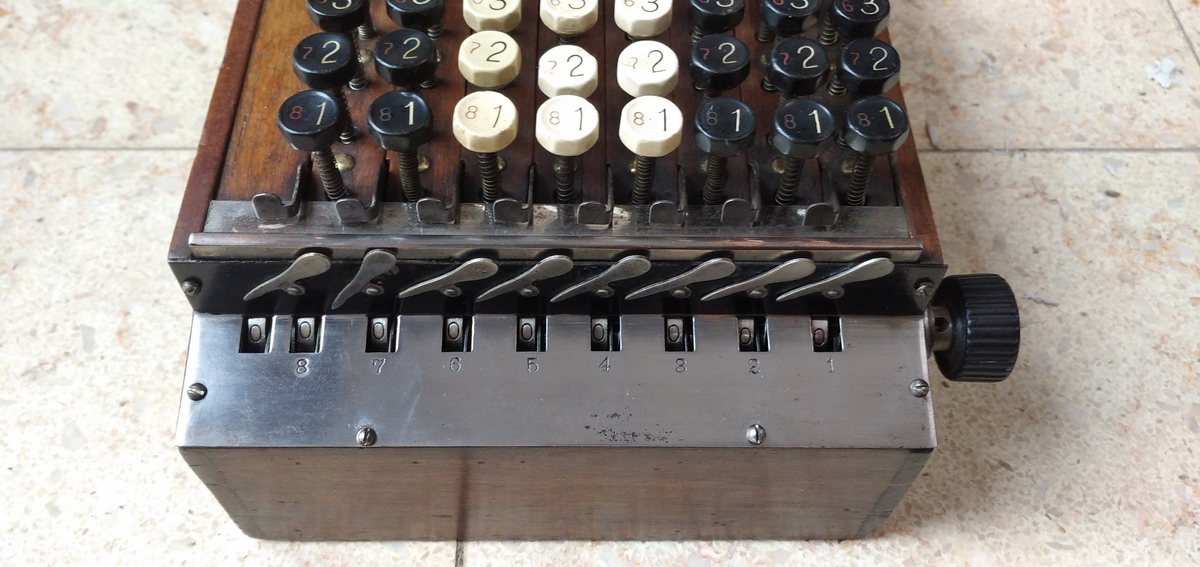
Then the mahogany box was waxed, and the machine put back in, before the clearing knob and lever could be reinstalled. Then the front plate had to go back on, and that was the machine finished.
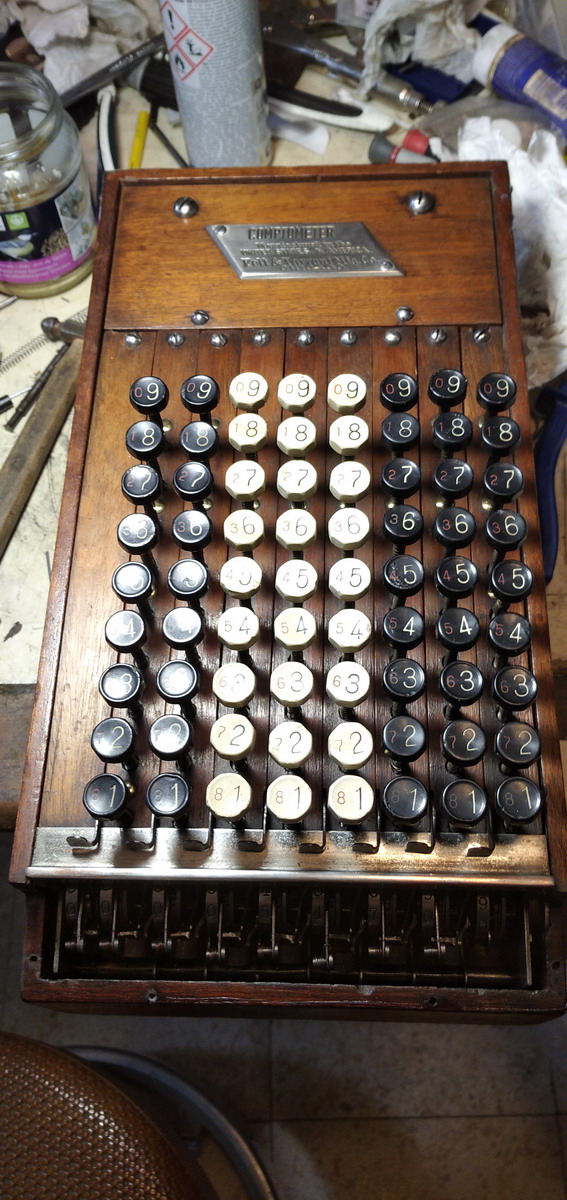
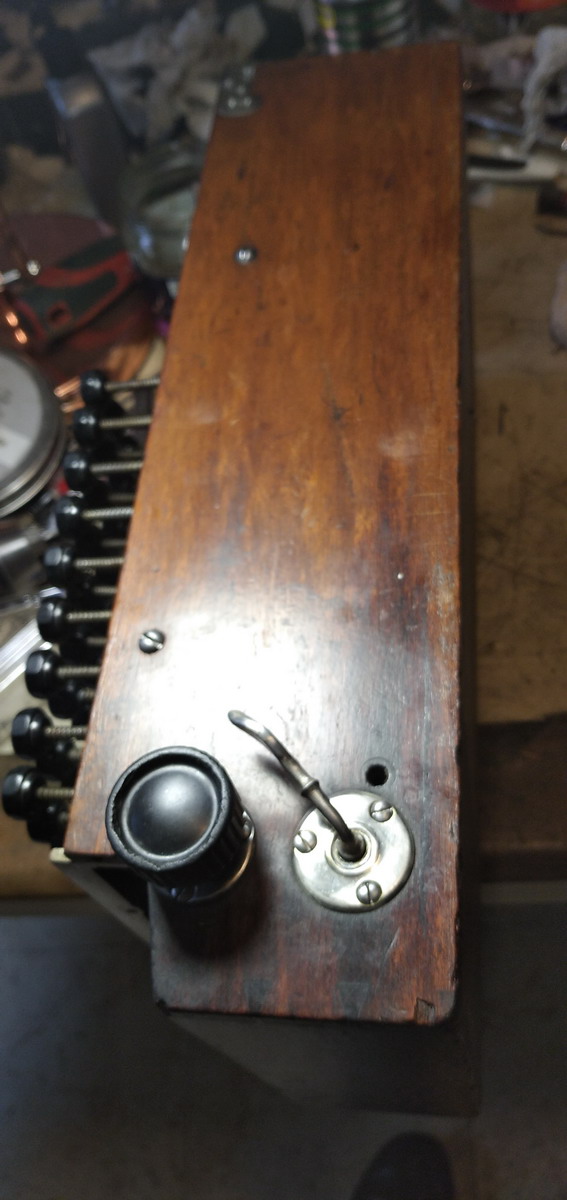
You can see from the last picture that the stop for the clearing lever is missing. I still need to make something up for that - it is a simple steel rod that is screwed into the case.
The frustrating bit is that it actually doesn’t look that different from the initial pictures ... but at least now it works properly.
There’s also a video of the machine in operation.
These early comptometers are not yet provided with a system that allows simultaneous keypresses and carries, so keys need to be pushed individually. if any carries are to occur properly. There are also no securities built in yet, or a bell to indicate that a certain column has been properly cleared. It is still a very basic machine, but it does already have the plastic octagonal keys, and no longer the round glass-topped ones like the Comptograph I restored for the Arithmeum.